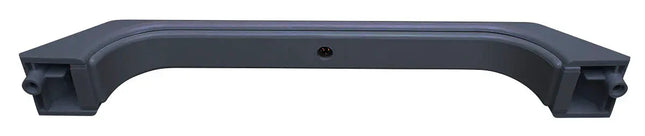
XPARTCO WH01X24378 Washer / Dryer Cycle Selector Knob
The XPARTCO WH01X24378 is an aftermarket replacement cycle selector knob (options knob) compatible with a wide range of GE, Hotpoint, RCA, Haier, Monogram, and Café washers and dryers. The selector knob is one of the primary user controls on the appliance's control panel — it's what you grip and turn to choose the wash or dry options and settings for each load. On many GE-platform washers and dryers, this smaller selector knob works alongside a larger main timer/cycle knob to give you fine-grained control over the specific options within your selected cycle. Over time, selector knobs wear out from repeated twisting motions, get cracked or dropped, or lose their grip on the internal shaft — all of which make it difficult or impossible to change the appliance's settings.
Constructed from heat-resistant plastic with a clean white and chrome finish. Snap-on installation — no tools required. Pulls straight off the control shaft and pushes back on. This knob directly replaces WH01X24378, AP5986397, 4396548, and PS11726904. Important: this is the smaller cycle selector/options knob. If you need the larger main timer knob for your GE washer, that's a different part number (PS11736611) — check which knob is broken before ordering. Installs in under 1 minute — no tools required.
Quick Answer
The XPARTCO WH01X24378 Washer Cycle Selector Knob replaces a cracked, loose, stripped, or missing selector knob on GE, Hotpoint, RCA, Haier, Monogram, and Café washers and dryers. Heat-resistant plastic, white and chrome finish. Snap-on installation — pulls straight off, pushes back on. Replaces AP5986397, 4396548, PS11726904. This is the smaller cycle/options knob — NOT the larger main timer knob (PS11736611). No tools required.
Common Problems This Part Fixes
Selector knob cracked, broken, or split from age and repeated use
Knob loose and slipping on the control shaft — no longer changes settings when turned
Knob has stripped or damaged internal grip and won't stay coupled to the shaft
Knob missing entirely from the control panel
Knob damaged from impact — dropped or bumped
Knob discolored, faded, or worn from years of daily handling
Difficulty selecting cycle options — knob no longer clicks into detent positions cleanly
Water or detergent damage to the knob material
Cross Reference Information
Part numbers can change over a product's lifecycle as manufacturers update designs or release new appliance models. For your convenience, we've included any known superseded, alternate, or cross-reference part numbers that match this item.
Replaces Part Numbers
This cycle selector knob directly replaces the following OEM and cross-reference part numbers:
WH01X24378, 4396548, AGE26094, AP5986397, EAP11726904, OEM17959200, PD00037085, PS11726904.
If your part number is not listed above, contact our support team before ordering and we will verify compatibility.
Compatibility
This selector knob is compatible with select washers and dryers from the following brands:
GE washers — GTW500ASNWS and related top-load models
GE dryers — GTX42GASJWW, GTD45GASJ2WS and related models
GE Profile and GE Café washers and dryers (select models)
GE Monogram washers and dryers (select models)
Hotpoint washers and dryers (select models)
RCA washers and dryers (select GE-built models)
Haier washers and dryers (select models using GE-platform controls)
Important — Two Knobs, Two Part Numbers: Many GE washers and dryers have TWO knobs on the control panel: a larger main timer/cycle knob and a smaller cycle selector/options knob. The WH01X24378 is the smaller cycle selector/options knob. If your broken knob is the larger main timer knob, you need a different part number (PS11736611 on many GE models). Before ordering, visually confirm which knob is broken and compare the size and shape to the images. Contact our support team with your model number if you're unsure.
Key Features
Cycle selector/options knob — used to choose specific settings within your selected wash or dry cycle
Snap-on installation — pulls straight off the control shaft, pushes straight back on; no tools or hardware required
Heat-resistant plastic construction — designed for years of daily use without warping or cracking
Clean white and chrome finish complements GE appliance styling
Ergonomic shape for comfortable grip and precise cycle selection
Restores full cycle control when the original knob has cracked, stripped, or gone missing
Replaces WH01X24378, AP5986397, 4396548, and PS11726904
Compatible with GE, Hotpoint, RCA, Haier, Monogram, and Café washers and dryers
Important: this is the smaller cycle selector/options knob — NOT the larger main timer knob (PS11736611, sold separately)
Aftermarket replacement built to OEM-equivalent quality standards
Quick replacement — installs in under 1 minute
Product Specifications
Part Number
XPWH01X24378
Part Type
Washer/Dryer Cycle Selector Knob (Options Knob)
Condition
Aftermarket Replacement
Application
Washers and Dryers (GE platform)
Knob Size
Smaller cycle/options knob (NOT the larger main timer knob)
Color
White / Chrome
Material
Heat-resistant plastic
Installation
Snap-on — no tools required
Larger Timer Knob
Different part — PS11736611 (sold separately)
Compatible Brands
GE, Hotpoint, RCA, Haier, Monogram, Café
Installation Notes
⚠️ Unplug Washer/Dryer Before Starting — Quick Toolless Replacement Disconnect power before beginning as a general safety precaution. Wear work gloves if desired. Locate the old cycle selector knob on the control panel of your washer or dryer. Grip the knob firmly and pull it straight off the control shaft — it should come off with a moderate pull (no tools or hardware required). If the knob is stuck or the internal grip has stripped and it's spinning without releasing, use a soft cloth wrapped around it for better grip, or gently pry it off with a plastic tool (avoid metal tools that could damage the control panel finish). Once the old knob is off, inspect the metal or plastic control shaft — if it's damaged, worn round, or spinning freely with no resistance, the underlying switch or shaft may also need replacement. If the shaft is intact, align the new WH01X24378 knob with the flat sides of the shaft (the knob has a matching D-shape or flat receiver inside) and push it firmly into place until it seats fully. Rotate the knob through its full range of positions to confirm it clicks into detents cleanly and turns smoothly. Restore power and run a test cycle. Tools needed: None (soft cloth optional).
Frequently Asked Questions
Is this the smaller or larger knob on my GE washer?
The WH01X24378 is the smaller cycle selector (options) knob. Many GE washers and dryers have two knobs on the control panel: a larger main timer/cycle knob that selects the primary wash program, and a smaller cycle options knob (this one) that selects sub-options like temperature, spin speed, or soil level. Before ordering, look at your control panel and identify which knob has failed — if the smaller knob is broken, this is the correct part. If the larger main timer knob is broken, you need a different part (PS11736611 on many GE models). The two knobs are not interchangeable.
How do I remove the old knob if it's cracked or spinning without coming off?
If the internal grip on the old knob has stripped and it's spinning freely on the shaft without releasing, wrap a soft cloth around it for extra grip and pull firmly straight up. If that still doesn't work, gently pry it off with a plastic pry tool (a plastic putty knife or credit card can work). Avoid metal tools that could scratch the control panel finish. If the knob is cracked, you can sometimes break away the broken pieces to expose the internal grip on the shaft, then work each piece off. Once the old knob is off, inspect the control shaft — if it's damaged or spinning without resistance, the underlying switch may need replacement too.
Do I really not need any tools for this?
Correct — the WH01X24378 uses a snap-on installation with no screws or hardware. To install, align the new knob with the flat side (D-shape) of the control shaft and push it straight down until it seats fully. The whole replacement typically takes under a minute. Just make sure the knob is fully seated and rotates through all positions with the correct detent clicks before you plug the appliance back in.
The knob installs fine but my washer still doesn't change settings — what next?
If the new knob is installed correctly (fully seated and rotates through positions with detent clicks) but changing the knob position doesn't change the cycle behavior, the underlying selector switch or control shaft has likely failed — not the knob. Common causes include the shaft spinning freely without engaging the switch inside (the shaft has stripped or broken), or the electrical selector switch itself has failed. In these cases, replacing just the knob won't fix the problem — the switch assembly behind the panel also needs to be replaced. Contact our support team with your model number for the correct switch part number.
Is this an OEM or aftermarket part?
This is an aftermarket replacement part built to OEM-equivalent quality standards. It is not a genuine GE OEM part, but is manufactured from heat-resistant plastic to match the dimensions, D-shape shaft receiver, snap-on installation, and cycle selection function of the original WH01X24378 selector knob used in compatible GE, Hotpoint, RCA, Haier, Monogram, and Café washers and dryers.
Shop With Confidence
A U.S.-based appliance parts retailer specializing in genuine OEM and high-quality replacement parts. We stock components for all major appliance brands and offer fast shipping from our U.S. warehouse. Our team is available to help verify compatibility before you purchase.
✓ Fast US Shipping ✓ Quality Aftermarket Parts ✓ Compatibility Support ✓ Secure Checkout
WB15X27280 Genuine OEM GE Oven Door Handle and End Cap Assembly — Stainless Steel
The WB15X27280 is a genuine GE OEM oven door handle and end cap assembly, finished in stainless steel, for GE ranges. This is the bar you grip every time you open or close the oven door, along with the two end caps that anchor it securely to the door frame. It's a simple mechanical part, but it takes a lot of repeated stress and impact over years of daily cooking, which is exactly why it's a common wear item.
The handle measures 27.5 inches long. Over time, frequent use, exposure to high oven temperatures, and accidental impact can loosen, crack, or bend the handle or its end caps, making the door harder or less safe to operate. This is sold as a complete assembly — the handle bar and both end caps come together as one part and are not available individually, since the caps are what secure the handle to the door and the two are engineered as a matched set. It directly replaces AP6030812, WB15T10222, 4456008, and PS11762365.
Quick Answer
The WB15X27280 Genuine OEM GE Oven Door Handle and End Cap Assembly fixes GE, Hotpoint, RCA, and select Kenmore ranges with an oven door handle that's loose, cracked, wobbly, or has a broken or missing end cap. Stainless steel finish, 27.5" long. Replaces AP6030812, WB15T10222, 4456008, PS11762365. Sold only as a complete assembly — the handle and end caps are not available separately, even if only one end cap has failed.
Common Problems This Part Fixes
Oven door handle feels loose or wobbly when gripped
Handle has cracked, bent, or broken
End cap is cracked, broken, or missing entirely
Handle has separated or come loose from the door frame
Difficulty safely opening or closing the oven door
Visible discoloration or heat damage on the handle or end caps
Cross Reference Information
Part numbers can change over a product's lifecycle as manufacturers update designs or release new appliance models. For your convenience, we've included any known superseded, alternate, or cross-reference part numbers that match this item.
Replaces Part Numbers
This oven door handle and end cap assembly directly replaces the following OEM and cross-reference part numbers:
WB15X27280, WB15T10222, AP6030812, AGE21582, 4456008, EAP11762365, PD00032591, PS11762365
If your part number is not listed above, contact our support team before ordering and we will verify compatibility.
Compatibility
This handle and end cap assembly is compatible with select GE ranges, and also fits select Hotpoint, RCA, and Kenmore ranges built on the GE platform.
Note — sold as a complete assembly only: The handle bar and end caps for this part are not sold separately, even if only one end cap or only one side has failed — you'll need to replace the complete WB15X27280 assembly. Always verify your full model number before ordering. Contact our support team with your model number if you're unsure.
Key Features
Genuine GE OEM part — factory-specified fit, finish, and mounting
Complete assembly — handle bar and both end caps included as a matched set
Resolves "loose or wobbly handle," "cracked or broken handle," and "missing or broken end cap" symptoms
Stainless steel finish for durability and a clean, matching appearance
27.5" handle length
Direct drop-in replacement for the original door-mounted handle
Replaces WB15T10222, AP6030812, 4456008, and PS11762365
Compatible with GE, Hotpoint, RCA, and select Kenmore ranges
Genuine OEM replacement — guaranteed fit, materials, and performance
Product Specifications
Part Number
WB15X27280
Part Type
Oven Door Handle and End Cap Assembly
Condition
Genuine OEM
Brand
GE
Finish
Stainless steel
Handle Length
27.5 in.
Kit Contents
Handle bar + 2 end caps (sold as one assembly)
Repair Difficulty
Moderate — inner door panel removal required
Quantity
1 handle and end cap assembly
Compatible Brands
GE, Hotpoint, RCA, Kenmore
Installation Notes
⚠️ Unplug Range Or Shut Off Breaker Before Starting — Support The Door While Working Disconnect power at the outlet or shut off the circuit breaker before beginning. Wear work gloves. Open the oven door and locate the screws along the bottom edge of the door — typically four screws securing the inner door panel. Remove these screws, then carefully remove the inner door panel to expose the screws that hold the handle assembly in place from behind. Photograph the mounting hardware and orientation before removing the old handle. Remove the screws securing the old handle and end caps, and lift the assembly free. Position the new WB15X27280 assembly in the same orientation, secure it with the mounting screws, and reinstall the inner door panel with its bottom screws. Close and open the door a few times to confirm the handle feels solid with no wobble before returning the oven to normal use. Tools needed: Phillips or nut driver screwdriver, work gloves.
Frequently Asked Questions
Can I just replace one end cap instead of the whole handle?
No. GE does not sell the end caps or the handle bar separately for this part — WB15X27280 is sold only as the complete assembly. Even if just one end cap has cracked or broken while the handle bar itself is fine, you'll need to order the full assembly to make the repair.
How do I access the handle to replace it?
Start at the bottom edge of the oven door, where you'll find screws (typically four) securing the inner door panel. Remove those screws and take off the inner panel, which exposes the screws holding the handle assembly in place from behind. From there, removing the old handle and installing the new one is straightforward.
My handle is curved — can I get a flat one instead?
This assembly is designed to match your oven's original handle shape and mounting points, so it replicates the curved profile if that's what your model originally came with. A differently shaped handle isn't offered as a substitute for this part number, since the end caps and mounting points are engineered specifically for the original handle's geometry.
Is this an OEM or aftermarket part?
This is a genuine OEM part, manufactured by GE to factory specifications — guaranteed fit, materials, and performance. It matches the original stainless steel finish, length, and mounting configuration of the handle and end cap assembly originally installed on your range.
Shop With Confidence
A U.S.-based appliance parts retailer specializing in genuine OEM and high-quality replacement parts. We stock components for all major appliance brands and offer fast shipping from our U.S. warehouse. Our team is available to help verify compatibility before you purchase.
✓ Genuine OEM Parts ✓ Fast US Shipping ✓ Compatibility Support ✓ Secure Checkout
WB24T10029 Genuine OEM GE Range Surface Burner Control Switch
The WB24T10029 is a genuine GE OEM surface burner control switch — also called an infinite switch — for the 6-inch surface element on GE, Hotpoint, and select Kenmore electric ranges and cooktops. This switch is what the burner knob actually turns: it doesn't have fixed positions like a light switch, but instead cycles the element's power on and off at varying ratios as you rotate the knob, which is why it's called an "infinite" switch — it lets you dial in a continuous range of heat levels rather than a handful of fixed steps. Turn the knob to a low setting and the switch feeds the element power only briefly out of every few seconds; turn it toward high and the element stays powered for most of that same window.
This switch is rated for 1,500 watts and controls a 6-inch surface element, drawing 4.4–7.4A at 240V. Over years of use the internal contacts wear, pit, or weld from repeated on/off cycling, and moisture from boilovers or spills can corrode the switch body and cause it to short internally. A worn switch produces predictable symptoms: the burner won't turn on or off at all, it sticks at one heat level no matter where the knob is turned, or it works only intermittently. It directly replaces 769696, AP2024076, AH236754, EA236754, and PS236754. As a genuine OEM part, the WB24T10029 is manufactured by GE to factory specifications — guaranteed fit, materials, and performance.
Quick Answer
The WB24T10029 Genuine OEM GE Range Surface Burner Control Switch fixes GE, Hotpoint, and Kenmore electric ranges where a surface burner won't turn on or off, stays at one heat level regardless of the knob setting, or works intermittently. This is the 6-inch element switch — 1,500W, 4.4–7.4A at 240V. Replaces 769696, AP2024076, AH236754, EA236754, PS236754. Not the same switch as the WB24T10025 used on the 8-inch element — check which burner is affected before ordering.
Common Problems This Part Fixes
Surface burner won't turn on at all when the knob is turned
Burner won't turn off — stays hot even with the knob at the off position
Burner stuck at one heat level regardless of where the knob is set
No ability to adjust temperature — always full blast or always low
Intermittent burner operation — works sometimes, not others
Burner cycles unpredictably, on and off faster or slower than the knob setting suggests
Knob feels loose, gritty, or doesn't click through its normal range of motion
Burner failure that followed a boilover or liquid spill on the control panel
Cross Reference Information
Part numbers can change over a product's lifecycle as manufacturers update designs or release new appliance models. For your convenience, we've included any known superseded, alternate, or cross-reference part numbers that match this item.
Replaces Part Numbers
This range surface burner control switch directly replaces the following OEM and cross-reference part numbers:
WB24T10029, 769696, AP2024076, AH236754, EA236754, EAP236754, AGE22522, PD00008555, PS236754
If your part number is not listed above, contact our support team before ordering and we will verify compatibility.
Compatibility
This surface burner control switch is compatible with select GE, Hotpoint, and Kenmore electric ranges and cooktops using a 6-inch surface element, across a very wide range of model families, including:
GE JB, JBP, JCBP, and JBS series electric ranges
GE RB and RA series electric ranges
Hotpoint RB series electric ranges (select GE-built models)
Select Kenmore electric ranges built on the GE platform
This switch fits several thousand model variants across GE's electric range lineup, including common families such as JB250, JB350, JB500, JB600 through JB870, JBP10 through JBP99, JCBP35 through JCBP85, JBS07, JBS27, JBS55, JBS60, JBS86, RA724, RB536, RB540, RB560, RB585, RB720, RB740, RB757, RB758, RB787, RB790, RB798, and RB800 — each spanning many color and revision suffixes. Because the model list is extremely long, always verify your full model number against your range's data label, located inside the storage drawer or along the back panel, before ordering.
Note — 6-inch element switch only: GE ranges typically pair a smaller 6-inch element with a larger 8-inch element, and each uses its own dedicated infinite switch. The WB24T10029 is the switch for the 6-inch element. The larger 8-inch element on the same range uses the separate WB24T10025 switch (replaces 769692, AP2024072, AH236750, EA236750, PS236750) instead. The two switches look nearly identical and are easy to mix up when ordering — before you buy, confirm which specific burner has failed and measure or check the element size. Contact our support team with your model number if you're unsure which switch you need.
Key Features
Genuine GE OEM part — factory-specified contact design and heat-cycling calibration
Infinite switch design allows continuous heat adjustment rather than a handful of fixed positions
Rated for the 6-inch surface element — 1,500 watts, 4.4–7.4A at 240V
Resolves "burner won't turn on," "burner won't turn off," "stuck at one heat level," and "intermittent operation" symptoms caused by worn or corroded switch contacts
Direct drop-in replacement — mounts to the same control panel bracket and wiring harness
Replaces 769696, AP2024076, AH236754, EA236754, and PS236754
Compatible with a wide range of GE, Hotpoint, and Kenmore electric range models
Genuine OEM replacement — guaranteed fit, materials, and performance
Product Specifications
Part Number
WB24T10029
Part Type
Range Surface Burner Control Switch (Infinite Switch)
Condition
Genuine OEM
Brand
GE
Element Size Controlled
6 in.
Wattage Rating
1,500 W
Amperage
4.4–7.4 A
Voltage
240V
Function
Cycles element power to allow continuous (infinite) heat adjustment
Mounting
Control panel bracket, knob shaft, and wiring harness terminals
Quantity
1 switch
Compatible Brands
GE, Hotpoint, select Kenmore
Installation Notes
⚠️ 240V Circuit — Unplug Range Or Shut Off Breaker Before Starting Disconnect power at the outlet or shut off the circuit breaker before beginning — this switch operates on a 240V circuit, and working on it while powered presents a serious shock hazard. Wear work gloves. Access is from the front of the control panel: remove the burner knob (it typically pulls straight off, though some models use a small retaining clip or screw), then remove the screws securing the control panel or backsplash to reach the switch from behind. Photograph the wiring before disconnecting anything — this switch has multiple terminals and getting one out of order will affect either the wrong burner or its heat-cycling behavior. Disconnect the wire terminals from the old switch, noting or labeling each one, then remove the mounting screws or clips holding the switch to the panel and pull it free. Install the new WB24T10029 in the same orientation, reconnect each wire terminal exactly as labeled, and secure the mounting hardware. Reinstall the control panel or backsplash, press the knob back onto the shaft, restore power, and test the burner through its full range from low to high to confirm smooth, continuous heat adjustment. Tools needed: Phillips screwdriver, nut driver, wire terminal pliers (helpful but optional), work gloves.
Frequently Asked Questions
How do I know if I need the WB24T10029 or the WB24T10025?
It depends entirely on which burner has failed. Most GE ranges pair a smaller 6-inch element with a larger 8-inch element, and each has its own dedicated infinite switch. The WB24T10029 is for the 6-inch element; the WB24T10025 is for the 8-inch element. Look at your range and identify which specific burner is misbehaving, then measure that element's diameter if you're not sure — the two switches are not interchangeable even though they look nearly identical side by side.
What does "infinite switch" mean, and why does mine only work at one setting?
An infinite switch lets you dial in a continuous range of heat rather than a few fixed positions, by rapidly cycling the element's power on and off at a ratio set by the knob — low settings get short power pulses, high settings get long ones. When the internal contacts wear or weld together from years of cycling, the switch can get stuck feeding constant power (burner always hot) or stop switching at all (burner always off), regardless of where the knob is turned. That "stuck at one heat level" complaint is the classic symptom of a failing infinite switch.
A spill got into the control panel and now the burner won't turn off. Is that the switch?
Very likely, yes. Liquid boilovers and spills are one of the most common causes of infinite switch failure — moisture gets into the switch body, corrodes or bridges the internal contacts, and the switch can end up stuck feeding power continuously even with the knob turned to off. If you suspect this, shut off power to the range immediately at the breaker rather than relying on the knob, since a shorted switch may not respond to it at all.
My burner works but only at high heat no matter where I turn the knob. Could it be something else?
The infinite switch is the most common cause, but it's worth a quick visual check first. Make sure the knob itself is properly seated on its shaft — a knob that's been pushed on at the wrong angle, or whose shaft has worn round, can make it feel like the switch isn't responding even though it is. If the knob is properly seated and turns smoothly through its full range but the heat output doesn't change, the switch's internal contacts have failed and replacement is the correct fix.
Is this an OEM or aftermarket part?
This is a genuine OEM part, manufactured by GE to factory specifications — guaranteed fit, materials, and performance. It matches the original 1,500W, 4.4–7.4A, 240V electrical rating and the heat-cycling behavior of the infinite switch originally installed for the 6-inch element in your GE, Hotpoint, or Kenmore range.
Shop With Confidence
A U.S.-based appliance parts retailer specializing in genuine OEM and high-quality replacement parts. We stock components for all major appliance brands and offer fast shipping from our U.S. warehouse. Our team is available to help verify compatibility before you purchase.
✓ Genuine OEM Parts ✓ Fast US Shipping ✓ Compatibility Support ✓ Secure Checkout
WB24X25013 Genuine OEM GE Range Surface Burner Infinite Switch Replaces WB24X47186.
The WB24X25013 is a genuine GE OEM infinite control switch for a dual (bridge) surface element on GE, Hotpoint, and select Kenmore electric ranges — the kind of burner with an inner coil and an outer coil that can be run together for a large pot or as the inner coil alone for a small pan. Because it's governing two coil zones instead of one, this switch uses six terminal connections rather than the three or four found on a standard single-element infinite switch, and it mounts to the control panel with a distinctive figure-8 style shaft and two female mounting holes.
Like any infinite switch, it doesn't have fixed heat positions — instead it rapidly cycles power to the element(s) on and off at a ratio set by the knob, giving continuous heat adjustment from warm to high rather than a handful of steps. Rated for 240VAC at 15 amps. Over years of cycling, the internal contacts on a switch like this wear, pit, or weld together, and boilovers or spills can corrode the switch body and cause it to fail. A worn switch on a dual-element burner can produce an unusually wide symptom set: the whole burner may fail, or just the outer ring may stop responding while the inner coil still works, or the burner may stay on continuously regardless of the knob position. It directly replaces WB24X47186, 191D4774P005, AP5999509, PS11729102, EAP11729102, and 4464832. As a genuine OEM part, the WB24X25013 is manufactured by GE to factory specifications — guaranteed fit, materials, and performance.
Quick Answer
The WB24X25013 Genuine OEM GE Range Surface Burner Infinite Switch fixes GE, Hotpoint, and Kenmore electric ranges with a dual (bridge) element burner where the burner won't turn on or off, only the outer ring fails to work while the inner coil still heats, the burner stays on continuously, or heat can't be adjusted. Six-terminal switch, figure-8 shaft, 240VAC / 15A. Replaces WB24X47186, 191D4774P005, AP5999509, PS11729102, EAP11729102, 4464832. Not the same switch as a standard single-element infinite switch — this one is specific to dual/bridge burners with an inner and outer coil.
Common Problems This Part Fixes
Dual-element burner won't turn on at all when the knob is turned
Outer ring of a dual/bridge element won't activate while the inner coil still works
Burner won't turn off — stays hot even with the knob at the off position
Burner stuck at one heat level regardless of where the knob is set
No ability to adjust temperature — always full blast or always low
Intermittent burner operation — works sometimes, not others
Knob feels loose, gritty, or doesn't turn smoothly through its range
Burner failure that followed a boilover or liquid spill on the control panel
Cross Reference Information
Part numbers can change over a product's lifecycle as manufacturers update designs or release new appliance models. For your convenience, we've included any known superseded, alternate, or cross-reference part numbers that match this item.
Replaces Part Numbers
This range surface burner infinite switch directly replaces the following OEM and cross-reference part numbers:
WB24X25013, WB24X47186, 191D4774P005, AGE1543754, AP7216136, PS11729102, PS17872685, EAP11729102, 4464832, 191D4774P005, MDSA-W767-GEM
If your part number is not listed above, contact our support team before ordering and we will verify compatibility.
Compatibility
This dual-element infinite switch is compatible with select GE, Hotpoint, and Kenmore electric ranges equipped with a dual (bridge) surface element, including model families such as:
GE JB6, JB7, and JB8 series electric ranges (including JB630, JB640, JB645, and JB655)
GE JBS series electric ranges
GE JS6 and JS7 series electric ranges (including the JS760 series)
GE GRS and GRF series electric ranges
Hotpoint electric ranges (select GE-built models)
Select Kenmore electric ranges built on the GE platform
Verified model numbers include: JB645RK6SS, JS760EP6ES, JS760DP6WW, JS760SP7SS, JS760DP7WW, JS760SP6SS, JS760FP7DS, JS760FP6DS, JS760EP7ES, JB860EJAES, JB860FJADS, and GRS500PV1SS.
Note: This is a six-terminal switch built specifically for a dual (bridge) element with a figure-8 style shaft and two female mounting holes — it is NOT interchangeable with a standard single-element infinite switch such as the WB24T10029 or WB24T10025, which use fewer terminals and a different shaft profile. Fitting a standard single-element switch to a dual-element burner circuit will not correctly control both coil zones. Always verify your full model number and confirm the affected burner is a dual/bridge element before ordering. Contact our support team with your model number if you're unsure.
Key Features
Genuine GE OEM part — factory-specified contact design for dual-element switching
Six-terminal design controls both the inner coil and outer ring of a dual (bridge) surface element
Figure-8 style shaft with two female mounting holes matched to the original control panel bracket
Infinite switch design allows continuous heat adjustment rather than a handful of fixed positions
Rated 240VAC at 15 amps
Resolves "burner won't turn on," "outer ring not working," "won't turn off," and "stuck at one heat level" symptoms caused by worn or corroded switch contacts
Direct drop-in replacement — mounts to the same control panel bracket and wiring harness
Replaces 191D4774P005, AP5999509, PS11729102, EAP11729102, and 4464832
Genuine OEM replacement — guaranteed fit, materials, and performance
Product Specifications
Part Number
WB24X25013
Part Type
Range Surface Burner Infinite Switch (Dual/Bridge Element)
Condition
Genuine OEM
Brand
GE
Element Type Controlled
Dual (bridge) surface element — inner coil + outer ring
Terminal Connections
6
Shaft Style
Figure-8
Mounting
Two female mounting holes
Voltage
240VAC
Amperage
15A
Function
Cycles element power to allow continuous (infinite) heat adjustment across both coil zones
Quantity
1 switch
Compatible Brands
GE, Hotpoint, select Kenmore
Installation Notes
⚠️ 240V Circuit — Unplug Range Or Shut Off Breaker Before Starting Disconnect power at the outlet or shut off the circuit breaker before beginning — this switch operates on a 240V circuit, and working on it while powered presents a serious shock hazard. Wear work gloves. Remove the burner knob (it typically pulls straight off, though some models use a small retaining clip) then remove the screws securing the control panel or backsplash to reach the switch from behind. Photograph the wiring before disconnecting anything — this is a six-terminal switch, and getting even one wire out of place can miswire the inner coil, the outer ring, or both. Label each wire as you remove it. Disconnect all six terminal connections from the old switch, then remove the mounting screws from the two mounting holes and pull the switch free from its figure-8 shaft opening. Install the new WB24X25013 in the same orientation, reconnect each of the six wires exactly as labeled, and secure the mounting hardware. Reinstall the control panel or backsplash, press the knob back onto the shaft, restore power, and test the burner at every knob position — confirm the inner coil and outer ring both activate correctly (together and, if your model supports it, with the outer ring switched off independently) before considering the repair complete. Tools needed: Phillips screwdriver, nut driver, wire terminal pliers (helpful but optional), work gloves.
Frequently Asked Questions
How do I know if my burner uses a dual-element switch like this one?
Look at the burner element itself: a dual (bridge) element has two distinct coil rings — a smaller inner coil and a larger outer ring — usually with a separate control or a knob position that lets you activate just the inner coil for a small pan or both rings together for a large pot. A standard single-ring element has only one coil and uses a simpler switch with fewer terminals. If your range has this two-ring burner design, the WB24X25013 (or the exact switch behind it) is the correct type — but always confirm your model number, since dual-element switches vary by range generation.
Only the outer ring of my dual burner doesn't work. Is it the switch or the element?
It could be either, and it's worth narrowing down before ordering. If the inner coil heats normally but the outer ring never activates at any knob position, check the outer ring element itself first — a broken element coil is a common and cheaper fix than a switch. If the outer ring element tests fine but the switch's six-terminal wiring specific to the outer coil circuit has failed or corroded, the infinite switch is the correct replacement.
Can I use a standard single-element infinite switch instead if this one is out of stock?
No. A standard single-element switch has fewer terminals and cannot correctly control the two separate coil zones of a dual (bridge) burner. Wiring a single-element switch into a dual-element circuit will leave one coil zone permanently uncontrolled or non-functional. Always order the six-terminal dual-element switch specified for your model.
What does "infinite switch" mean?
An infinite switch lets you dial in a continuous range of heat rather than a few fixed positions, by rapidly cycling the element's power on and off at a ratio set by the knob — low settings get short power pulses, high settings get long ones. When the internal contacts wear or weld together from years of cycling, the switch can get stuck feeding constant power (burner always hot) or stop switching at all (burner always off), regardless of where the knob is turned.
A spill got into the control panel and now the burner won't turn off. Is that the switch?
Very likely, yes. Liquid boilovers and spills are one of the most common causes of infinite switch failure — moisture gets into the switch body, corrodes or bridges the internal contacts, and the switch can end up stuck feeding power continuously even with the knob turned to off. If you suspect this, shut off power to the range immediately at the breaker rather than relying on the knob, since a shorted switch may not respond to it at all.
Is this an OEM or aftermarket part?
This is a genuine OEM part, manufactured by GE to factory specifications — guaranteed fit, materials, and performance. It matches the original six-terminal wiring, figure-8 shaft, 240VAC/15A electrical rating, and dual-coil switching behavior of the infinite switch originally installed for the dual (bridge) element in your GE, Hotpoint, or Kenmore range.
Shop With Confidence
A U.S.-based appliance parts retailer specializing in genuine OEM and high-quality replacement parts. We stock components for all major appliance brands and offer fast shipping from our U.S. warehouse. Our team is available to help verify compatibility before you purchase.
✓ Genuine OEM Parts ✓ Fast US Shipping ✓ Compatibility Support ✓ Secure Checkout
DG94-01496A Genuine OEM Samsung Gas Cooktop Valve Assembly
The DG94-01496A is a Genuine OEM Samsung replacement gas cooktop auxiliary valve assembly compatible with select Samsung gas cooktops in the NA30K, NA30N, NA36K, and related series. The valve assembly is the mechanical component that connects the burner knob to the gas supply manifold — when you turn the knob, the valve precisely regulates the flow of gas to the burner, controlling the flame size from low simmer to high heat. Without a properly functioning valve, the burner can fail to light, stay lit, shut off when turned, or stick in position making the knob unable to turn.
This is the auxiliary (single-flow) burner valve, used in burner positions that have a single flame ring. Samsung cooktops typically use multiple valve assemblies — one per burner position — and the center burner (dual-flame) uses a different dual valve assembly. As a Genuine OEM part manufactured by Samsung to factory specifications, the DG94-01496A directly replaces AP6049694, EAP12072702, PD00052726, and PS12072702. Important: this is a gas appliance part — installation requires shutting off the gas supply, working safely with gas connections, and leak-testing after installation. Installs in 45–60 minutes with basic hand tools by experienced DIYers, or call a qualified appliance technician.
Quick Answer
The DG94-01496A Genuine OEM Samsung Gas Cooktop Valve Assembly fixes Samsung gas cooktops with a burner that won't light, won't shut off, where the knob is stuck or won't turn, or where flame size won't adjust properly. Auxiliary (single-flow) burner valve. Genuine OEM. Replaces AP6049694, EAP12072702, PD00052726, PS12072702. Compatible with Samsung NA30K6550TG/AA, NA30K6550TS/AA, NA30N6555TG/AA, NA36K6550TG/AA, NA36K7750TG/AA and related gas cooktops. Center (dual-flame) burner uses a different valve — confirm which burner position before ordering.
Common Problems This Part Fixes
Burner won't light — gas not flowing through the valve to the burner
Burner won't shut off — valve stuck open, gas continuing to flow even with the knob turned to "OFF"
Knob stuck and won't turn — valve internally seized (often caused by water entering during cleaning)
Burner flame size won't adjust — valve unable to modulate gas flow
Flame too high even on low setting — valve not restricting flow properly
Flame too low or weak on high setting — valve partially blocked
Gas smell at the cooktop or burner area — valve seal failure
Difficulty turning the knob — internal valve corrosion or wear
Replaces Part Numbers
This gas cooktop valve assembly directly replaces the following OEM and cross-reference part numbers:
AP6049694, ASM116044, EAP12072702, PD00052726, PS12072702.
Contact our support team with your model number if you need confirmation before ordering.
Compatibility
This valve assembly is compatible with select Samsung gas cooktops, including:
Samsung gas cooktops — NA30K6550TG/AA-00, NA30K6550TS/AA-00 series
Samsung gas cooktops — NA30N6555TG/AA-00 series
Samsung gas cooktops — NA36K6550TG/AA-00, NA36K7750TG/AA-00 series
Other Samsung gas cooktops in the NA-series using compatible auxiliary burner valves
Important — Confirm the Burner Position Before Ordering: Samsung gas cooktops use multiple valve assemblies — typically one per burner position. The DG94-01496A is the auxiliary (single-flow) burner valve. The center dual-flame burner uses a different valve assembly, and other burner positions may also have position-specific part numbers. Before ordering, verify in your cooktop's parts diagram that DG94-01496A is listed for the specific burner position you're replacing, or compare the old valve's part number markings to the new one. Contact our support team with your model number if you're unsure.
Key Features
Genuine OEM part manufactured by Samsung to factory specifications — guaranteed fit and performance
Auxiliary (single-flow) burner valve assembly — controls gas flow to one burner position on compatible Samsung gas cooktops
Restores smooth knob action and precise flame size adjustment from simmer to high heat
Replaces a stuck, leaking, or failed original valve
Replaces AP6049694, EAP12072702, PD00052726, and PS12072702
Compatible with Samsung NA30K, NA30N, NA36K series gas cooktops
For experienced DIYers or qualified appliance technicians — gas appliance work requires safety precautions and leak testing
Installation typically takes 45–60 minutes with basic hand tools
Product Specifications
Part Number
DG94-01496A
Part Type
Gas Cooktop Valve Assembly (Auxiliary / Single-Flow Burner)
Condition
Genuine OEM
Application
Gas Cooktops (Samsung NA-series)
Valve Type
Auxiliary (single-flow) burner valve
Note
Center dual-flame burner uses a different valve assembly
Compatible Brands
Samsung
Installation Notes
⚠️ Gas Appliance Safety Warning This part is installed in a gas cooktop. Always shut off the gas supply at the shutoff valve before beginning any repair, and disconnect electrical power to the cooktop. After installation is complete, ALL gas connections must be checked for leaks using a soap-and-water solution or an approved gas leak detector before restoring full gas service. If you smell gas at any point during or after installation, leave the area immediately and contact your gas utility provider. If you are not comfortable working with gas connections, have this repair done by a qualified appliance technician. Improper installation of gas components can cause fire, explosion, or carbon monoxide hazards.
⚠️ Wear Work Gloves — Significant Disassembly Required Shut off the gas supply at the shutoff valve and disconnect electrical power. Wear work gloves to protect your hands. Remove the burner caps, burner heads, and grates from the cooktop surface. The valve assembly is accessed by removing the cooktop top surface — this typically involves removing 16–20 screws around the perimeter of the cooktop to lift the top free. Photograph everything as you go, including the gas line routing and electrical wire connections. Once the top is off, locate the specific valve being replaced (confirm against the parts diagram and the burner position). Disconnect the gas line from the valve (use two wrenches — one to hold the manifold, one to turn the nut — to avoid stressing the manifold). Disconnect any electrical connections to the valve (spark ignitor wires) and remove the valve's mounting hardware. Install the new DG94-01496A valve in the same position with the same orientation, reconnect the gas line and any electrical connections, and secure the mounting hardware. Reinstall the cooktop top, burner heads, caps, and grates. Before restoring full gas service, turn on the gas at the shutoff valve and use a soap-and-water solution or gas leak detector on all gas connections to confirm there are no leaks. Restore electrical power and test the burner by lighting it and confirming smooth flame control across the full range of the knob. Tools needed: Phillips screwdriver, set of wrenches (two needed at each gas connection), gas leak detector or soap solution, work gloves.
Frequently Asked Questions
Why is my burner knob stuck and won't turn?
A stuck burner knob is one of the most common symptoms of a failed valve assembly on Samsung gas cooktops — and one frequent root cause is water entering the valve during knob cleaning. When the knobs are washed (especially with soap and water) and water enters the valve through the knob shaft, it can rust the internal valve mechanism, causing the knob to seize. Once the valve is internally corroded, no amount of force on the knob will free it without risking damage — replacing the valve is the correct repair. To prevent recurrence on the remaining valves: clean knobs by wiping them in place rather than removing and submerging them, and dry the knob shaft area carefully before reinstalling.
Does this fit all five burners on my Samsung cooktop?
Not necessarily. Samsung gas cooktops typically use multiple valve assemblies — the surrounding burner positions (front-left, front-right, rear-left, rear-right) use auxiliary single-flow valves like the DG94-01496A, while the center burner is typically a dual-flame burner that uses a different dual-valve assembly. If you're replacing valves on more than one burner, confirm which position each valve is needed for and verify the part numbers in your specific model's parts diagram. The valves often look similar but are not interchangeable across positions.
Can I do this repair myself, or should I hire a technician?
Replacing a gas valve is a manageable DIY repair for someone comfortable with mechanical work, but it does involve disconnecting and reconnecting gas connections — which means leak testing is mandatory and any error can have serious safety consequences. If you have experience with plumbing or gas appliance work and you're confident in your ability to make tight, leak-free connections and properly test them, this is a feasible DIY. If you've never worked with gas connections before, hiring a qualified appliance technician (typical cost $200–$400) is the safer option. The PartsDr customer story mentioned that a quote from a service technician was $750 for this repair, so the DIY savings are substantial — but only if done safely.
My cooktop has more than one stuck or failed valve — should I replace them all at once?
If multiple valves have failed at the same time, it's worth considering. Once the cooktop top is off, all valves are accessible — replacing additional valves only adds 5–10 minutes per valve. Since the valves are exposed to the same age, use, and potential water intrusion, multiple valve failures often indicate the others are heading the same way. However, valve part numbers may differ by burner position (the center dual-flame valve is different from the auxiliary single-flow valves) — make sure you order the correct valve for each specific position.
Is this a Genuine OEM or aftermarket part?
This is a Genuine OEM part manufactured by Samsung to factory specifications. It is the exact same gas cooktop valve assembly installed in compatible Samsung gas cooktops from the factory — guaranteed fit, materials, and performance.
Shop With Confidence
A U.S.-based appliance parts retailer specializing in genuine OEM and high-quality replacement parts. We stock components for all major appliance brands and offer fast shipping from our U.S. warehouse. Our team is available to help verify compatibility before you purchase.
✓ Genuine OEM Parts ✓ Fast US Shipping ✓ Compatibility Support ✓ Secure Checkout
XPARTCO 5304506469 Refrigerator Door Handle (White)
Replaces Part Numbers: 5304506469, 5304486359, 5304497105, 5304504507, 242059501, 242059504, 4456321, 5304510038, 5304510040, AP6036330, PS11770473.
Description: This Door Handle Set is a replacement part designed to offer a perfect fit and finish for select Frigidaire refrigerator models. This set includes handles that are crucial for the easy opening and closing of your refrigerator or freezer doors. Common causes of a bad door handle set can include regular wear and tear, which may lead to loosening or breakage, or accidental damage from impacts. Over time, handles may also discolor or degrade, affecting the overall appearance and functionality of your appliance.
This is an aftermarket part that can be used as a replacement for the OEM part.
WPW10411934 Range Genuine OEM Surface Element Switch – Compatible with Whirlpool, Maytag & KitchenAid Ranges
Product Description
Restore precise burner temperature control with the WPW10411934 Range Genuine OEM Surface Element Switch. This Genuine OEM switch is engineered by the original manufacturer to control the heat output of electric surface elements. A faulty surface element switch can cause burners to stay on high, not heat at all, or cycle inconsistently. Replacing it with this authentic OEM part ensures proper electrical performance, safe operation, and factory-level reliability.
This part is a Genuine OEM component, manufactured to exact specifications for fit, durability, and long-term performance.
Replaces Part Numbers
WPW10411934, W10411934, 4446483, PD00033778, EAP11754410, AP6021089, PS11754410.
Compatibility
This Genuine OEM surface element switch fits select Whirlpool, Maytag, KitchenAid, Jenn-Air, Amana, and Kenmore (Whirlpool-manufactured) electric ranges.
Common compatible models include (but are not limited to):
Whirlpool WFE515S0ES
Maytag MER8800FZ
KitchenAid KERA205PB
Always verify your range’s model number before ordering.Contact our support team if you’re unsure.
✅ Key Features
🏭 Genuine OEM Part – Manufactured to original factory specifications
🔥 Accurate Heat Regulation – Restores proper burner temperature control
⚡ Safe Electrical Operation – Designed for correct voltage and load handling
🎛️ Smooth Adjustment – Ensures responsive burner control
🔧 Exact Fit & Direct Replacement – No modifications required
📐 Product Specification
Part Number: WPW10411934
Component Type: Surface Element Control Switch
Voltage: 240V
Application: Electric range surface burner control
Mounting: Shaft-mounted behind control panel
OEM Status: Genuine OEM
🛠️ Installation Notes
Tools Needed: Phillips screwdriver, nut driver
⚠️ Safety First: Disconnect power at the breaker before servicing the range to avoid electrical shock.
Basic Steps:
Turn off power to the range at the breaker.
Remove the control knob and access the control panel.
Label and disconnect wires from the old switch.
Remove mounting screws and remove the old switch.
Install the new WPW10411934 Genuine OEM switch.
Reconnect wiring, reassemble the control panel, and restore power.
Test burner operation.
⏱️ Time Required: 20–30 minutes
📦 Shop With Confidence
🏭 Genuine OEM Appliance Part
🚚 Free Shipping on All Orders
🔄 30-Day Return Policy
Restore factory-level burner control and safe cooking performance — Add to Cart Now with confidence!
25QBP3821 Microwave Door Handle (Black)
Replaces part Numbers: WB15X321, WB15X0321, WB15X0323, WB15X323, AH232251, EA232251, AP2021139, PS232251.
This is an aftermarket part that can be used as a replacement for the OEM part.
California Residents only
WARNING: Cancer and/or Reproductive Harm - www.p65warnings.ca.gov
WB06X10943CM Microwave Door Handle End Cap (White)
End Cap (White)
Black end cap used on over-the-range Microwaves.
Fits Specific GE Microwave
Made in USA
Replaces part Numbers: WB06X10943, 261301814001, 3025054, AP5790057, PS8753758.
This is an aftermarket part that can be used as a replacement for the OEM part.
California Residents only
WARNING: California’s Proposition 65
WE04X20415 Dryer Genuine OEM Timer
The WE04X20415 is a genuine GE OEM electromechanical timer for GE electric and gas dryers, and also fits select Hotpoint and Kenmore models. This timer manages the duration of the drying cycle, running the dryer for the correct amount of time based on your selected setting and automatically shutting the machine off once the cycle is complete — that automatic shutoff is what prevents over-drying, which can damage fabrics and waste energy.
Rated with manufacturer designation 212D1233P005, measuring approximately 2-1/8"H x 3"W x 4-1/4"D. Over time, the timer's internal mechanical components can wear out, be damaged by power surges, or simply age past their reliable service life. A failing timer typically shows up as the dryer not shutting off at the end of a cycle, not running for the correct length of time, or the control knob feeling loose or failing to turn the mechanism properly. It directly replaces 3276788, WE04X20415-20PK, WE4M355, WE4M357, AGE25827, AP5805477, EAP9491767, PS9491767, PD00027041. As a genuine OEM part, the WE04X20415 is manufactured by GE to factory specifications — guaranteed fit, materials, and performance.
Quick Answer
The WE04X20415 Dryer Genuine OEM Timer fixes GE, Hotpoint, and Kenmore electric and gas dryers that won't shut off at the end of a cycle, don't run for the correct length of time, or have a knob that's stripped or won't turn properly. Replaces 3276788, WE04X20415-20PK, WE4M355, WE4M357, AGE25827, AP5805477, EAP9491767, PS9491767, PD00027041. Photograph the wiring before disconnecting the old timer, and transfer each wire one at a time to the new timer to make sure everything ends up in the correct position.
Common Problems This Part Fixes
Dryer won't shut off at the end of the cycle
Dryer doesn't run for the correct amount of time for the selected setting
Control knob feels loose, stripped, or won't turn the timer mechanism
Dryer running longer than expected, risking over-drying of fabrics
Timer that has stopped advancing through the cycle
Cross Reference Information
Part numbers can change over a product's lifecycle as manufacturers update designs or release new appliance models. For your convenience, we've included any known superseded, alternate, or cross-reference part numbers that match this item.
Replaces Part Numbers
This dryer timer directly replaces the following OEM and cross-reference part numbers:
WE04X20415, 3276788, WE04X20415-20PK, WE4M355, WE4M357, AGE25827, AP5805477, EAP9491767, PS9491767, PD00027041
If your part number is not listed above, contact our support team before ordering and we will verify compatibility.
Compatibility
This dryer timer is compatible with select GE electric and gas dryers, and also fits select Hotpoint and Kenmore dryers built on the GE platform, including model numbers such as DBXR463GG2WW, DBXR300GG7WS, DBXR300GG0WS, DX4500GG4WW, DX4500GG5WW, DX4500GG6WW, DBSR463GG3WW, DLLLR33GJ1WW, DLLLR33GJ2WW, DHDSR46GG4WW, DHDSR46GG6WW, DHDSR46GG9WW, and DBLR333GG4WW.
Note: This is a different timer from our WE04X36457 listing and other similarly-numbered GE WE04X-prefix timers, each fitting a different set of models. These are not interchangeable. Always verify your full model number before ordering. Contact our support team with your model number if you're unsure.
Key Features
Genuine GE OEM part — factory-specified timing mechanism and terminal layout
Manages drying duration and automatic shutoff
Resolves "won't shut off," "wrong cycle length," and "knob won't turn" symptoms caused by timer failure
Manufacturer designation 212D1233P005
Approximately 2-1/8"H x 3"W x 4-1/4"D
Direct drop-in replacement matching the original mounting and terminal layout
Replaces 3276788, WE04X20415-20PK, WE4M355, WE4M357, AGE25827, AP5805477, EAP9491767, PS9491767, PD00027041
Compatible with GE, Hotpoint, and Kenmore electric and gas dryers
Genuine OEM replacement — guaranteed fit, materials, and performance
Straightforward repair, typically about 15 minutes
Product Specifications
Part Number
WE04X20415
OEM Part Number
WE04X20415
Manufacturer Designation
212D1233P005
Part Type
Dryer Timer (Electromechanical)
Condition
Genuine OEM
Dimensions
2-1/8"H x 3"W x 4-1/4"D
Function
Manages drying duration and automatic shutoff
Repair Difficulty
Easy — approx. 15 minutes
Quantity
1 dryer timer
Compatible Brands
GE, Hotpoint, Kenmore
Installation Notes
⚠️ Unplug Dryer Before Starting — Transfer Wires One At A Time Disconnect power at the outlet or shut off the circuit breaker before beginning. Wear work gloves. Remove the screws from the back panel and set the panel aside. Remove the control knob from the front panel. Pull the old timer out and photograph the wiring connections before disconnecting anything. Transfer each wire one at a time from the old timer to the new WE04X20415, matching each connection exactly as photographed — moving them one at a time rather than all at once helps avoid mixing up positions. Secure the new timer in its mounting position, reconnect the knob to the front panel, and reattach the back panel. Restore power and test the timer by setting it for a few minutes and starting a cycle to confirm the dryer runs for the correct duration and shuts off with the buzzer at the end. Tools needed: Phillips screwdriver, work gloves.
Frequently Asked Questions
My dryer won't shut off at the end of the cycle. Is this the timer?
Yes, this is one of the most direct symptoms of a failing timer. The timer is responsible for automatically shutting the dryer off once the selected cycle duration is complete, so if that mechanism has worn out or jammed, the dryer can continue running well past when it should have stopped.
My control knob feels loose and won't turn the timer properly. Is that this same part?
It could be related. One customer found the knob stem had worn smooth and would no longer turn the timer mechanism at all — in that case, replacing the timer resolves the issue since the knob attaches directly to the timer's internal shaft.
Is this a hard repair to do myself?
No, several customers describe this as a straightforward repair. One account details removing the back panel screws, disconnecting the dryer, removing the front knob, photographing the wiring, and transferring each wire one at a time to the new timer — the whole process, including testing, took well under an hour, and even helped one customer celebrate an 80th birthday with a successful father-son repair.
Is this an OEM or aftermarket part?
This is a genuine OEM part, manufactured by GE to factory specifications — guaranteed fit, materials, and performance. It matches the original timing mechanism, terminal layout, and dimensions of the timer originally installed in your dryer.
Shop With Confidence
A U.S.-based appliance parts retailer specializing in genuine OEM and high-quality replacement parts. We stock components for all major appliance brands and offer fast shipping from our U.S. warehouse. Our team is available to help verify compatibility before you purchase.
✓ Genuine OEM Parts ✓ Fast US Shipping ✓ Compatibility Support ✓ Secure Checkout
XPARTCO DA61-03734A Refrigerator Door Handle Fastener
Cross Reference Information: DA61-03734A, DA61-11161A, AP6286751, AP4372038, PS4144145.
Description: This Refrigerator Handle Mounting Stud is essential for securing your refrigerator's handle firmly in place. This replacement part ensures a perfect fit for select Samsung refrigerator models, maintaining the integrity and functionality of your appliance. Crafted from durable materials, the handle mounting stud provides reliable support, preventing the handle from becoming loose or detached over time. Installation is straightforward, allowing you to replace the old or damaged stud with ease and restore your refrigerator's appearance and usability quickly.