422133CM Surface Element Infinite Switch
120V, 15 Amp ceramic element.
Fits Bosch glasstop free standing ranges
Replaces Part Numbers:00422133, 422133, AH3462872, EA3462872, AP3723298, PS3462872, PS8713176.
This is an aftermarket part that can be used as a replacement for the OEM part.
California Residents only
WARNING: Cancer and/or Reproductive Harm - www.p65warnings.ca.gov
XPARTCO WE1X21975 Dryer Fuse, 30 Amp
The XPARTCO WE1X21975 is a 30 Amp, 250 Volt ceramic thermal fuse used in GE dryers as a safety cutoff component. It's wired into the heating circuit and monitors the dryer's operating temperature — if the unit overheats due to restricted airflow, a failing thermostat, or a clogged exhaust vent, this fuse blows and cuts power to the heating circuit (or the entire unit, depending on the model's wiring) to prevent overheating damage or a fire hazard. Unlike a resettable thermostat, this is a one-time safety device: once it blows, it must be replaced — it cannot be reset.
A blown thermal fuse is one of the most common reasons a GE dryer runs but produces no heat, or in some wiring configurations won't start at all and clicks when the start button is pressed. Because this fuse is a safety-critical protection device, it's worth also checking and clearing the cause of the overheating (lint buildup, a crushed or clogged exhaust duct, or a failed cycling thermostat) at the same time you replace it — otherwise the new fuse is likely to blow again.
Quick Answer
The XPARTCO WE1X21975 Dryer Fuse fixes a GE dryer that runs with no heat, or shuts off mid-cycle after getting hot. 30 Amp / 250 Volt ceramic thermal fuse, direct OEM fit and function. Classic symptom: dryer tumbles fine but clothes come out cold, or the dryer clicks and won't start. Always clear the cause of overheating (lint, vent restriction, or a failed thermostat) when replacing this fuse.
Common Problems This Part Fixes
Dryer runs and tumbles but produces no heat
Dryer starts, heats briefly, then shuts off mid-cycle
Dryer won't start at all — clicking sound when the start button is pressed
Dryer stops running entirely after the unit has overheated
Clothes come out damp or cold after a full cycle
Dryer previously showed signs of overheating (hot exterior, burning smell) before losing heat
Cross Reference Information
Part numbers can change over a product's lifecycle as manufacturers update designs or release new appliance models. For your convenience, we've included any known superseded, alternate, or cross-reference part numbers that match this item.
Replaces Part Numbers
This thermal fuse directly replaces the following part numbers:
WE1X21975, 4248223, AGE25250, AP5957584, EAP10065161, PD00030077, PS10065161, 14QBP30CFB, 3AB, 6AB, SP, RABC, 314, ABC, CES-2, CES-4
Some listings also reference the earlier GE part number 4248223, which appears to correspond to the same fuse design. We were not able to fully confirm the exact supersession relationship between 4248223 and WE1X21975, so if your dryer's parts diagram shows 4248223, contact our support team with your model number and we'll verify fit before you order.
Compatibility
This thermal fuse is compatible with a wide range of GE dryer models, including:
GTD42EASJ0WW, GTD42EASJ1WW, GTD42EASJ2WW, GTD42EASJ3WW
GTD45EASJ0WS, GTD45EASJ1WS
Many additional GTD-, DBXR-, and similar GE dryer model series
Note: GE used this same thermal fuse across dozens of dryer model and sub-model variants over several production years. The list above is only a sample. Check your dryer's model/serial tag (typically on the door frame or cabinet edge) and compare against your unit's parts diagram, or contact our support team with your exact model number to confirm fit before ordering.
Key Features
Direct replacement thermal fuse for GE dryers
30 Amp, 250 Volt rating matches OEM specification
Ceramic body 3AB-style fuse construction for heat resistance and reliability
Cuts power to the heating circuit if the dryer overheats, protecting internal components
Resolves no-heat, mid-cycle shutoff, and click-and-won't-start symptoms
Simple, low-cost fix — typically a 15–20 minute repair with basic hand tools
Product Specifications
Part Number
XPWE1X21975
OEM Part Number
WE1X21975
Part Type
Dryer Thermal Fuse (Safety Cutoff)
Condition
Aftermarket Replacement
Amperage Rating
30 Amp
Voltage Rating
250 Volt
Fuse Type
3AB Ceramic Thermal Fuse (Non-Resettable)
Application
GE Dryers
Installation Notes
⚠️ Unplug Power Before Installing Unplug the dryer or switch off its circuit breaker before beginning. On most GE dryers, this fuse is mounted on or near the heater housing/blower duct at the rear of the dryer, which typically requires removing the rear panel or top panel to access. It can be easy to overlook on the parts diagram, so compare the physical part against your model's diagram carefully before ordering or installing. Disconnect the wire terminals from the old fuse, note their positions, and transfer them to the same terminals on the new fuse. Before closing the dryer back up, inspect and clean the lint trap, exhaust duct, and vent hood for blockages, and check that the cycling thermostat is functioning — a fuse that blew due to an uncleared overheating cause will often blow again shortly after replacement.
Frequently Asked Questions
My dryer runs but doesn't heat — is this the part I need?
A blown thermal fuse is one of the most common causes of a GE dryer that tumbles normally but produces no heat. It's worth testing the fuse for continuity with a multimeter before replacing it, since a few other components (the cycling thermostat, igniter on gas models, or heating element) can cause similar symptoms.
Can this fuse be reset instead of replaced?
No. This is a one-time thermal fuse, not a resettable thermostat or breaker. Once it blows, it's permanently open and must be replaced — there's no reset button or procedure.
Why did my thermal fuse blow in the first place?
This fuse blows in response to excessive heat, usually caused by restricted airflow — a clogged lint trap, a crushed or blocked exhaust duct, or a bird's nest or lint buildup in the outside vent hood — or by a failed cycling thermostat that no longer regulates temperature correctly. Clear the airflow path and check the thermostat when you replace the fuse, or the new one is likely to blow again.
Where is this fuse located on my dryer?
On most GE dryers it's mounted on or near the heater box/blower housing at the rear of the unit. Some installers find it tucked in a spot that isn't obvious even with the parts diagram in hand, so take your time locating it and confirm it visually matches before removing the old one.
Shop With Confidence
A U.S.-based appliance parts retailer specializing in genuine OEM and high-quality replacement parts. We stock components for all major appliance brands and offer fast shipping from our U.S. warehouse. Our team is available to help verify compatibility before you purchase.
✓ Fast US Shipping ✓ Quality Aftermarket Parts ✓ Compatibility Support ✓ Secure Checkout
(4 Pack) 74009592CM Burner Control Knob
Black plastic burner knob
Fits Specific Maytag, Jenn Air, Whirlpool ranges
Replaces Part Numbers: WP74009592, 74009592, 1032643, 71003477, AP6011140, PS11744334.
Description: This Top Burner Control Knob is a replacement part for specific Whirlpool ranges and cooktop models. This part allows for precise control over the heat level of the stove's burners, enabling users to adjust the flame size for various cooking needs. Constructed from durable materials, the knob is designed to withstand the rigors of daily use, providing a reliable interface for setting and maintaining the desired cooking temperature.
This is an aftermarket part that can be used as a replacement for the OEM part.
XPARTCO WB27X10542 Range Vent Hood Fuse – Compatible with GE and Hotpoint Range Hoods
Product Description
Protect your vent hood electronics from power surges and overheating with the XPARTCO WB27X10542 Range Vent Hood Fuse. This high-quality aftermarket replacement fuse interrupts electrical current when excessive heat or voltage occurs, safeguarding the control board and motor. A blown fuse can cause the vent hood lights or fan to stop working. Replacing it with this durable XPARTCO fuse restores safe, reliable operation at a fraction of the OEM cost.
Replaces Part Numbers
WB27X10542, 946789, AH239683, EA239683, PD00040792, AP3185501, PS239683.
Compatibility
This replacement line fuse fits select GE and Hotpoint range hoods.
Example compatible models include (but are not limited to): GE JV347H1WW, GE JV348L1SS, and Hotpoint RVM1535DM1BB.
Always verify your vent hood’s model number before ordering. Contact our support team if you’re unsure.
✅ Key Features
🔄 Aftermarket Replacement – Matches OEM performance for GE range hoods
⚡ Electrical Protection – Prevents control board and motor damage from power surges
💰 Budget-Friendly Fix – Reliable replacement at a lower cost than OEM
🛠️ Quick Installation – Direct-fit design requires only basic tools
🛡️ Fixes Common Issues – Solves power loss, fan not running, or lights not turning on
📐 Product Specification
Part Number: WB27X10542
Component Type: Range Hood Line Fuse - FUSE 5 A 125V
Material: Ceramic and metal fuse with insulated leads
Mounting: Inline wiring harness or control board clip
Operating Conditions: Rated for high-temperature kitchen environments
Compliance: Built to OEM-equivalent safety standards (not OEM)
🛠️ Installation Notes
Tools Needed: Phillips screwdriver, needle-nose pliers
⚠️ Safety First: Always unplug the range hood or switch off the circuit breaker before performing repairs to prevent electrical shock.
Steps:
Disconnect power to the range hood.
Remove the cover or control panel to access the fuse holder.
Carefully disconnect the old fuse from its terminals.
Install the new XPARTCO WB27X10542 fuse in the same orientation.
Replace the cover, restore power, and test operation.
⏱️ Time Required: 10–15 minutes
📦 Shop With Confidence
🚚 Free Shipping on All Orders
⚙️ Trusted Appliance Parts Supplier
🔄 30-Day Return Policy
Restore safe vent hood operation — Add to Cart Now for a reliable, cost-effective repair!
XPARTCO HS810 Refrigerator 3-in-1 Hard Start Kit 1/12 to 1/5 HP 120V
The XPARTCO XPHS810 is a universal 3-in-1 hard start kit that combines a solid-state starting relay, a start capacitor, and thermal overload protection into a single prewired unit for refrigerator and freezer compressors rated 1/12 to 1/5 HP at 120V (110–125VAC). It's designed as a direct equivalent to the widely used Supco RCO810 and similar kits, giving a struggling compressor extra starting torque to overcome internal friction and gas pressure at startup — commonly used to fix the classic "click-buzz-click" no-start symptom without replacing the entire compressor.
The kit is fully prewired with color-coded leads (typically black = Common, white = Start, red = Run) and mounts directly onto the compressor's terminal pins, with instructions printed on the unit itself. It directly replaces Supco RCO810, URCO810, URC0810, RC0810, RC100, TJ90RCO810, AP4503019, ERP810, ERPU810, HS8, HS810, HS81, PCS810, and Mars 32781. Installs in 15–30 minutes with basic hand tools.
Quick Answer
The XPARTCO HS810 3-in-1 Hard Start Kit fixes refrigerators and freezers whose compressor makes a repeated "click-buzz-click" sound and fails to start, or that shut off on thermal overload during startup. Combines relay, start capacitor, and overload protector in one prewired unit for 1/12 to 1/5 HP compressors, 120V, 3.5A RLA. Replaces Supco RCO810, URCO810, RC0810, RC100, TJ90RCO810, AP4503019, ERP810, HS8, HS810, HS81, PCS810, Mars 32781. Do not install on LG linear/inverter compressors — see Installation Notes.
Common Problems This Part Fixes
Compressor makes a repeated "click-buzz-click" noise and fails to start
Refrigerator or freezer runs warm because the compressor won't stay running
Compressor hums but doesn't start, then trips off on overload
Refrigerator cycles on and off rapidly without reaching temperature
Older or worn compressor that starts hard, especially after a power outage
⚠ Capacitor Hazard — Read Before Servicing This kit contains a start capacitor, which can store a dangerous electrical charge even after the refrigerator is unplugged. Always disconnect power before servicing, and discharge the capacitor safely (using an insulated-handle resistor tool or by briefly shorting the terminals with an insulated screwdriver) before handling it. Never touch capacitor terminals with bare hands. If you are not comfortable working around stored electrical charge, have this repair performed by a qualified technician.
Cross Reference Information
Part numbers can change over a product's lifecycle as manufacturers update designs or release new appliance models. For your convenience, we've included any known superseded, alternate, or cross-reference part numbers that match this item.
Replaces Part Numbers
This 3-in-1 hard start kit directly replaces the following OEM and cross-reference part numbers:
XPHS810, RCO810, URCO810, URC0810, RC0810, RC100, TJ90RCO810, AP4503019, ERP810, ERPU810, HS8, HS810, HS81, PCS810, Mars 32781
If your part number is not listed above, contact our support team before ordering and we will verify compatibility.
Compatibility
This universal hard start kit is compatible with refrigerator and freezer compressors in the following range:
Compressors rated 1/12 HP through 1/5 HP
120V (110–125VAC) single-phase compressors
Standard PSC (permanent split capacitor) and RSIR compressor types across Whirlpool, GE, Frigidaire, LG, Samsung, and most other major brands
Important: Do NOT install this kit on LG linear/inverter compressors, or any compressor using a variable-speed inverter board (often labeled "Inverter," "Linear," "BLDC," or "Digital"). Connecting a standard hard start kit to an inverter-driven compressor can destroy the inverter control board. Check your compressor's label before ordering, or contact our support team with your model number if you're unsure.
Key Features
3-in-1 design combines starting relay, start capacitor, and thermal overload protector in one prewired unit
Delivers additional starting torque to help a struggling compressor overcome startup friction and gas pressure
Resolves "click-buzz-click," "won't start," and "trips on overload" symptoms on eligible compressors
Rated for 1/12 to 1/5 HP compressors at 120V, 3.5A RLA
Prewired, color-coded leads with instructions printed on the unit for straightforward installation
Can operate with or without an existing run capacitor
Replaces Supco RCO810, URCO810, RC0810, RC100, TJ90RCO810, AP4503019, ERP810, HS8, HS810, HS81, PCS810, and Mars 32781
Aftermarket replacement built to OEM-equivalent quality and safety standards
Product Specifications
Part Number
XPHS810
Equivalent To
Supco RCO810 / RC0810
Part Type
3-in-1 Refrigerator/Freezer Hard Start Kit (Relay, Capacitor, Overload)
Condition
Aftermarket Replacement
HP Range
1/12 to 1/5 HP
Voltage
120V (110–125VAC)
Current Rating
3.5A RLA
Terminal / Wire Color Code
Black = Common (C), White = Start (S), Red = Run (R) — typical; confirm against included diagram
Not Compatible With
LG linear/inverter compressors
Installation Notes
⚠️ Unplug Refrigerator Before Starting — Discharge Capacitor Safely Disconnect power before beginning. Before touching any wiring, check your compressor's data label to confirm it is NOT a linear/inverter/BLDC compressor — this kit is not compatible with those and can damage the inverter board if connected. Access the compressor compartment, typically at the rear or bottom of the unit. Remove the existing relay/overload assembly by gently pulling it straight off the compressor terminal pins — do not force or twist. Use a multimeter to confirm which pins are Common (C), Start (S), and Run (R) if not already labeled. Connect the hard start kit's wires to the matching pins. Wire the kit's main power leads into the refrigerator's supply wiring using wire nuts, following the included diagram. Secure the kit with zip ties or its mounting strap to prevent vibration damage during compressor operation. Restore power and confirm the compressor starts smoothly without repeated clicking. Tools needed: nut driver or screwdriver, digital multimeter, wire nuts, insulated screwdriver (for capacitor discharge).
Frequently Asked Questions
My compressor makes a clicking or buzzing sound and won't start — will this fix it?
A hard start kit resolves this in many cases, especially on older or worn compressors that struggle to overcome internal gas pressure at startup. However, "click-buzz-click" can also indicate a failing compressor winding or a compressor nearing end of life. If the hard start kit doesn't resolve the issue, the compressor itself may need replacement — a hard start kit can extend a marginal compressor's life but can't revive one with failed internal windings.
Can I use this on any refrigerator?
This kit works on standard PSC and RSIR compressors within the 1/12 to 1/5 HP range at 120V. It is NOT compatible with LG linear/inverter compressors or any variable-speed inverter-driven compressor — connecting it to one of those can destroy the inverter control board. Check your compressor's label for "Inverter," "Linear," "BLDC," or "Digital" before ordering.
Do I need to remove my existing start capacitor or relay first?
Yes — remove the old relay/overload assembly from the compressor terminal pins before installing this kit. The XPHS810 is designed to work with or without an existing separate run capacitor remaining in the circuit, but the old start relay and any old start capacitor should be removed and replaced by this kit, not left in place alongside it.
Is this safe to install myself?
Many DIYers install hard start kits successfully, but this repair involves a capacitor that can hold a dangerous electrical charge even after the unit is unplugged, plus correctly identifying compressor terminals. If you're not comfortable working around stored electrical charge or don't have a multimeter to confirm terminal identification, we'd recommend having a qualified technician perform this repair.
Shop With Confidence
A U.S.-based appliance parts retailer specializing in genuine OEM and high-quality replacement parts. We stock components for all major appliance brands and offer fast shipping from our U.S. warehouse. Our team is available to help verify compatibility before you purchase.
✓ Fast US Shipping ✓ Quality Aftermarket Parts ✓ Compatibility Support ✓ Secure Checkout
XPARTCO 3387747 Dryer Heating Element Replaces WP3387747
The XPARTCO 3387747 is an aftermarket replacement heating element assembly for Whirlpool, Kenmore, Maytag, KitchenAid, Amana, and Roper electric dryers. This element is the source of virtually all the heat in the dryer: current flows through a nickel-chromium coil, which glows and radiates heat as the blower pushes air across it and into the drum. Everything downstream — the drum temperature, the drying time, the final dampness of your clothes — depends on this coil working correctly.
Rated 5400W at 240V, with two 5/16" terminals for a direct connection. The nickel-chromium coil is rated at roughly 85% nickel-chromium content for effective, heat-and-abrasion-resistant heating, and it's mounted in high-temperature ceramic insulators that hold it firmly in the frame so it won't loosen or shift under the vibration of a running dryer. Over years of use, the coil itself typically fails with a visible break somewhere along its length — a section simply burns through and the circuit opens, cutting off heat entirely. It directly replaces WP3387747, WP3387747VP, W11045584, W11344457, 80003, 525502, AP6008281, AP2947033, PS344597, PS11741416, EAP11741416, FIX11741416, AWP47520, and PD00002365.
Quick Answer
The XPARTCO 3387747 Dryer Heating Element fixes Whirlpool, Kenmore, Maytag, KitchenAid, Amana, and Roper electric dryers with no heat, insufficient heat, or drying times that have gotten noticeably longer. 5400W, 240V, two 5/16" terminals. Replaces WP3387747, WP3387747VP, W11045584, W11344457, 80003, 525502, AP6008281, AP2947033, PS344597, PS11741416, EAP11741416, FIX11741416, AWP47520, PD00002365. If the dryer has no heat at all, check the thermal fuse first — it's a cheaper, faster fix, and a blown fuse produces the same "no heat" symptom as a failed element.
Common Problems This Part Fixes
Dryer runs a full cycle but produces no heat at all
Dryer produces some heat, but not enough to dry clothes properly
Drying times that have gotten noticeably longer than they used to
Clothes coming out cold or barely warm at the end of a cycle
Visible break or burned-through section in the heating coil
Element that tests as an open circuit (no continuity) with a multimeter
Dryer that heats inconsistently, cycling on and off unexpectedly
Cross Reference Information
Part numbers can change over a product's lifecycle as manufacturers update designs or release new appliance models. For your convenience, we've included any known superseded, alternate, or cross-reference part numbers that match this item.
Replaces Part Numbers
This dryer heating element directly replaces the following OEM and cross-reference part numbers:
WP3387747, WP3387747VP, W11045584, W11344457, 80003, 525502, AP6008281, AP2947033, PS344597, PS11741416, EAP11741416, FIX11741416, AWP47520, PD00002365
If your part number is not listed above, contact our support team before ordering and we will verify compatibility.
Compatibility
This heating element is compatible with select Whirlpool electric dryers, and also fits select Kenmore, Maytag, KitchenAid, Amana, and Roper dryers built on the same platform, including model numbers such as:
GEW9200LW0, GEW9200LW1, GEW9250PL0, GEW9250PW0, GEW9250PW1
GEQ9800PW1, GEQ9800PW2
MEDB835DW4, MEDC700VW0
WED5100HW1, WED5500XW1, WED5700AC1, WED6120HW1, WED6620HW1, WED8300SW2
MED5500FW1, MED6230HW1, MED6230RHW1
Kenmore 110.82822101
Note: Always verify your full model number before ordering, since Whirlpool uses several different heating elements across its dryer lineup. Contact our support team with your model number if you're unsure.
Key Features
Aftermarket replacement heating element assembly — generates the heat that dries clothes
Resolves "no heat," "insufficient heat," and "drying takes too long" symptoms caused by a burned-through coil
Nickel-chromium coil (approx. 85% Ni-Cr content) for effective, heat-and-abrasion-resistant heating
High-temperature ceramic insulators hold the coil firmly in the frame against vibration
Rated 5400W at 240V
Two 5/16" terminals for a direct connection
Approximately 10"L x 6"W x 1"H
Direct drop-in replacement — no modification required
Replaces WP3387747VP, W11045584, W11344457, 80003, 525502, AP6008281, AP2947033, PS344597, PS11741416, EAP11741416, FIX11741416, AWP47520, and PD00002365
Compatible with Whirlpool, Kenmore, Maytag, KitchenAid, Amana, and Roper electric dryers
Aftermarket replacement built to OEM-equivalent quality standards
Product Specifications
Part Number
3387747
OEM Part Number
WP3387747
Part Type
Dryer Heating Element Assembly
Condition
Aftermarket Replacement
Wattage
5400 W
Voltage
240V
Terminals
2 (5/16")
Coil Material
Nickel-chromium (approx. 85% Ni-Cr)
Insulators
High-temperature ceramic
Dimensions
Approx. 10"L x 6"W x 1"H
Repair Difficulty
Medium — basic electrical skills and dryer panel disassembly required
Quantity
1 heating element assembly
Compatible Brands
Whirlpool, Kenmore, Maytag, KitchenAid, Amana, Roper
Installation Notes
⚠️ Unplug Dryer Before Starting — Test Continuity Before Assuming It's The Element Disconnect power at the outlet or shut off the circuit breaker before beginning. Wear work gloves. Access is typically through the rear panel or the front, depending on your model, to reach the heater duct/blower housing area where the element is mounted. Before removing anything, test the old element with a multimeter set to continuity — a healthy element reads continuous end to end, while a failed one (with a visible break in the coil) reads open. Photograph the wiring before disconnecting anything. Disconnect the two wire terminals from the old element, remove the mounting screws or clips holding it in the duct housing, and pull it free. Install the new 3387747 assembly in the same position, reconnect the two wire terminals, and secure the mounting hardware. While the dryer is open, this is a good time to fully clean the exhaust vent ducting from the lint trap to the outside vent hood — restricted airflow is a major cause of heating element failure, and a fresh element installed into a clogged system will likely fail again prematurely. Reassemble the panel, restore power, and run a test cycle to confirm the dryer is heating normally. Tools needed: 1/4" nut driver, 5/16" wrench, Phillips screwdriver, multimeter, work gloves.
Frequently Asked Questions
My dryer has no heat at all. Should I replace the element first, or check something else?
Check the thermal fuse first. A blown thermal fuse produces the exact same "no heat at all" symptom as a failed heating element, and it's a much cheaper, faster part to test and replace. Whirlpool's own service guidance recommends checking the thermal fuse before replacing the element. If the fuse tests good and the dryer still has no heat, the element itself is the next thing to test and likely replace.
How can I tell if the element has actually failed?
The most reliable way is a continuity test with a multimeter — set it to continuity mode, disconnect the element's wires, and touch a probe to each terminal. A healthy element shows continuity (a complete circuit); a failed one shows open (no continuity), which usually corresponds to a visible break or burned-through section somewhere in the coil if you inspect it closely.
Why does the listing recommend cleaning the vent duct during this repair?
Restricted airflow from a lint-clogged exhaust duct is one of the most common root causes of heating element failure — when air can't move through the system properly, heat builds up around the element well beyond its designed operating range, accelerating wear and often leading directly to a burned-through coil. Since you'll already have the dryer open for this repair, cleaning the full duct run from the lint trap to the outside vent hood is a good use of the same trip and helps the new element last.
Is this an OEM or aftermarket part?
This is an aftermarket replacement part built to OEM-equivalent quality standards. It is not a genuine Whirlpool OEM part, but is manufactured to match the 5400W/240V electrical rating, nickel-chromium coil composition, ceramic insulator mounting, and terminal configuration of the original WP3387747 heating element used in compatible Whirlpool, Kenmore, Maytag, KitchenAid, Amana, and Roper dryers.
Shop With Confidence
A U.S.-based appliance parts retailer specializing in genuine OEM and high-quality replacement parts. We stock components for all major appliance brands and offer fast shipping from our U.S. warehouse. Our team is available to help verify compatibility before you purchase.
✓ Quality Aftermarket Parts ✓ Fast US Shipping ✓ Compatibility Support ✓ Secure Checkout
WPW10545291 Genuine OEM Whirlpool Range / Oven Thermal Fuse
The WPW10545291 is a genuine Whirlpool OEM thermal fuse mounted next to the heating source inside wall ovens, ranges, and microwave-oven combo units. This fuse is a one-time safety device: as long as the oven stays within its normal operating temperature, it does nothing at all, but the instant internal temperatures climb high enough — most often during a self-clean cycle, which runs far hotter than normal baking or roasting — the fuse permanently opens the circuit and cuts power. That's why a blown thermal fuse produces such a distinctive symptom: the oven loses power completely, sometimes with the door still electronically locked from the self-clean cycle that triggered the failure.
Unlike a thermostat, this thermal fuse cannot be reset once it blows — it must be replaced. Because it's mounted directly behind the control panel on many wall oven models, replacing it typically means pulling the unit partway out from the wall and removing the control section to reach it, rather than a simple rear-panel swap. It directly replaces AP6022803, W10545291, 3021646, PS11756140, PS7783661, and W10436435.
Quick Answer
The WPW10545291 Genuine OEM Whirlpool Range / Oven Thermal Fuse fixes Whirlpool, Maytag, KitchenAid, Jenn-Air, Amana, Magic Chef, Admiral, Norge, Roper, and Kenmore wall ovens, ranges, and microwave-oven combos that lost power completely — often right after a self-clean cycle. Replaces AP6022803, W10545291, 3021646, PS11756140, PS7783661, W10436435. If the door is electronically locked and won't open, you may need to manually release the lock before you can access the oven for this repair — see the FAQ below.
Common Problems This Part Fixes
Oven has no power at all — no lights, no display, no response to any button
Oven lost power suddenly, especially during or right after a self-clean cycle
Oven door remains electronically locked with no power to release it
Oven that stopped working after running unusually hot
Control panel completely dark and unresponsive
Continuity test shows an open circuit across the old fuse
Cross Reference Information
Part numbers can change over a product's lifecycle as manufacturers update designs or release new appliance models. For your convenience, we've included any known superseded, alternate, or cross-reference part numbers that match this item.
Replaces Part Numbers
This range/oven thermal fuse directly replaces the following OEM and cross-reference part numbers:
WPW10545291, W10545291, 3021646, W10436435, AP6022803, AWP50815, EAP11756140, PD00032820, PS11756140.
If your part number is not listed above, contact our support team before ordering and we will verify compatibility.
Compatibility
This thermal fuse is compatible with select Whirlpool wall ovens, ranges, and microwave-oven combo units, and also fits select Maytag, KitchenAid, Jenn-Air, Amana, Magic Chef, Admiral, Norge, Roper, and Kenmore appliances built on the Whirlpool platform, including model numbers such as WOD77EC7HS, WOD77EC0HV, and WOD51EC7AB02.
Note: Whirlpool uses several different thermal fuses across its range/oven lineup, including separate fuse designs used in other model families. Always verify your full model number before ordering. Contact our support team with your model number if you're unsure.
Key Features
Genuine Whirlpool OEM part — factory-specified opening temperature and terminal configuration
One-time safety device that cuts power if the oven overheats
Resolves "no power at all," "lost power after self-clean," and "door locked with no power" symptoms caused by a blown fuse
Mounts next to the heating source, typically behind the control panel
Replaces AP6022803, W10545291, 3021646, PS11756140, PS7783661, and W10436435
Compatible with Whirlpool, Maytag, KitchenAid, Jenn-Air, Amana, Magic Chef, Admiral, Norge, Roper, and Kenmore wall ovens, ranges, and microwave-oven combos
Genuine OEM replacement — guaranteed fit, materials, and performance
Product Specifications
Part Number
WPW10545291
Part Type
Range / Wall Oven Thermal Fuse
Condition
Genuine OEM
Brand
Whirlpool
Application
Wall Ovens, Ranges, Microwave-Oven Combo Units
Location
Next to the heating source, typically behind the control panel
Resettable
No — one-time use, must be replaced once blown
Repair Difficulty
Moderate to Hard — control panel disassembly required on many models
Quantity
1 thermal fuse
Compatible Brands
Whirlpool, Maytag, KitchenAid, Jenn-Air, Amana, Magic Chef, Admiral, Norge, Roper, Kenmore
Installation Notes
⚠️ Unplug Oven Or Shut Off Breaker Before Starting — Access Is Typically Behind The Control Panel Shut off the oven's power at the breaker before beginning. Wear work gloves. If the door is electronically locked and won't open due to the power loss, you may need to manually release it first — see the FAQ below for a common workaround. Remove the oven's retaining screws and carefully pull the unit out from the wall a few inches to access the screws holding the control section in place. Remove the screws securing the control panel — typically four — and pull the control unit loose, letting the display ribbon cable stay connected while you rest the panel out of the way on top of the oven; avoid pulling it further than the ribbon allows. The thermal fuse is usually mounted right behind the control panel at this point. Photograph the wiring before disconnecting the old fuse's connectors. Pull the connectors off the old fuse and plug them onto the new WPW10545291 fuse in the same orientation. Reconnect the control panel's ground wire and ribbon cable, reinstall the control panel and its screws, and carefully push the oven back into the wall opening, securing it with its retaining screws. Restore power at the breaker and confirm the oven powers on normally and the door unlocks and operates correctly. Tools needed: Phillips screwdriver, power tester (helpful), work gloves.
Frequently Asked Questions
My oven lost all power right after a self-clean cycle. Is this the thermal fuse?
Yes, this is one of the most common and well-documented triggers for this exact failure. Self-clean cycles run at extremely high temperatures compared to normal cooking, and if that heat exceeds what the thermal fuse is rated to tolerate, it blows to protect the oven — cutting all power in the process. A total loss of power during or shortly after a self-clean cycle is a strong sign this fuse is the cause.
My oven door is locked and I have no power to release it. How do I get it open?
This is a known complication when the thermal fuse blows during or after a self-clean cycle, since the door lock can remain engaged with no power available to release it electronically. One documented workaround: with the house power to the oven confirmed off, some owners have used a thin, flexible material (such as a bent paper clip or a flexible cutting board edge) worked carefully between the door and the lock mechanism to manually trip the lock open. This varies by model and takes patience — if you're not comfortable attempting it, a qualified appliance technician can open the door safely.
Can I just reset the thermal fuse instead of replacing it?
No. Unlike a thermostat, this thermal fuse is a one-time safety device — once it blows, its internal circuit is permanently broken and it cannot be reset or repaired. Replacement is the only option.
Is this an OEM or aftermarket part?
This is a genuine OEM part, manufactured by Whirlpool to factory specifications — guaranteed fit, materials, and performance. It matches the original opening temperature, terminal configuration, and mounting position of the thermal fuse originally installed in your oven, range, or microwave-oven combo.
Shop With Confidence
A U.S.-based appliance parts retailer specializing in genuine OEM and high-quality replacement parts. We stock components for all major appliance brands and offer fast shipping from our U.S. warehouse. Our team is available to help verify compatibility before you purchase.
✓ Genuine OEM Parts ✓ Fast US Shipping ✓ Compatibility Support ✓ Secure Checkout
XPARTCO W10613606 Refrigerator Compressor Start Relay and Capacitor
The XPARTCO W10613606 is an aftermarket replacement compressor start relay and capacitor assembly compatible with a wide range of Whirlpool, Kenmore, Maytag, KitchenAid, Amana, Jenn-Air, Admiral, Crosley, Dacor, Hardwick, Inglis, Litton, and Magic Chef refrigerators. The start relay is a small but critical electrical component that plugs directly onto the compressor terminals and provides the initial power surge needed to start the compressor motor. Once the compressor reaches operating speed, the relay drops out — leaving the compressor to run on its own. The capacitor (rated 15µF ±5%, 250VAC) works alongside the relay to store and release the burst of electrical energy needed on startup.
When the start relay fails, the compressor cannot start — causing the refrigerator to stop cooling entirely. A failed relay typically produces a clicking sound every few minutes as the compressor tries and fails to start, followed by a short rest, then another attempt. This kit includes both the start relay and the CBB61 capacitor. It directly replaces W10416065, 8208290, 8208368, C8931605, 67003186, 67005560, 67005561, 67005562, 67003764, 8171210, and several additional cross-reference numbers. Installs in under 15 minutes — no tools required in most cases.
Quick Answer
The XPARTCO W10613606 Refrigerator Compressor Start Relay and Capacitor fixes refrigerators that are not cooling, are too warm, or are making a repeated clicking sound every few minutes as the compressor tries to start. Plugs directly onto the compressor terminals. Kit includes start relay and 15µF 250VAC CBB61 capacitor. Compatible with Whirlpool, Kenmore, Maytag, KitchenAid, Amana, and more. Replaces W10416065, 8208290, C8931605, 67005560, and more. No tools required — installs in under 15 minutes.
Common Problems This Part Fixes
Refrigerator not cooling — compressor not running
Freezer section too warm or not freezing
Both refrigerator and freezer compartments gradually warming up
Repeated clicking sound every 2–5 minutes from behind or underneath the refrigerator
Compressor hums briefly then shuts off without reaching operating temperature
Refrigerator runs but cannot maintain set temperature
Shaking the start relay reveals a rattling sound inside — confirms internal failure
Replaces Part Numbers
This start relay and capacitor kit directly replaces the following OEM and cross-reference part numbers:
W10613606, 67005560, 3023300, 67003186, 67003764, 67005561, 67005562, W10416065, 8171210, 8208290, 8208368, W10244032, 302TFBYY, SSP14R302TFR, AWP41206, C8931605, PD00004905, EAP8746522, AP5787784, PS8746522.
If your part number is not listed above, contact our support team before ordering and we will verify compatibility.
Compatibility
This start relay and capacitor is compatible with select refrigerators from the following brands:
Whirlpool refrigerators (side-by-side, French door, bottom-freezer)
Kenmore / Sears refrigerators (select Whirlpool-built models)
Maytag refrigerators
KitchenAid refrigerators
Amana refrigerators
Jenn-Air refrigerators
Admiral refrigerators
Crosley refrigerators
Dacor refrigerators
Hardwick refrigerators
Inglis refrigerators
Litton refrigerators
Magic Chef refrigerators
Important: Always verify your refrigerator's model number and compare the old relay's shape and terminal configuration to the new part before installing. Some models may require trimming the wire connector tabs for a proper fit. Contact our support team with your model number if you need confirmation before ordering.
Key Features
Provides the initial electrical surge needed to start the compressor motor — without it, the compressor cannot run and the refrigerator cannot cool
Kit includes both the start relay and the CBB61 run capacitor (15µF ±5%, 250VAC) — everything needed in one package
Plugs directly onto the compressor terminals — no wiring or soldering required in most cases
Quick rattle test — shake the old relay; if it rattles, the internal contacts have failed and it needs replacement
Replaces W10416065, 8208290, C8931605, and over a dozen additional cross-reference part numbers
Compatible with 13 major appliance brands on the Whirlpool platform
Aftermarket replacement built to OEM-equivalent quality standards
Fast DIY repair — installs in under 15 minutes, no tools required in most cases
Product Specifications
Part Number
W10613606
Part Type
Refrigerator Compressor Start Relay and Capacitor Kit
Condition
Aftermarket Replacement
Application
Refrigerator Compressor (side-by-side, French door, bottom-freezer)
Capacitor Type
CBB61 Run Capacitor
Capacitor Rating
15µF ±5%, 250VAC
Kit Includes
1x Start relay, 1x CBB61 capacitor
Installation
Plug-in — no tools required in most cases
Compatible Brands
Whirlpool, Kenmore, Maytag, KitchenAid, Amana, Jenn-Air, Admiral, Crosley, Dacor, Hardwick, Inglis, Litton, Magic Chef
Installation Notes
⚠️ Unplug Refrigerator Before Starting Unplug the refrigerator from the power outlet before beginning. Move the refrigerator away from the wall to access the rear or lower back panel. Remove the rear access panel by unscrewing the retaining screws to expose the compressor. The compressor is a large black dome-shaped component — the start relay and capacitor assembly plugs onto the side terminals. Grip the old relay firmly and pull it straight off the compressor pins. Shake it — if it rattles, the internal contacts have failed and replacement is confirmed. Compare the old relay to the new W10613606 to confirm the terminal layout matches. Align the new relay with the compressor pins and press it firmly on. Reinstall the access panel, restore power, and listen for the compressor to start and run normally within a few minutes. Note: Some models may require trimming the wire connector tabs or reversing the connector orientation for a proper fit — do not force the connection. Tools needed: Phillips screwdriver (for panel access only).
Frequently Asked Questions
What does the compressor start relay do?
The start relay plugs onto the compressor terminals and provides the brief but powerful surge of electrical current needed to start the compressor motor from a standstill. Once the compressor reaches operating speed — usually within a second or two — the relay drops out and the compressor runs on its own. Without a working start relay, the compressor cannot start at all, and the refrigerator stops cooling. The capacitor works alongside the relay to store and deliver the extra energy needed on startup.
How do I know if my start relay has failed?
The most reliable quick test is the rattle test: unplug the refrigerator, pull the start relay off the compressor, and shake it near your ear. A working relay is silent. A failed relay will rattle — the internal contacts have broken free and are loose inside the casing. Another sign is a repeated clicking sound every 2–5 minutes from the back of the refrigerator, where the compressor attempts to start, fails, trips the overload protector, rests, and tries again. If the fridge is warm and you hear clicking, check the relay first.
What is the difference between the start relay and the capacitor?
The start relay is the switching device that connects and disconnects the start winding of the compressor motor during startup. The capacitor stores a charge and releases it during startup to give the motor the additional torque it needs to get moving under load. Together they work as a startup system for the compressor. This kit includes both — replacing both at the same time ensures the complete startup circuit is fresh and reliable.
My fridge is still not cooling after replacing the start relay — what else could it be?
If replacing the start relay does not restore cooling, other possible causes include a failed compressor (the compressor runs but no longer builds pressure), a refrigerant leak in the sealed system, a failed start capacitor (if not replaced along with the relay), a bad overload protector, or a faulty main control board. Listen carefully after installing the new relay — if the compressor now starts and runs but the fridge still doesn't cool after several hours, a sealed system issue or refrigerant problem is likely and will require a certified technician.
Is this an OEM or aftermarket part?
This is an aftermarket replacement part built to OEM-equivalent quality standards. It is not a genuine Whirlpool OEM part, but is manufactured to match the electrical specifications and terminal configuration of the original W10613606 start relay and capacitor assembly.
Shop With Confidence
A U.S.-based appliance parts retailer specializing in genuine OEM and high-quality replacement parts. We stock components for all major appliance brands and offer fast shipping from our U.S. warehouse. Our team is available to help verify compatibility before you purchase.
✓ Fast US Shipping ✓ Quality Aftermarket Parts ✓ Compatibility Support ✓ Secure Checkout
Genuine Whirlpool OEM
Whirlpool W11428245 Range Genuine OEM Screw
Factory-original replacement screw for select Whirlpool, Roper, and Estate ranges.
Product Description
W11428245 is a Genuine Whirlpool OEM range screw. On many compatible gas ranges it is used as the surface burner valve mounting screw.
It supersedes original Whirlpool part number 98005521.
Quick Answer
If your parts diagram calls for W11428245 or 98005521, this is the genuine Whirlpool OEM replacement. Verify the complete appliance model and screw location before ordering because Whirlpool ranges use several similar fasteners.
Key Features
Genuine Whirlpool OEM part
Factory-correct range mounting screw
Replaces 98005521
Commonly used for surface burner valve mounting
Fits select Whirlpool, Roper, and Estate ranges
Sold individually
Replaces and Cross-References
W11428245, 98005521, AP6981620, AWP44475, EAP12745627, PS12745627, PD00057954
Compatibility
Confirmed model examples include WFG320M0BS3, WFG320M0MS0, WFG505M0BB2, WFG505M0MS0, SF110AXSQ0, SF114PXSB0, SF114PXSQ0, TGP310LW0, FGP300KN0, FGP300KW1, FGP305KW3, and FGP337KW1.
Partial model list only. Verify your full appliance model number and the screw callout in the parts diagram before purchase.
Product Specifications
Part Number
W11428245
Brand
Whirlpool
OEM Status
Genuine OEM
Part Type
Range Mounting Screw
Replaces
98005521
Common Use
Surface Burner Valve Mounting
Quantity
1 Screw
Condition
New
Common Reasons for Replacement
Original screw is missing
Threads are stripped
Screw head is damaged
Burner valve or related component is loose
Correct OEM hardware is required during reassembly
Installation Notes
Disconnect electrical power before service.
Shut off the gas supply if servicing burner-valve or gas-manifold components.
Verify the screw location in the model-specific parts diagram.
Start the screw by hand to avoid cross-threading.
Do not overtighten.
Follow the appliance service procedure and complete any required gas-leak checks after servicing gas-system components.
High-Quality Replacement Part
Manufactured to meet or exceed original specifications for your appliance. Reliable, durable, and built to last.
Shipping Information
Free Tracking included with every order.
We ship to the eBay-verified address only.
Address changes after checkout cannot be guaranteed. Please double-check before purchasing.
Compatibility Help
Not sure if this part fits your appliance?
Contact us anytime and we’ll gladly help confirm fitment.
Payments & Tax
We accept: Visa, MasterCard, Discover, AMEX, and PayPal.
Applicable sales tax will be collected per eBay policy.
Returns & Warranty
Returns:
Item must be in brand new, resalable condition.
20% restocking fee may apply.
If shipping was free, it will be deducted from your refund.
Buyer is responsible for return shipping.
Please include a copy of the packing list or order number with a brief reason for return.
Warranty:
30-Day Replacement or Money-Back Guarantee.
Item must be returned before a replacement can be issued.
Buyer is responsible for return shipping.
Why Buy From Express Parts Direct?
Trusted aftermarket replacement parts
Fast shipping & free tracking
Responsive customer service
Simple return & warranty process
Express Parts Direct
XPARTCO S97018253 Range Vent Hood Light Fuse
The replacement S97018253 Range Vent Hood Light Fuse is designed for select Broan range hood models. This replacement fuse protects the range hood’s light circuit from power surges or faults. Ideal for restoring functionality to select Broan range hoods experiencing light-related issues, such as non-functioning lights or intermittent power.
Note: Disconnect power before installation. Handle glass fuse carefully.
Replaces part numbers: S97018253, 1930589, 97018253, AP5616207, PS10280886.
Compatibility (S97018253):
Compatible with select Broan range hood models, including but not limited to:
Broan: QP2, QP3, QP4 series (e.g., QP230BC, QP230BL, QP230SS, QP236BC, QP236BL, QP236SS, QP236WW, QP242BC, QP242BL, QP242SS, QP242WW, QP330BL, QP330SS, QP330WW, QP336BL, QP336SS, QP336WW, QP342BL, QP342SS, QP342WW, QP430SS, QP436SS, QP442SS)
Verify your model number or contact our support team for assistance.
Key Features (S97018253):
✅ Brand Compatibility: Fits select Broan range hood models.
🔥 Specifications: Replacement fuse, 8A, 120V, glass fuse (5x20mm), heat-resistant.
💰 Cost-Effective Alternative: Offers OEM-equivalent performance at a lower price.
🛠️ Easy Installation: Requires basic tools (e.g., screwdriver, pliers); typically installed in 10–15 minutes.
🛡️ Reliable Fixes: Addresses range hood light issues like non-functioning lights or intermittent power.
Installation Notes (S97018253):
Safety First: Disconnect the appliance from the power source before installation.
Location: Typically found in the upper left corner of the range hood control board; remove filters and bottom pan to access.
Tools: Use a screwdriver to access the control board and pliers to remove and install the fuse.
Shop Parts-O-Matic for high-quality replacement appliance parts with a 30-day return policy. Get your microwave or range hood running today!
Add to cart now for a budget-friendly fix!
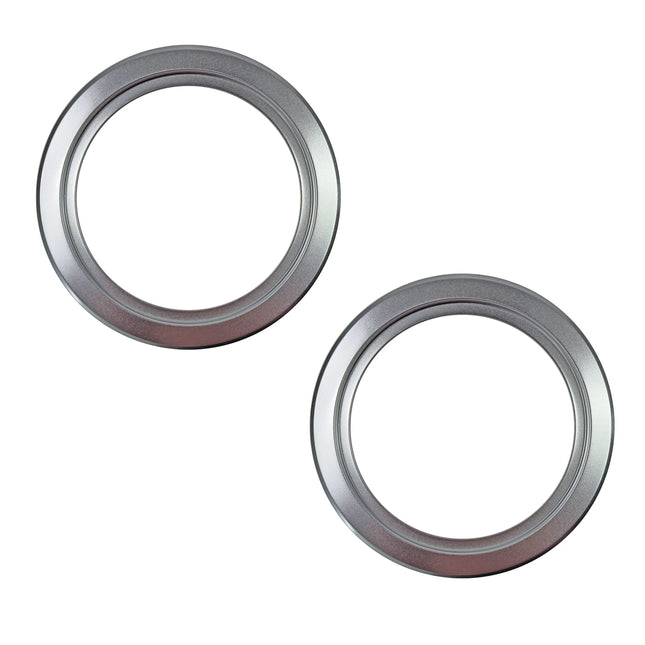
(2 Pack) WB31X5013CM 6" Burner Trim Ring
6" Chrome ring.
Fits GE, Hotpoint range.
Replaces Part Numbers: WB31X5013, 340525, 5, WB31X0056, WB31X5008, WB31X5013A, WB31X5013B, WB31X5013DS, WB31X5013R, WB31X5015, WB31X56, AH244475, EA244475, AP2028085, PS244475.
This is an aftermarket part that can be used as a replacement for the OEM part.
California Residents only
WARNING: Cancer and/or Reproductive Harm - www.p65warnings.ca.gov
XPARTCO WB02X10646 Hood Line Fuse
The replacement WB02X10646 Hood Line Fuse is designed for select GE range hood models. This fuse protects the hood’s electrical system (e.g., fan or light circuits) from power surges or faults. Ideal for restoring functionality to GE appliances experiencing hood-related power issues, such as fan or light failures.
Note: Disconnect power before installation. Verify voltage and amperage compatibility with your appliance model.
Replaces part numbers: WB02X10646, 873971, AH223926, EA223926, WB02X10584, WB2X10584, WB2X10646, AP3423517, PS223926.
Compatibility (WB02X10646):
Compatible with select GE microwave and range hood models, including but not limited to:
GE: JVM series, Profile, Cafe, Monogram (specific models pending verification)
Verify your model number or contact our support team for assistance.
Key Features (WB02X10646):
✅ Brand Compatibility: Fits select GE microwave and range hood models.
🔥 Specifications: Replacement hood line fuse, specifications vary by model (typically 125V–250V, verify amperage), heat-resistant.
💰 Cost-Effective Alternative: Offers OEM-equivalent performance at a lower price.
🛠️ Easy Installation: Requires basic tools (e.g., screwdriver, pliers); typically installed in 10–15 minutes.
🛡️ Reliable Fixes: Addresses hood-related issues like fan or light not working.
Installation Notes (WB02X10646):
Safety First: Disconnect the appliance from the power source before installation.
Shop Parts-O-Matic for high-quality replacement appliance parts with a 30-day return policy. Get your microwave or hood running today!
Add to cart now for a budget-friendly fix!