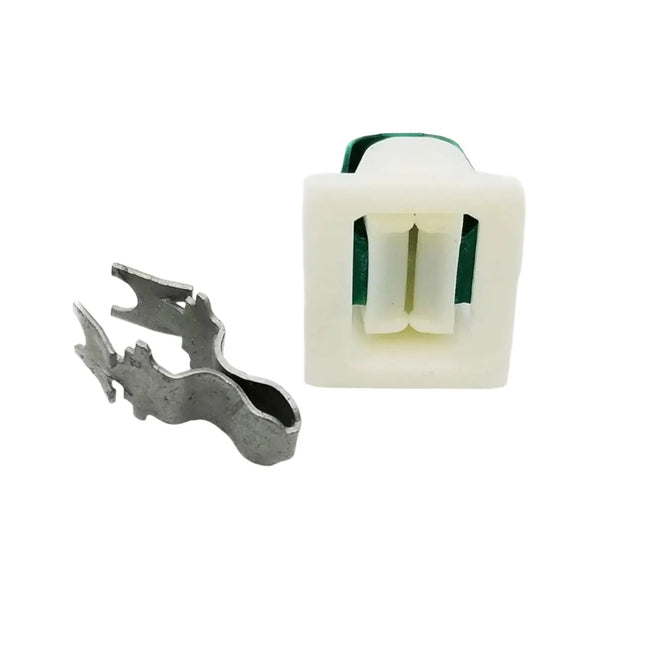
XPARTCO W10209656 Range Surface Igniter – Compatible with Whirlpool, Maytag, KitchenAid, and Kenmore Gas Ranges
Product Description
Restore reliable burner ignition with the XPARTCO W10209656 Range Surface Igniter. This high-quality aftermarket replacement provides the heat needed to ignite gas burners on your cooktop. A weak or failed igniter can cause burners not to light or take too long to ignite. Replacing it with this durable XPARTCO igniter restores instant ignition and safe cooking performance.
Replaces Part Numbers
WPW10209656, W10209656, 1468965, 98008959, 98012193, 98014514, 98014515, 98017561, 98017562, 98017917, W10112313, W10127479, AP6017135, PS11750430.
Compatibility
This replacement surface igniter is compatible with select Whirlpool, Maytag, KitchenAid, and Kenmore gas ranges.
Example compatible models include (but are not limited to): Whirlpool WFG320M0BS3, Maytag MGR6600FZ0, and Kenmore 665.75002100.
Always verify your range’s model number before ordering. Contact our support team if you’re unsure.
✅ Key Features
🔄 Aftermarket Replacement – Compatible with Whirlpool-brand gas ranges
🔥 Reliable Ignition – Provides consistent spark for fast burner lighting
💰 Affordable Solution – Quality alternative to OEM parts at lower cost
🛠️ DIY Friendly – Installs easily with basic hand tools
🛡️ Fixes Common Issues – Solves burners not igniting or clicking without flame
📐 Product Specification
Part Number: W10209656
Component Type: Gas Range Surface Igniter
Material: High-temperature ceramic base and metal electrode
Mounting: Direct-fit replacement for surface burner assembly
Operating Conditions: Designed for standard household gas ranges
Compliance: Built to OEM-equivalent standards (not OEM)
🛠️ Installation Notes
Tools Needed: Phillips screwdriver, nut driver
⚠️ Safety First: Always unplug the range and shut off the gas supply before starting repairs.
Steps:
Disconnect power and shut off gas supply.
Remove burner grates and top panel to access the igniter.
Detach the wire connector and mounting screw from the old igniter.
Install the new XPARTCO W10209656 igniter and reconnect wires.
Reassemble burner components, restore power and gas, and test ignition.
⏱️ Time Required: 15–25 minutes
📦 Shop With Confidence
🚚 Free Shipping on All Orders
🛠️ Trusted Appliance Parts Supplier
🔄 30-Day Return Policy
Enjoy quick, reliable ignition every time — Add to Cart Now for a dependable, budget-friendly repair!
XPARTCO W11176454 Gas Range Oven Igniter
The XPARTCO W11176454 is an aftermarket replacement oven burner igniter compatible with select Whirlpool, Maytag, and Amana gas ranges. The igniter is a hot surface igniter made from silicon carbide that draws electrical current through the oven safety valve to open it, then heats to ignition temperature to light the gas burner. When the igniter weakens or fails, the oven will not heat, will take too long to preheat, or the igniter will glow without lighting the burner.
This igniter draws 3.3–3.6 amps at 120V AC and reaches operating temperatures of 1,800°F–3,100°F with a heating time of approximately 17 seconds. The igniter body measures 3-7/10 inches (Length A) with 9-1/2 inch leads and two separate connectors. It directly replaces OEM part numbers W11176454 and W10914411, and is compatible with Whirlpool WFG and WFG505 series, Amana AGR and AGG series, and select Maytag gas range models. Installs in 10–20 minutes with basic hand tools.
Quick Answer
The XPARTCO W11176454 Gas Range Oven Igniter fixes Whirlpool, Maytag, and Amana gas ovens that won't heat, take too long to preheat, or have an igniter that glows but never lights the burner. Silicon carbide construction. Draws 3.3–3.6A at 120V. Igniter body 3-7/10" with 9-1/2" leads and 2 separate connectors. Replaces W10914411.
Common Problems This Part Fixes
Oven not heating at all — gas is not igniting
Oven takes excessively long to preheat (weak igniter not reaching ignition temperature)
Igniter glows orange or red but never lights the gas burner
Smell of gas when oven is turned on but burner does not light
Oven heats inconsistently or shuts off mid-cycle
Clicking sounds from the oven without successful ignition
Oven element will not heat despite other components functioning normally
Replaces Part Numbers
This oven igniter directly replaces the following OEM and cross-reference part numbers:
W11176454, 4547416, W10914411, EAP12348439, AWP43029, PD00044759, AP6327293, PS12348439.
If your part number is not listed above, contact our support team before ordering and we will verify compatibility.
Compatibility
This igniter is compatible with select gas ranges from the following brands:
Whirlpool gas ranges — WFG320 and WFG505 series (freestanding)
Amana gas ranges — AGR and AGG series
Maytag gas ranges — select AGR series models
Always verify your model number before ordering. Contact our support team if you're unsure.
Key Features
Hot surface igniter — draws current through the oven safety valve to open it, then ignites the gas burner
Silicon carbide construction — superior heat resistance vs. standard ceramic igniters
Draws 3.3–3.6 amps at 120V AC — correct range to open the Whirlpool gas safety valve
Operating temperature: 1,800°F – 3,100°F with approximately 17-second heat-up time
Igniter body length: 3-7/10 inches; lead length: 9-1/2 inches
Two separate connectors for easy plug-in installation
Directly replaces W11176454 and W10914411 — no modification required
Aftermarket replacement built to OEM-equivalent quality standards
Quick DIY repair — installs in 10–20 minutes with a screwdriver
Product Specifications
Part Number
W11176454
Also Replaces
W10914411
Part Type
Oven Burner Igniter (Hot Surface Igniter)
Condition
Aftermarket Replacement
Application
Gas Ranges and Ovens
Material
Silicon Carbide
Amperage Draw
3.3 – 3.6 Amps
Voltage
120V AC
Resistance
40 – 800 Ohms
Operating Temperature
1,800°F – 3,100°F
Heat-Up Time
Approximately 17 seconds
Igniter Body Length (A)
3-7/10 inches
Lead Length
9-1/2 inches
Connectors
2 separate connectors
Compatible Brands
Whirlpool, Amana, Maytag
Installation Notes
⚠️ Gas Appliance Safety Warning This part is used in gas ranges. Working with gas appliances carries risk of gas leaks, fire, and explosion if installed incorrectly. Always shut off the gas supply at the shutoff valve and unplug the range before beginning any repair. If you smell gas at any point during or after installation, leave the area immediately and contact your gas utility provider. If you are not confident working on gas appliances, have this part installed by a qualified appliance technician.
⚠️ Installation Instructions Unplug the range and shut off the gas supply before beginning. Open the oven door and remove the oven racks. Lift and remove the oven bottom panel by unscrewing the retaining screws. Remove the heat shield (if present) to expose the burner and igniter assembly. Unscrew the igniter mounting screws — typically one or two — and carefully disconnect the wire connector. Connect the new W11176454 igniter to the wire harness using the two separate connectors, secure it to the burner bracket with the mounting screws, then reinstall the heat shield and oven bottom panel. Restore gas supply and power and run a test cycle to confirm the oven lights correctly. Important: Do not touch the silicon carbide igniter element with bare hands — oils from skin reduce its lifespan. Handle only by the bracket and leads. Tools needed: Phillips screwdriver, work gloves.
Frequently Asked Questions
What is the difference between W11176454 and W10914411?
The W11176454 is the updated part number that directly supersedes the older W10914411. Both are the same hot surface igniter for compatible Whirlpool, Amana, and Maytag gas ranges. This aftermarket replacement is compatible with both part numbers.
How do I know if my oven igniter needs to be replaced?
The most common signs are the oven not heating at all, taking much longer than usual to preheat, or the igniter glowing orange but never lighting the burner. A working igniter reaches ignition temperature within about 30–90 seconds and glows bright orange. If it glows dimly or stays on indefinitely without the burner lighting, the igniter has weakened and is no longer drawing enough current to open the gas safety valve.
Why does my igniter glow but the oven still won't heat?
This is the classic symptom of a weak igniter. The gas safety valve requires a minimum amperage draw — typically around 3.2 amps — to open and allow gas to flow to the burner. As the igniter ages, its resistance increases and amperage drops below this threshold. The igniter still glows because it has some current, but not enough to open the valve. Replacing the igniter resolves this in nearly all cases.
Is the W11176454 compatible with my Amana or Maytag range?
Yes — the W11176454 is compatible with select Amana AGR and AGG series gas ranges and select Maytag AGR series models in addition to Whirlpool WFG320 and WFG505 series ranges. Always verify your specific model number before ordering to confirm compatibility.
Is this an OEM or aftermarket part?
This is an aftermarket replacement part built to OEM-equivalent quality standards. It is not a genuine Whirlpool OEM part, but is made from silicon carbide to match the electrical specifications and performance of the original W11176454 igniter.
Shop With Confidence
A U.S.-based appliance parts retailer specializing in genuine OEM and high-quality replacement parts. We stock components for all major appliance brands and offer fast shipping from our U.S. warehouse. Our team is available to help verify compatibility before you purchase.
✓ Fast US Shipping ✓ Quality Aftermarket Parts ✓ Compatibility Support ✓ Secure Checkout
XPARTCO 5304509706 Gas Oven Igniter
Product Overview
The XPARTCO 5304509706 Gas Oven Igniter is designed to ignite the gas burner and ensure consistent oven heating performance. This Oven Igniter is a replacement part for select Frigidaire, Kenmore, GE gas oven models, designed to ignite the gas in the oven burner to start the heating process. This part is responsible for creating the spark that ignites the gas, providing the heat needed to cook and bake food. Over time, the oven igniter can wear out or become damaged, which can prevent the oven from heating.
Quick Answer
If your gas oven is not heating, takes too long to preheat, or the burner does not ignite, the 5304509706 igniter may be weak or faulty. Replacing this igniter restores proper ignition and consistent oven performance.
Replaces Part Numbers
Replaces OEM part number: 5304509706, 316489402, 316489408, 316119301, 4545981, 012505482182, EAP12071409, AFR18015, PD00035904, AP6230715, PS12071409, WB2X10016, WB02X10016, 1704, EAP241804, AGE826644, PD00042950, AH241804, EA241804, AP2009619, PS241804.
Compatibility
This gas oven igniter is compatible with select Frigidaire, Electrolux, Kenmore, and other compatible gas ranges and ovens.
Frigidaire Gas Ranges
Electrolux Ovens
GE Gas Ranges
Kenmore Gas Ovens
Always verify your appliance model number before ordering.
Common Problems This Part Fixes
Oven not heating
Slow or delayed ignition
Burner not lighting
Gas smell due to ignition failure
Key Features
Designed for gas oven ignition
Provides fast and reliable burner ignition
High-quality aftermarket replacement
Durable construction for long-lasting performance
Product Specifications
Part Number: XP5304509706
Part Type: Gas Oven Igniter
Brand: XPARTCO
Condition: New
OEM / Aftermarket: Aftermarket
Application: Gas Ovens & Ranges
Troubleshooting Guide
Oven not igniting → Faulty igniter
Long preheat time → Weak igniter
No flame despite gas flow → Igniter failure
When Should You Replace This Igniter?
Replace this igniter if your oven fails to heat, takes too long to preheat, or does not ignite the gas burner properly.
Installation Notes
⚠️ Disconnect power and shut off gas before installation. Remove mounting screws, disconnect wiring, and install the new igniter carefully. Avoid touching the igniter surface with bare hands.
Related Parts
Gas Oven Safety Valve
Oven Temperature Sensor
Control Board
Frequently Asked Questions
Will this igniter fit my oven?This igniter fits many Frigidaire and compatible gas ovens. Always verify your model number.
What does an oven igniter do?It ignites the gas burner and allows the oven to heat properly.
What are signs of a bad igniter?Oven not heating, delayed ignition, or no flame during operation.
Is this OEM or aftermarket?This is a high-quality aftermarket replacement part.
Shop With Confidence
Parts-O-Matic is a U.S.-based appliance parts retailer specializing in OEM and high-quality replacement parts. We offer fast shipping, reliable products, and expert support.
Fast Shipping Quality Tested Parts Compatibility Support
XPARTCO 00631633 Range Surface Burner Igniter Electrode
The XPARTCO 00631633 is an aftermarket replacement gas range surface burner igniter electrode (also called a spark electrode) compatible with select Bosch, Thermador, and Gaggenau gas ranges and cooktops in the HDI, HGI, NGM, NGMP, HDIP, and HGIP series. The surface burner igniter electrode is the ceramic-tipped spark generator located at each gas burner position on the cooktop. When the burner is turned on, the ignition system sends a high-voltage pulse to the electrode, which generates a spark across the ceramic tip to ignite the gas flowing from the burner. When the electrode cracks, chips, or becomes contaminated with grease or food residue, the burner may fail to light, click continuously without igniting, or spark intermittently.
This replacement electrode is constructed from high-quality ceramic and metal — the ceramic insulator body withstands the thermal cycling of repeated ignition, while the metal spark tip maintains reliable spark gap geometry over time. Sold individually — one electrode per order. It directly replaces AP5950372, 4162041, and PS10057850. Because a gas range typically has four or more burners with individual electrodes, compare your existing electrode's dimensions and mounting configuration before ordering to ensure a correct fit. Installs in minutes — no tools required in most cases.
Quick Answer
The XPARTCO 00631633 Range Surface Burner Igniter Electrode fixes Bosch, Thermador, and Gaggenau gas ranges where a surface burner won't light, clicks repeatedly without igniting, or sparks intermittently. Ceramic and metal construction. Sold individually — one electrode per order. Compatible with Bosch HDI, HGI, NGM, NGMP, HDIP, HGIP series. Replaces AP5950372, 4162041, PS10057850. Compare dimensions to your original before ordering — each burner position uses the same electrode style on compatible models.
Common Problems This Part Fixes
Gas burner will not light when the knob is turned
Burner clicks repeatedly without igniting the gas
Burner sparks intermittently — fires once or twice but does not sustain ignition
Igniter clicks continuously even when the burner knob is in the off position
One burner not lighting while other burners on the same range work normally
Electrode tip visibly cracked, chipped, or heavily contaminated with baked-on grease
Weak or inconsistent spark — arc not reaching the burner port reliably
Replaces Part Numbers
This igniter electrode directly replaces the following OEM and cross-reference part numbers:
00631633, 631633, ABS11789, AP5950372, EAP10057850, PD00044775, PS10057850
If your part number is not listed above, contact our support team before ordering and we will verify compatibility.
Compatibility
This igniter electrode is compatible with select gas ranges and cooktops from the following brands and series:
Bosch gas ranges — HDI8054U, HDI8056U, HGI8046UC, HGI8054UC, HGI8056UC series
Bosch gas ranges — HDIP054U, HDIP056U, HGIP054UC, HGIP056UC series
Bosch gas cooktops — NGM5055UC, NGM5455UC, NGM5655UC, NGM8055UC, NGM8065UC, NGM8655UC, NGM8665UC, NGMP055UC, NGMP655UC series
Thermador gas ranges and cooktops (select models using the same electrode style)
Gaggenau gas ranges and cooktops (select models using the same electrode style)
Note: Before ordering, compare your existing igniter electrode's physical dimensions and mounting configuration to confirm this electrode is the correct fit for your burner position. Always verify your exact model number. If you are unsure, contact our support team with your model number for confirmation.
Key Features
Ceramic and metal spark electrode — generates the high-voltage spark that ignites the gas burner when the knob is turned
High-quality ceramic insulator body — withstands repeated thermal cycling without cracking under normal use
Durable metal spark tip — maintains reliable spark gap geometry for consistent ignition
Replaces AP5950372, 4162041, and PS10057850
Compatible with Bosch HDI, HGI, NGM, NGMP, HDIP, and HGIP series gas ranges and cooktops
Also compatible with select Thermador and Gaggenau gas ranges and cooktops
Sold individually — one electrode per order; order as many as needed for your burner positions
Aftermarket replacement built to OEM-equivalent quality standards
Quick DIY repair — installs in minutes, no special tools required in most cases
Product Specifications
Part Number
00631633
Also Known As
631633
Part Type
Gas Range Surface Burner Igniter Electrode (Spark Electrode)
Condition
Aftermarket Replacement
Application
Gas Ranges and Cooktops
Material
Ceramic / Metal
Color
White
Sold As
Single electrode — order quantity as needed
Compatible Brands
Bosch, Thermador, Gaggenau
Installation Notes
⚠️ Gas Appliance Safety Warning This part is used in gas ranges. Always turn off the gas supply at the shutoff valve and unplug the range from the electrical outlet before beginning any repair. If you smell gas at any point during or after installation, leave the area immediately and contact your gas utility provider. If you are not confident working on gas appliances, have this part installed by a qualified appliance technician.
⚠️ Unplug Range and Turn Off Gas Before Starting With the range unplugged and gas supply off, remove the cooktop grates and burner caps to access the burner heads. The igniter electrode is the small ceramic component positioned beside each burner head, held in place by a mounting bracket and screw or a snap-in clip depending on the model. Disconnect the single wire connector from the old electrode. Remove the mounting screw and lift the old electrode out. Install the new 00631633 electrode in the same position, secure the mounting screw, and reconnect the wire connector. Replace the burner caps and grates. Restore power and gas supply, then test each burner for reliable ignition. If the burner still does not light after replacing the electrode, inspect the igniter wire and the electronic ignition module. Tools needed: Phillips or Torx screwdriver (for mounting bracket on some models); no tools needed on models with snap-in electrodes.
Frequently Asked Questions
What does the surface burner igniter electrode do?
The igniter electrode is the component that creates the spark to light each gas burner. When you turn a burner knob past the "lite" position, the range's electronic ignition module sends a series of high-voltage pulses through the igniter wiring to the electrode at that burner. The electrode generates a visible spark across its ceramic tip to the grounded burner cap or burner head, and that spark ignites the gas flowing from the burner ports. Each burner position has its own dedicated electrode — failure of one electrode affects only that burner, while other burners on the same range continue to work normally.
My burner clicks constantly even when turned off — is it the electrode?
Constant clicking when a burner is in the off position is almost always caused by moisture or food residue in the igniter system rather than a failed electrode. When liquid boilover or steam gets into the burner cap area or electrode housing, it can cause the ignition module to fire continuously. Remove the burner cap and grate from the affected burner and allow everything to dry thoroughly — an hour in a warm oven (electric only, turned off) can help. Wipe the electrode tip clean with a dry cloth. If clicking persists after the components are completely dry and clean, the electrode or the ignition module may have been damaged by the moisture and needs replacement.
How many electrodes do I need for my Bosch range?
Most Bosch gas ranges have four surface burners, each with its own dedicated igniter electrode — so a full cooktop replacement typically requires four electrodes. This listing is for one electrode. If only one burner is not lighting, you likely only need one replacement. If multiple burners are failing, order one electrode for each affected burner. Because the electrodes on compatible Bosch models use the same part number across all burner positions, one order of multiple quantities covers all positions.
Can I clean the electrode instead of replacing it?
Yes — a contaminated or greasy electrode can often be cleaned successfully rather than replaced. Remove the electrode from the burner area and gently clean the ceramic tip and metal contact with a dry cloth or a soft toothbrush. Do not use water or liquid cleaners directly on the electrode — moisture in the ceramic can cause persistent clicking. If the ceramic body is cracked or the metal tip is corroded or missing, replacement is required. If the ceramic is intact and clean but the spark is still weak or absent, the electrode's spark gap geometry may have changed from thermal expansion and a replacement is the better fix.
Is this an OEM or aftermarket part?
This is an aftermarket replacement part built to OEM-equivalent quality standards. It is not a genuine Bosch OEM part, but is manufactured from high-quality ceramic and metal to match the dimensions and spark performance of the original 00631633 igniter electrode.
Shop With Confidence
A U.S.-based appliance parts retailer specializing in genuine OEM and high-quality replacement parts. We stock components for all major appliance brands and offer fast shipping from our U.S. warehouse. Our team is available to help verify compatibility before you purchase.
✓ Fast US Shipping ✓ Quality Aftermarket Parts ✓ Compatibility Support ✓ Secure Checkout
17438200000404 Genuine OEM Midea Dryer Temperature Sensor (Thermistor)
The 17438200000404 is a Genuine OEM Midea replacement dryer temperature sensor (thermistor) compatible with an extensive range of Midea, Criterion, and Insignia electric and gas dryers. This NTC (negative temperature coefficient) thermistor continuously monitors air temperature inside the dryer and sends resistance-based readings to the control board, which uses this data to regulate heating element cycling, prevent overheating, and maintain consistent drying temperatures throughout the cycle. As the thermistor heats up, its electrical resistance decreases in a predictable way, allowing the control board to calculate the exact temperature in real time.
When this sensor fails — whether shorted, open, or providing drifted/inaccurate readings — the dryer may overheat, may not heat at all, may dry clothes unevenly, may take much longer than normal to complete a cycle, or may trigger a not-heating fault on models with digital displays. As a Genuine OEM part manufactured by Midea to factory specifications, the 17438200000404 directly replaces WF-123X2060 (an alternate catalog cross-reference used by some suppliers, including for compatible Maytag-branded Midea-built units). Installs in 20–30 minutes with basic hand tools.
Quick Answer
The 17438200000404 Genuine OEM Midea Dryer Temperature Sensor (Thermistor) fixes Midea, Criterion, and Insignia dryers that are overheating, not heating, drying unevenly, or taking too long to dry. NTC thermistor — resistance drops as temperature rises; ~10,000–12,000 ohms at room temperature (70°F). Genuine OEM. Replaces WF-123X2060. Compatible with Midea MLE41N1AWW, MLE45N1AWW/BWW, MLE45N3BMG/BWW, MLE52N3AWW, MLE52S7AGS/AWW, MLG45N1AWW/BWW, MLG45N3BMG/BWW, MLG52S7AGS/AWW, Criterion CDE41N1AW/CDG41N1AW, and a wide range of Insignia models.
Common Problems This Part Fixes
Dryer overheating — thermistor not accurately reporting rising temperature to the control board
Dryer not heating at all — thermistor circuit open or shorted
Dryer drying clothes unevenly — inconsistent temperature regulation during the cycle
Dryer taking much longer than normal to complete a cycle
Not-heating fault code displayed on models with digital control panels
Multimeter test shows 0 ohms (shorted) or infinite resistance (open) instead of the expected NTC reading
Dryer cycling heat on and off erratically
Replaces Part Numbers
This temperature sensor directly replaces the following OEM and cross-reference part numbers:
17438200000404, WF-123X2060, AP7157538, PS18188581
Contact our support team with your model number if you need confirmation before ordering.
Compatibility
This temperature sensor is compatible with an extensive range of Midea, Criterion, and Insignia dryers, including:
Midea electric dryers — MLE41N1AWW, MLE41N1AWWC, MLE45N1AWW, MLE45N1BWW, MLE45N1BWWC, MLE45N3BMG, MLE45N3BWW, MLE52N3AWW, MLE52S7AGS, MLE52S7AWW
Midea gas dryers — MLG45N1AWW, MLG45N1BWW, MLG45N3BMG, MLG45N3BWW, MLG52S7AGS, MLG52S7AWW
Midea — CLADE67W, MDD160A2301E1305, MDD160VG012F0110EUS13
Criterion — CDE41N1AW (electric), CDG41N1AW (gas)
Insignia electric dryers — NSDRE67WH8A, NSDRE67WH8AC, NSFDRE67WH8A, NSFDRE67WH8AC, NSFDRE77WH8B, NSFDRE77WH8BC, NSTDRE67W1, NSTDRE75W1
Insignia gas dryers — NSFDRG67WH8A, NSTDRG67W1, NSTDRG75W1
Always verify your appliance model number before ordering. Contact our support team if you're unsure.
Key Features
Genuine OEM part manufactured by Midea to factory specifications — guaranteed fit and performance
NTC (negative temperature coefficient) thermistor — resistance decreases predictably as temperature rises, allowing precise temperature monitoring
Sends real-time temperature data to the control board to regulate heating element cycling and prevent overheating
Approximately 10,000–12,000 ohms of resistance at room temperature (around 70°F) when functioning correctly
Compatible across both electric and gas Midea-platform dryers, including Criterion and Insignia house-brand models
Replaces WF-123X2060
Installs in 20–30 minutes with basic hand tools
Product Specifications
Part Number
17438200000404
Part Type
Dryer Temperature Sensor (NTC Thermistor)
Condition
Genuine OEM
Application
Electric and Gas Dryers (Midea platform)
Sensor Type
NTC (Negative Temperature Coefficient)
Resistance at Room Temp
Approximately 10,000 – 12,000 ohms (~70°F)
Location
Blower housing/exhaust duct or drum cavity, depending on model
Compatible Brands
Midea, Criterion, Insignia
Installation Notes
⚠️ Unplug Dryer Before Starting (Shut Off Gas First on Gas Models) Disconnect power before beginning (and shut off the gas supply first if you have a gas dryer model). Midea dryers typically have 2–3 temperature sensors: an exhaust thermistor on the blower housing or exhaust duct, a drum thermistor inside the drum cavity, and on heat pump models, an evaporator thermistor — confirm which sensor location matches your symptom and part diagram before starting. Access the sensors by removing the back panel on vented models, or the side/bottom panels on heat pump models. Photograph the connector position before disconnecting. Unplug the old sensor's connector and inspect it for corrosion or heat discoloration on the wires — discoloration indicates prior overheating in that area. Remove the mounting clip or screw securing the old sensor and pull it free. Install the new 17438200000404 sensor in the same position, reseat the connector firmly, and secure the mounting hardware. Reassemble the panel, restore power, and run a test heat cycle to confirm normal temperature regulation. Tools needed: Phillips screwdriver, multimeter (for testing).
Frequently Asked Questions
How do I test if the temperature sensor (thermistor) has failed?
Unplug the dryer, disconnect the sensor's connector, and set your multimeter to resistance mode. At room temperature (around 70°F), a working NTC thermistor should read approximately 10,000 to 12,000 ohms. If the sensor reads 0 ohms, it has shorted internally. If it reads infinite resistance (open circuit, often shown as "OL" on the multimeter), the sensor has failed open. Either reading confirms the sensor needs replacement. If you have multiple sensors testing bad at the same time, check the shared ground wire — a broken ground connection can cause all sensors on that circuit to read as open even if the individual sensors are fine.
My Midea dryer has more than one temperature sensor — how do I know which one to replace?
Midea dryers typically use 2–3 temperature sensors depending on the model: an exhaust thermistor mounted on the blower housing or exhaust duct, a drum thermistor inside the drum cavity, and — on heat pump/ventless models — an evaporator thermistor in the refrigerant circuit area. The 17438200000404 is used across this Midea/Criterion/Insignia platform, but confirming the exact mounting location for your specific symptom (e.g., overheating vs. uneven drying) and model number before ordering will help ensure you're replacing the correct sensor.
What is the difference between 17438200000404 and WF-123X2060?
These are the same temperature sensor. WF-123X2060 is an alternate catalog cross-reference number used by some parts suppliers for the identical Midea-manufactured thermistor — it appears in listings for compatible Maytag-branded Midea-built units as well as the standard Midea, Criterion, and Insignia models. If your dryer's parts diagram shows either number, the 17438200000404 is the correct part.
Does this sensor fit my Insignia or Criterion dryer?
Yes — Insignia (Best Buy) and Criterion (Sears/Kmart) are house brands whose dryers in this size and configuration are manufactured by Midea and use the same internal components, including this temperature sensor. Confirmed compatible models include Insignia NSDRE67WH8A, NSFDRE67WH8A, NSFDRE77WH8B, NSTDRE67W1, NSTDRE75W1 (electric) and NSFDRG67WH8A, NSTDRG67W1, NSTDRG75W1 (gas), as well as Criterion CDE41N1AW (electric) and CDG41N1AW (gas). Always verify your specific model number before ordering.
Is this a Genuine OEM or aftermarket part?
This is a Genuine OEM part manufactured by Midea to factory specifications. It is the exact same NTC thermistor temperature sensor installed in compatible Midea, Criterion, and Insignia dryers from the factory — guaranteed fit, materials, and performance.
Shop With Confidence
A U.S.-based appliance parts retailer specializing in genuine OEM and high-quality replacement parts. We stock components for all major appliance brands and offer fast shipping from our U.S. warehouse. Our team is available to help verify compatibility before you purchase.
✓ Genuine OEM Parts ✓ Fast US Shipping ✓ Compatibility Support ✓ Secure Checkout
XPARTCO 134719300 Dryer Drum Belt
The XPARTCO 134719300 is an aftermarket replacement dryer drum drive belt compatible with a wide range of Frigidaire, Electrolux, Crosley, Kenmore, White-Westinghouse, and Gibson dryers. The drum belt is a critical component that connects the motor pulley to the drum, enabling the drum to rotate during drying cycles. The belt wraps around the drum circumference, passes over an idler pulley (which maintains tension), and connects to the drive motor pulley. When the motor runs, it drives the belt, which rotates the drum to tumble clothes for even drying. Over time, drive belts fail due to normal wear from friction and heat, cracking or fraying from age and repeated flexing, stretching that reduces tension and causes slipping, contamination from lint buildup, or sudden breakage from overloading or mechanical stress.
Constructed from durable black rubber with reinforced fabric or cord embedded inside for strength and flexibility, designed to withstand thousands of hours of operation under high temperatures and constant friction. Dimensions: 90"L x 5/16"W x 1/8"H with 5 ribs and 4 grooves. It directly replaces 134719300, 137315300, 7134719300, LB5300, 1482960, AP4368788, EAP2349294, PD00000843, and PS2349294. Important: install the belt with the grooves facing DOWN, against the drum. Often replaced together with the idler pulley (134793500/134793511, sold separately) as a paired repair since both wear together. Installs in 30–60 minutes with basic hand tools.
Quick Answer
The XPARTCO 134719300 Dryer Drum Belt fixes Frigidaire, Electrolux, Crosley, Kenmore, White-Westinghouse, and Gibson dryers where the drum won't turn (motor runs but drum stays still), the drum spins slowly, the dryer makes loud squealing or squeaking noises, or clothes take too long to dry. 90"L x 5/16"W x 1/8"H. 5 ribs, 4 grooves. Black rubber. Replaces 137315300, 7134719300, LB5300, 1482960, AP4368788, EAP2349294, PD00000843, PS2349294. Install with grooves facing DOWN against the drum. Often paired with idler pulley (134793500/134793511, sold separately).
Common Problems This Part Fixes
Dryer drum doesn't turn — motor runs but drum stays still (belt snapped)
Dryer drum rotates slowly or intermittently — belt worn or slipping
Loud squealing, squeaking, or thumping noises during operation — belt cracked, glazed, or misaligned
Dryer won't start — belt switch (on some models) tripped by broken belt
Clothes taking much longer than normal to dry — drum not tumbling clothes effectively
Visible cracks, fraying, or glazing on the belt surface
Belt broken completely — often heard as a loud snap during operation
Drum spins freely by hand with no resistance — clear sign the belt has snapped
Cross Reference Information
Part numbers can change over a product's lifecycle as manufacturers update designs or release new appliance models. For your convenience, we've included any known superseded, alternate, or cross-reference part numbers that match this item.
Replaces Part Numbers
This dryer drum belt directly replaces the following OEM and cross-reference part numbers:
134719300, 137315300, 7134719300, AFR14405, AP4368788, EAP2349294, LB5300, PD00000843, PS2349294.
If your part number is not listed above, contact our support team before ordering and we will verify compatibility.
Compatibility
This dryer drum belt is compatible with select dryers from the following brands:
Frigidaire dryers (select electric and gas models) — including FDEB34RGS1/GS2, FDEB55RGS0/GS1, FDER436RHS0 and related models
Electrolux dryers (select models)
Crosley dryers — CDE4500KW0, CDE4700LB0/LW0, CDE4701QW0, CDE7300RW0, CDE7400QW0/QW1, CDE7500KB0/KR0/KW0, CDE7700LR0/LW0, CDEC450KW0, CDEC750KW0, CDG4500KW0, CDG4700LB0/LW0, CDG4701QW0, CDG7300RW0/RW1, CDG7400QW0, CDG7500KB0/KR0/KW0, CDG7700LW0/LW1 series
Kenmore / Sears dryers — select Frigidaire/Electrolux-built models
White-Westinghouse dryers (select models)
Gibson dryers (select models)
Note: When you replace the drum belt, this is also the ideal time to inspect the idler pulley (134793500 or 134793511, sold separately) — it wears from the same friction cycles as the belt, and if it's rough, seized, or noisy, the new belt will wear out prematurely. Many customers replace both together as a matched set. Always verify your dryer model number before ordering.
Key Features
Dryer drum drive belt — connects the motor pulley to the drum to enable tumbling during drying cycles
Resolves "drum won't turn," "loud squealing noise," and "long dry times" symptoms when caused by belt failure
Durable black rubber construction with reinforced fabric/cord for strength and flexibility
Engineered to withstand thousands of hours of high-temperature, high-friction operation
Dimensions: 90" L x 5/16" W x 1/8" H with 5 ribs and 4 grooves
Install with grooves facing DOWN against the drum for proper engagement
Replaces 137315300, 7134719300, LB5300, 1482960, AP4368788, EAP2349294, PD00000843, and PS2349294
Compatible with Frigidaire, Electrolux, Crosley (CDE/CDG series), Kenmore, White-Westinghouse, and Gibson dryers
Often replaced together with the idler pulley (134793500/134793511, sold separately) as a paired repair
Aftermarket replacement built to OEM-equivalent quality standards
DIY repair — installs in 30–60 minutes with basic hand tools
Product Specifications
Part Number
XP134719300
Part Type
Dryer Drum Drive Belt
Condition
Aftermarket Replacement
Application
Dryers (Frigidaire/Electrolux platform)
Length
90"
Width
5/16"
Thickness
1/8"
Ribs / Grooves
5 ribs / 4 grooves
Color
Black
Material
Rubber with reinforced fabric/cord
Installation Orientation
Grooves face DOWN against the drum
Often Paired With
Idler Pulley (134793500 or 134793511, sold separately)
Compatible Brands
Frigidaire, Electrolux, Crosley, Kenmore, White-Westinghouse, Gibson
Installation Notes
⚠️ Unplug Dryer Before Starting — Wear Work Gloves — Grooves Face DOWN Disconnect power at the breaker or outlet before beginning. Wear work gloves to protect your hands from sharp sheet metal edges inside the dryer cabinet. Remove the top and/or front panels of the dryer to access the drum — the specific procedure varies by model, but typically involves removing 2–4 screws under the top edge or lint trap area, then lifting or tilting the top panel forward. Once the top is off, disconnect the door switch wire harness and lift the front panel free. This exposes the drum, motor, and idler pulley. Photograph the belt routing before disassembly if any belt fragments remain — you'll need to match the routing pattern with the new belt. Remove any pieces of the old broken belt from around the drum, motor pulley, and idler pulley. Support the drum from underneath (a wooden block or two can help hold it in position). Route the new 134719300 belt around the drum in the same position as the old belt — approximately 4-6 inches from the front lip of the drum. Install with the grooves facing DOWN, against the drum surface — this is essential for proper engagement with the motor pulley. From under the drum, route the belt over the idler pulley and around the drive motor pulley in a Z-shape. Rotate the drum by hand a few full turns to confirm the belt seats correctly and rides smoothly. Verify the drum rotates freely without binding — if it doesn't, the belt is twisted, kinked, or misrouted; fix it before reassembling. Reinstall the front and top panels, reconnect the door switch, restore power, and run a test cycle to confirm normal operation. Tools needed: Phillips screwdriver, wooden block, side cutters (for removing broken belt fragments), flathead screwdriver, work gloves.
Frequently Asked Questions
My dryer runs but the drum won't turn — is the belt the problem?
Almost certainly, yes. When the motor runs (you hear the humming/whirring) but the drum stays still, the belt has almost always snapped or is slipping badly. To confirm without opening the dryer: reach in through the door and try turning the drum by hand. If it spins freely with no resistance whatsoever, the belt is broken. If it turns but feels notchy or resistant, the belt may still be intact but the drum bearings or rollers could be the issue. In either case, opening the dryer to inspect the belt visually is the definitive check — a snapped belt will be lying in the bottom of the cabinet.
Why do I have to install the belt with grooves facing down?
The dryer's motor pulley is a smooth, un-grooved cylinder — the belt runs against it with the flat (smooth) side. The drum, on the other hand, needs the grooves to positively engage and drive without slipping under load. So the grooved side faces the drum (down when you're routing the belt around the drum from above), and the smooth side wraps around the motor pulley and idler pulley. Installing the belt backwards with grooves facing up will cause the belt to slip against the drum immediately and can burn out the new belt within a few minutes of operation.
Should I replace the idler pulley at the same time?
Yes, it's strongly recommended. The idler pulley (134793500 or 134793511 on many compatible dryers) maintains constant tension on the drum belt as the drum rotates. It wears from the same friction cycles as the belt — when the belt fails, the idler pulley bearings have typically also been stressed and are near end-of-life. Since the dryer is already open and the pulley is right there next to the belt, replacing both saves you a repeat repair when the pulley fails a few months later. Signs of a worn idler pulley: rough or noisy rotation when spun by hand, visible wear grooves, or seized bearings.
What's the difference between 134719300 and 137315300?
These are the same drive belt across production revisions. 137315300 was a Frigidaire OEM part number and 134719300 is the current cross-referenced part number that covers the same belt. Both are physically and functionally identical — if your dryer's parts diagram shows either number, this listing is the correct replacement. LB5300 and 7134719300 are additional catalog references for the same belt.
Is this an OEM or aftermarket part?
This is an aftermarket replacement part built to OEM-equivalent quality standards. It is not a genuine Frigidaire/Electrolux OEM part, but is manufactured from durable rubber with reinforced fabric/cord to match the dimensions (90"L x 5/16"W x 1/8"H), rib and groove pattern (5 ribs, 4 grooves), and drive function of the original 134719300 drum belt used in compatible Frigidaire, Electrolux, Crosley, Kenmore, White-Westinghouse, and Gibson dryers.
Shop With Confidence
A U.S.-based appliance parts retailer specializing in genuine OEM and high-quality replacement parts. We stock components for all major appliance brands and offer fast shipping from our U.S. warehouse. Our team is available to help verify compatibility before you purchase.
✓ Fast US Shipping ✓ Quality Aftermarket Parts ✓ Compatibility Support ✓ Secure Checkout
XPARTCO PB04001 Oven Bake Igniter for Viking Replaces 065650-000
The XPARTCO PB04001 is an aftermarket replacement oven bake igniter compatible with select Viking gas ranges with hot surface ignition systems, including the CVDSC, EVGIC, EVGRT, VDSC, VGIC, VGRT, VGSC, VGSS, and VGGT series. The oven bake igniter is a flat glow bar hot surface igniter — it draws electrical current through the oven's gas safety valve to open it, then heats to ignition temperature to light the gas burner. When the igniter weakens or fails, the oven will not heat, will take too long to reach temperature, or the igniter will glow but the burner will never light.
This is a silicon carbide flat-style igniter with a 2.25-inch white ceramic body and 4.5-inch overall length. Wire leads extend approximately 12.5 inches from the igniter body with female insulated terminals for plug-in installation. Ceramic wire nuts for spliced installation are included. Rated 3.2–3.6 amps at 120V AC — the correct amperage range to open the Viking oven gas safety valve. It directly replaces 065650-000, PB040001, 792263, AP5315579, AP7180264, SGR4001, SGR40001, GR40001, RP712, and AR402. Sold individually. Installs in 15–25 minutes with basic hand tools.
Quick Answer
The XPARTCO PB04001 Oven Bake Igniter fixes Viking gas ranges where the oven won't heat, takes too long to preheat, or the igniter glows but the burner never lights. Flat silicon carbide glow bar, 3.2–3.6A, 120V AC. Ceramic body 2.25", overall 4.5", leads 12.5" with female terminals. Ceramic wire nuts included. Sold individually. Compatible with Viking CVDSC, EVGIC, EVGRT, VDSC, VGIC, VGRT, VGSC, VGSS, VGGT series. Replaces 065650-000, PB040001, 792263, AP5315579, AP7180264, SGR4001.
Common Problems This Part Fixes
Oven not heating at all — igniter has failed or burned out
Oven takes much longer than normal to preheat
Igniter glows orange but the gas burner never lights
Gas smell when oven is turned on but burner does not light
Oven heats on first use but fails to relight during subsequent heat cycles
Igniter visibly cracked, broken, or dark/charred at the ends
Oven baking inconsistently or shutting off heat mid-cycle
Replaces Part Numbers
This oven igniter directly replaces the following OEM and cross-reference part numbers:
065650-000, AP7180264, PB040001, PB04001, 792263, SGR40001, GR40001, RP712, AR402
If your part number is not listed above, contact our support team before ordering and we will verify compatibility.
Compatibility
This oven igniter is compatible with select Viking gas ranges with hot surface ignition (glow bar) systems, including the following series:
Viking CVDSC series — CVDSC365-4G, CVDSC485-6G and related models
Viking EVGIC series — EVGIC305, EVGIC365, EVGIC485 and related models
Viking EVGRT series — EVGRT360, EVGRT480, EVGRT600 and related models
Viking VDSC series — VDSC365, VDSC367, VDSC485, VDSC487 and related models
Viking VGIC series — VGIC245, VGIC245G, VGIC245K, VGIC245Q, VGIC305, VGIC367 and related models
Viking VGSC series — VGSC300, VGSC305 and related models
Viking VGSS series — VGSS300, VGSS480 and related models
Viking VGRT and VGGT series — VGRT360, VGGT240 and related models
Note: This igniter is for Viking ranges with hot surface (glow bar) ignition systems only. Not all Viking ranges use this style of igniter — verify your model number before ordering. Always verify compatibility before purchasing.
Key Features
Flat glow bar hot surface igniter — draws current through the oven gas safety valve to open it, then heats to ignition temperature to light the oven burner
Silicon carbide construction — superior heat resistance, reaches 1,800°F–3,100°F operating temperature in approximately 60 seconds
Draws 3.2–3.6 amps at 120V AC — correct amperage range to open the Viking oven gas safety valve
Ceramic body: 2.25 inches; overall length: 4.5 inches; wire leads: approximately 12.5 inches with female insulated terminals
Plug-in installation with female terminals; ceramic wire nuts included for spliced installation if needed
Sold individually — one igniter per order
Replaces 065650-000, PB040001, 792263, AP5315579, AP7180264, SGR4001, and more
Fragile silicon carbide element — handle only by the bracket and wires; never touch the ceramic body with bare hands
Aftermarket replacement built to OEM-equivalent quality standards
DIY repair — installs in 15–25 minutes with basic hand tools
Product Specifications
Part Number
PB04001
Also Known As
PB040001
Part Type
Gas Oven Bake Igniter (Flat Glow Bar Hot Surface Igniter)
Condition
Aftermarket Replacement
Application
Viking Gas Ranges with Hot Surface Ignition
Igniter Style
Flat glow bar, silicon carbide
Amperage Draw
3.2 – 3.6 Amps
Voltage
120V AC
Operating Temperature
1,800°F – 3,100°F (approximately 60-second heat-up)
Ceramic Body Length
2.25 inches
Overall Length
4.5 inches
Lead Length
Approximately 12.5 inches (female insulated terminals)
Includes
Igniter and ceramic wire nuts
Sold As
Single igniter
Compatible Brands
Viking
Installation Notes
⚠️ Gas Appliance Safety Warning This part is used in gas ranges. Always shut off the gas supply at the shutoff valve and unplug the range from the electrical outlet before beginning any repair. If you smell gas at any point during or after installation, leave the area immediately and contact your gas utility provider. If you are not confident working on gas appliances, have this part installed by a qualified appliance technician.
⚠️ Handle With Extreme Care — Fragile Silicon Carbide Element The silicon carbide igniter element is extremely fragile and will crack or break with minimal force. Never touch the ceramic bar with bare hands — oils from skin will damage the element and cause premature failure. Handle only by the bracket, wires, and ceramic wire nut connectors. To install: unplug the range and shut off gas. Remove the oven racks and oven bottom panel. Disconnect the old igniter's wire connector (or cut wires if splicing). Unscrew the mounting bracket from the burner assembly and remove the old igniter. Position the new PB04001 igniter on the burner bracket and secure with the mounting screws. If the female terminals plug directly into the existing wiring, connect them. If wires need to be spliced, use the included ceramic wire nuts — never use standard plastic wire nuts near the oven burner. Reinstall the oven bottom panel and racks. Restore gas and power, then run a test cycle to confirm the igniter heats and the burner lights within 60 seconds. Tools needed: Phillips screwdriver, work gloves.
Frequently Asked Questions
How does a hot surface igniter work on a Viking gas oven?
The hot surface igniter is wired in series with the oven's gas safety valve. When the oven is turned on, electrical current flows through the igniter, heating the silicon carbide element until it reaches ignition temperature — typically glowing bright orange. As the element heats, its electrical resistance changes and the current draw increases to 3.2–3.6 amps. At that amperage level, the gas safety valve opens and gas flows to the burner, where the glowing igniter ignites it. If the igniter weakens and can no longer draw enough current to open the safety valve, the oven will glow but the burner will never fire — this is the most common cause of a Viking oven not heating.
What is the difference between PB04001 and PB040001?
PB04001 and PB040001 are the same oven igniter — PB04001 is the shortened version of the PB040001 part number. Both refer to the same flat silicon carbide glow bar igniter used on compatible Viking gas ranges. This listing covers both designations and the part functions identically regardless of which number is referenced.
How do I know if my oven igniter has failed?
The most common sign is an oven that glows orange but the burner never lights. A healthy igniter glows bright orange and ignites the burner within about 60 seconds. If it glows dimly, stays on indefinitely without the burner lighting, or does not glow at all when the oven is turned on, the igniter has failed. You can also test with a multimeter — with the oven cold and unplugged, a working igniter shows resistance of approximately 40–90 ohms; an open circuit confirms failure. Visually inspect the element for cracks, dark spots, or a broken ceramic bar.
Why must I use ceramic wire nuts instead of standard plastic ones?
Standard plastic wire nuts are not rated for the temperatures inside an oven cavity — they will melt or degrade near the burner, exposing bare wires and creating a safety hazard. Ceramic wire nuts (included with this igniter) are heat-rated for oven burner temperatures and provide a safe, permanent connection when splicing is required. Always use only ceramic wire nuts for any wiring connections near the oven burner.
Is this an OEM or aftermarket part?
This is an aftermarket replacement part built to OEM-equivalent quality standards. It is not a genuine Viking OEM part, but is manufactured from silicon carbide and high-temperature materials to match the electrical specifications and dimensions of the original 065650-000 oven bake igniter.
Shop With Confidence
A U.S.-based appliance parts retailer specializing in genuine OEM and high-quality replacement parts. We stock components for all major appliance brands and offer fast shipping from our U.S. warehouse. Our team is available to help verify compatibility before you purchase.
✓ Fast US Shipping ✓ Quality Aftermarket Parts ✓ Compatibility Support ✓ Secure Checkout
EXP570 Dryer Door Latch Kit
Product Overview
This Door Catch and Strike Kit is a replacement part for specific Maytag, Kenmore, LG, Frigidaire, GE, Amana, Whirlpool dryer models. It includes the door catch and strike. This kit ensures the dryer door remains securely closed during operation, preventing heat loss and ensuring the appliance functions efficiently. Common causes of a bad door catch include regular wear and tear, physical damage, or misalignment of the door, which can impact the catch's ability to latch properly
Replaces Part Numbers
5366021400, 5303207102, AP2153772, PS475419, AP2137890, PS455020, LA-1003, LA1003, PS2162263, AP4242465, WE1M1011, WE1X1192, WE1M536, WE1X1195, WE01X1158, WE01X10023, WE01X10188, WE01X10184, AP5324728, PS3502777, AP2042206, PS266893, AP5324728, PS3502777, AP2042209, PS266896, AP2042175, PS266861, AP2042031, PS264343, AP3775568, PS959860, AP5238145, PS959856, WE1X1194, PS266895, AP2042208, WE1M1011, WE1X1192, WE1M536, WE1X1195, WE01X1158, WE01X10023, WE01X10188, WE01X10184, AP5324728, PS3502777, AP2042206, PS266893, AP5324728, PS3502777, AP2042209, PS266896, AP2042175, PS266861, AP2042031, PS264343, AP3775568, PS959860, AP5238145, PS959856, 4027EL2001A, 4026EL3001A, PS3522845, AP5238145, AP5242421, PS3522822, 00491624, AP3735937, PS959856, 5366021400, 5303207102, AP2153772, PS475419, AP2137890, PS455020, 279570.
Fixes the Following Issues
Dryer door doesn’t stay closed
Dryer won’t start due to an open-door error
Door pops open mid-cycle
Worn or broken latch mechanism
Compatible Brands
This latch kit is compatible with dryers manufactured by Whirlpool, Kenmore (Whirlpool-built), Maytag, Amana, Roper, Estate, Frigidaire, GE, Hotpoint, Inglis and many more, covering a broad range of top-loading and front-loading residential models.
Why Buy from Parts-O-Matic
High-quality aftermarket performance
Always Fast and Free U.S. shipping
Trusted by appliance repair techs and DIYers
Easy returns and responsive customer service
17438000001584 Genuine OEM Midea Dryer Belt Safety Switch
The 17438000001584 is a Genuine OEM Midea replacement belt safety switch compatible with select Midea, Criterion, and Insignia electric and gas dryers. This safety switch is positioned near the drive belt and tensioner pulley assembly, where it monitors belt-related conditions and interrupts electrical flow to the motor or heating circuit if a fault or unsafe condition is detected — such as a broken or severely slipped drive belt. This is a key safety mechanism: if the belt fails and the drum can no longer be safely driven, this switch helps prevent the motor from continuing to run unsafely or the heater from continuing to operate without normal airflow from drum rotation.
When this switch fails, the dryer may not start, may shut off unexpectedly during operation, or may fail to heat even though other components test correctly. As a Genuine OEM part manufactured by Midea to factory specifications, the 17438000001584 measures 2"L x 2"W x 3"H and weighs approximately 1 oz. It is found on the same parts diagram as the drive belt, tensioner pulley assembly, and drum support components on compatible models. Installs in 30–45 minutes with basic hand tools.
Quick Answer
The 17438000001584 Genuine OEM Midea Dryer Belt Safety Switch fixes Midea, Criterion, and Insignia dryers that won't start, shut off unexpectedly during operation, or fail to heat despite other components testing normally. Mounted near the drive belt and tensioner pulley assembly — interrupts power if a fault or unsafe belt condition is detected. Dimensions: 2"L x 2"W x 3"H, approx. 1 oz. Genuine OEM. Compatible with Midea MLG45N3BMG, Criterion CDG41N1AW, CDG45N1AW, and related Midea-platform dryer models.
Common Problems This Part Fixes
Dryer not starting — safety switch not signaling normal belt/drive conditions
Dryer shutting off unexpectedly partway through a cycle
Dryer not heating despite the heating element, thermostat, and other components testing normal
Dryer behaving erratically after a drive belt failure or replacement
Intermittent power interruption during operation traced to this switch area
Switch contacts failing continuity test with a multimeter
Replaces Part Numbers
This belt safety switch directly replaces the following part number:
17438000001584, AP7157511, PS18188483
This is the Midea manufacturer part number used across multiple Midea, Criterion, and Insignia dryer models. Contact our support team with your model number if you need confirmation before ordering.
Compatibility
This belt safety switch is compatible with select Midea, Criterion, and Insignia dryers, including:
Midea MLG45N3BMG gas dryer
Midea MLG45N1BWW, MLG45N3BWW, and related MLG gas dryer series
Midea MLE series electric dryers (select models)
Criterion CDG41N1AW, CDG45N1AW gas dryers (air vent series)
Insignia electric and gas dryers built on the Midea platform (select models)
Always verify your appliance model number before ordering. Contact our support team if you're unsure.
Key Features
Genuine OEM part manufactured by Midea to factory specifications — guaranteed fit and performance
Safety switch mounted near the drive belt and tensioner pulley assembly
Interrupts electrical flow to the motor or heating circuit if a fault or unsafe belt-related condition is detected
Compact design: 2"L x 2"W x 3"H, approximately 1 oz
Compatible with Midea MLG/MLE series, Criterion CDG series, and Insignia Midea-built dryers
Installs in 30–45 minutes with basic hand tools
Product Specifications
Part Number
17438000001584
Part Type
Dryer Belt Safety Switch
Condition
Genuine OEM
Application
Electric and Gas Dryers (Midea platform)
Dimensions
2"L x 2"W x 3"H
Weight
Approximately 1 oz
Location
Near drive belt and tensioner pulley assembly
Compatible Brands
Midea, Criterion, Insignia
Installation Notes
⚠️ Unplug Dryer Before Starting (Shut Off Gas First on Gas Models) — Wear Work Gloves Disconnect power before beginning (and shut off the gas supply first if you have a gas dryer model). Wear work gloves — there are sharp metal edges inside the dryer cabinet. Remove the lint filter housing screws, release the top panel locking clips with a putty knife, and lift the top panel. Remove the front panel to access the drum, drive belt, and tensioner pulley assembly. Locate the belt safety switch in this area — refer to your model's parts diagram to confirm its exact mounting position, as it is positioned near the belt and tensioner pulley support. Photograph the wire connections before disconnecting. Disconnect the wires from the old switch, remove the mounting screw or clip, and pull the switch free. Install the new 17438000001584 switch in the same position, secure the mounting hardware, and reconnect the wires. While this area is open, it's a good time to inspect the drive belt and tensioner pulley for wear, since this switch is related to belt operation. Reassemble the front panel and top panel in reverse order. Restore gas and power, and run a test cycle to confirm the dryer starts and runs normally. Tools needed: Phillips screwdriver, putty knife, work gloves.
Frequently Asked Questions
What does the belt safety switch do?
The belt safety switch monitors belt-related conditions near the drive belt and tensioner pulley assembly and interrupts electrical flow to the motor or heating circuit if it detects a fault or unsafe condition — such as a broken or badly slipped drive belt. This is a protective measure: if the belt has failed and the drum can no longer be driven normally, the switch helps prevent continued unsafe operation of the motor or heater. It works alongside other safety components in the dryer (like the door/cover switch and thermal limiters) as part of an overall safety system.
My dryer just had a belt replacement and now isn't working right — could this switch be involved?
It's possible. Since this switch is positioned near the belt and tensioner pulley assembly, it can be disturbed, dislodged, or its connector improperly reseated during a belt replacement. If your dryer is behaving erratically after a recent belt repair — failing to start, shutting off, or not heating — check that this switch's connector is fully seated and that the switch itself wasn't damaged during the repair. If the connector is good and the switch tests as an open circuit with a multimeter, it has failed and needs replacement.
How do I test if this safety switch has failed?
Unplug the dryer, disconnect the switch's wire connector, and set your multimeter to continuity mode. With the belt and tensioner mechanism in their normal operating position, the switch should show closed continuity (allowing current to flow). If the switch shows an open circuit when it should be closed, it has failed and needs replacement. Always refer to your specific model's wiring diagram to confirm the expected switch state, since exact behavior can vary by dryer model.
Does this switch fit Insignia and Criterion dryers as well as Midea?
Yes — Insignia (Best Buy) and Criterion (Sears/Kmart) are house brands whose dryers in certain configurations are manufactured by Midea and use the same internal components, including this belt safety switch. Confirmed Criterion models include the CDG41N1AW and CDG45N1AW gas dryers. Always verify your specific model number before ordering to confirm compatibility.
Is this a Genuine OEM or aftermarket part?
This is a Genuine OEM part manufactured by Midea to factory specifications. It is the exact same belt safety switch installed in compatible Midea, Criterion, and Insignia dryers from the factory — guaranteed fit, materials, and performance.
Shop With Confidence
A U.S.-based appliance parts retailer specializing in genuine OEM and high-quality replacement parts. We stock components for all major appliance brands and offer fast shipping from our U.S. warehouse. Our team is available to help verify compatibility before you purchase.
✓ Genuine OEM Parts ✓ Fast US Shipping ✓ Compatibility Support ✓ Secure Checkout
XPARTCO 3387134 - 3392519 Dryer Cycling Thermostat and Thermal Fuse Set - Compatible with Whirlpool, Kenmore, Maytag
Product Description
Maintain safe and efficient dryer operation with the XPARTCO 3387134 - 3392519 Dryer Cycling Thermostat and Thermal Fuse Set. This replacement kit includes one cycling thermostat (3387134, L155-25) and one thermal fuse (3392519), designed as a replacement for select Whirlpool, Kenmore, Maytag, and other compatible dryers. The cycling thermostat regulates drum temperature, while the thermal fuse prevents overheating by cutting power if temperatures exceed safe limits. This set addresses issues like overheating, insufficient heat, no heat, or prolonged drying times. Test the thermal fuse first if the dryer won't heat, as it typically fails before the thermostat.
Note: Includes (1) cycling thermostat and (1) thermal fuse. Disconnect power before installation. Verify compatibility with your dryer model.
Replaces part numbers:
Cycling Thermostat: WP3387134, 3387134, 3387135, 3387139, 3-6910, 306910, 326801, 661512, L150-15F, L155-25F, AP6008270, PS11741405.
Thermal Fuse: 3392519, WP3392519, 3388651, WE4X857, G4AP0500, 6L4101091C, ET401, 3388651, 694511, 80005, PS11741460, AP6008325.
Compatibility:
Compatible with select dryer models, including but not limited to:
Whirlpool: LE5700XKW0, LE5920XKW0, WED4815EW1, WED4910XQ1, WED5300SQ0
Kenmore: 110.97591420, 110.97591220, 110.97592420, 110.60072990
Maytag: MDE5500AYW, MDE6000AYW, MDE7600AYW
Roper: RED4440VQ1, REX5634KQ1
Amana: NED4655EW0
KitchenAid: KEYE760WWH0
Verify your model number or contact our support team for assistance.
Key Features:
✅ Brand and Models Compatibility: Fits select Whirlpool, Kenmore, Maytag, Roper, Amana, KitchenAid, and other dryers.
🔧 Specifications: Replacement kit with one cycling thermostat (L155-25 SPST, 120V, 2W) and one thermal fuse (250°F limit, non-resettable).
💪 Reliable Performance: Regulates drum temperature and prevents overheating for safe, efficient drying.
🛠️ Easy Installation: Requires a screwdriver and pliers; typically installed in 15–30 minutes.
🛡️ Effective Fixes: Resolves overheating, insufficient heat, no heat, or prolonged drying times.
Product Specification
Part Number: XPARTCO 3387134 - 3392519
Component Type: Dryer cycling thermostat and thermal fuse kit
Material: Plastic and metal
Electrical Specs:
Cycling Thermostat: 120V, 2W; L155-25 SPST, opens at 155°F, closes at 130°F
Thermal Fuse: 250°F limit, 125/250V, non-resettable
Compliance: Prop 65 warning for California
Installation Notes:
Safety First: Disconnect the dryer from the power source before installation.
Shop for high-quality appliance parts with a 30-day return policy. Keep your dryer running safely and efficiently today!
Add to cart now for a reliable fix!
5301EL1001J Dryer Genuine Heating Element
Fits Specific LG Dryer Models.
240V, 5400W complete assembly with housing and thermostats
Replaces Part Numbers: 5301EL1001J, 5301EL1001A, 1377645, AEG72910307, AH3527791, AP4439759, EA3527791, PS3527791, 5301EL1001H, 1377645, 5301EL1001E, 5301EL1001G, 5301EL1001S, 5301EL1001U, 5301EL1001W, AH3527790, AP5072170, EA3527790, PS3527790, AEG72910301, AP5669354, AEG72910309, AP7211081.
Description: This Heater Assembly is a Genuine OEM part for specific LG dryer models. This component is responsible for generating the heat required to dry clothes effectively. It consists of a heating element and necessary components that work together to maintain the desired drying temperature, ensuring clothes come out dry and ready to wear. Causes of a bad heater assembly can include wear and tear from regular use, overheating, electrical issues, or damage to the heating element itself. A malfunctioning heater assembly can lead to inefficient drying or no heat at all.
California Residents only
WARNING: Cancer and/or Reproductive Harm - www.p65warnings.ca.go