XPARTCO 134719300 Dryer Drum Belt
The XPARTCO 134719300 is an aftermarket replacement dryer drum drive belt compatible with a wide range of Frigidaire, Electrolux, Crosley, Kenmore, White-Westinghouse, and Gibson dryers. The drum belt is a critical component that connects the motor pulley to the drum, enabling the drum to rotate during drying cycles. The belt wraps around the drum circumference, passes over an idler pulley (which maintains tension), and connects to the drive motor pulley. When the motor runs, it drives the belt, which rotates the drum to tumble clothes for even drying. Over time, drive belts fail due to normal wear from friction and heat, cracking or fraying from age and repeated flexing, stretching that reduces tension and causes slipping, contamination from lint buildup, or sudden breakage from overloading or mechanical stress.
Constructed from durable black rubber with reinforced fabric or cord embedded inside for strength and flexibility, designed to withstand thousands of hours of operation under high temperatures and constant friction. Dimensions: 90"L x 5/16"W x 1/8"H with 5 ribs and 4 grooves. It directly replaces 134719300, 137315300, 7134719300, LB5300, 1482960, AP4368788, EAP2349294, PD00000843, and PS2349294. Important: install the belt with the grooves facing DOWN, against the drum. Often replaced together with the idler pulley (134793500/134793511, sold separately) as a paired repair since both wear together. Installs in 30–60 minutes with basic hand tools.
Quick Answer
The XPARTCO 134719300 Dryer Drum Belt fixes Frigidaire, Electrolux, Crosley, Kenmore, White-Westinghouse, and Gibson dryers where the drum won't turn (motor runs but drum stays still), the drum spins slowly, the dryer makes loud squealing or squeaking noises, or clothes take too long to dry. 90"L x 5/16"W x 1/8"H. 5 ribs, 4 grooves. Black rubber. Replaces 137315300, 7134719300, LB5300, 1482960, AP4368788, EAP2349294, PD00000843, PS2349294. Install with grooves facing DOWN against the drum. Often paired with idler pulley (134793500/134793511, sold separately).
Common Problems This Part Fixes
Dryer drum doesn't turn — motor runs but drum stays still (belt snapped)
Dryer drum rotates slowly or intermittently — belt worn or slipping
Loud squealing, squeaking, or thumping noises during operation — belt cracked, glazed, or misaligned
Dryer won't start — belt switch (on some models) tripped by broken belt
Clothes taking much longer than normal to dry — drum not tumbling clothes effectively
Visible cracks, fraying, or glazing on the belt surface
Belt broken completely — often heard as a loud snap during operation
Drum spins freely by hand with no resistance — clear sign the belt has snapped
Cross Reference Information
Part numbers can change over a product's lifecycle as manufacturers update designs or release new appliance models. For your convenience, we've included any known superseded, alternate, or cross-reference part numbers that match this item.
Replaces Part Numbers
This dryer drum belt directly replaces the following OEM and cross-reference part numbers:
134719300, 137315300, 7134719300, AFR14405, AP4368788, EAP2349294, LB5300, PD00000843, PS2349294.
If your part number is not listed above, contact our support team before ordering and we will verify compatibility.
Compatibility
This dryer drum belt is compatible with select dryers from the following brands:
Frigidaire dryers (select electric and gas models) — including FDEB34RGS1/GS2, FDEB55RGS0/GS1, FDER436RHS0 and related models
Electrolux dryers (select models)
Crosley dryers — CDE4500KW0, CDE4700LB0/LW0, CDE4701QW0, CDE7300RW0, CDE7400QW0/QW1, CDE7500KB0/KR0/KW0, CDE7700LR0/LW0, CDEC450KW0, CDEC750KW0, CDG4500KW0, CDG4700LB0/LW0, CDG4701QW0, CDG7300RW0/RW1, CDG7400QW0, CDG7500KB0/KR0/KW0, CDG7700LW0/LW1 series
Kenmore / Sears dryers — select Frigidaire/Electrolux-built models
White-Westinghouse dryers (select models)
Gibson dryers (select models)
Note: When you replace the drum belt, this is also the ideal time to inspect the idler pulley (134793500 or 134793511, sold separately) — it wears from the same friction cycles as the belt, and if it's rough, seized, or noisy, the new belt will wear out prematurely. Many customers replace both together as a matched set. Always verify your dryer model number before ordering.
Key Features
Dryer drum drive belt — connects the motor pulley to the drum to enable tumbling during drying cycles
Resolves "drum won't turn," "loud squealing noise," and "long dry times" symptoms when caused by belt failure
Durable black rubber construction with reinforced fabric/cord for strength and flexibility
Engineered to withstand thousands of hours of high-temperature, high-friction operation
Dimensions: 90" L x 5/16" W x 1/8" H with 5 ribs and 4 grooves
Install with grooves facing DOWN against the drum for proper engagement
Replaces 137315300, 7134719300, LB5300, 1482960, AP4368788, EAP2349294, PD00000843, and PS2349294
Compatible with Frigidaire, Electrolux, Crosley (CDE/CDG series), Kenmore, White-Westinghouse, and Gibson dryers
Often replaced together with the idler pulley (134793500/134793511, sold separately) as a paired repair
Aftermarket replacement built to OEM-equivalent quality standards
DIY repair — installs in 30–60 minutes with basic hand tools
Product Specifications
Part Number
XP134719300
Part Type
Dryer Drum Drive Belt
Condition
Aftermarket Replacement
Application
Dryers (Frigidaire/Electrolux platform)
Length
90"
Width
5/16"
Thickness
1/8"
Ribs / Grooves
5 ribs / 4 grooves
Color
Black
Material
Rubber with reinforced fabric/cord
Installation Orientation
Grooves face DOWN against the drum
Often Paired With
Idler Pulley (134793500 or 134793511, sold separately)
Compatible Brands
Frigidaire, Electrolux, Crosley, Kenmore, White-Westinghouse, Gibson
Installation Notes
⚠️ Unplug Dryer Before Starting — Wear Work Gloves — Grooves Face DOWN Disconnect power at the breaker or outlet before beginning. Wear work gloves to protect your hands from sharp sheet metal edges inside the dryer cabinet. Remove the top and/or front panels of the dryer to access the drum — the specific procedure varies by model, but typically involves removing 2–4 screws under the top edge or lint trap area, then lifting or tilting the top panel forward. Once the top is off, disconnect the door switch wire harness and lift the front panel free. This exposes the drum, motor, and idler pulley. Photograph the belt routing before disassembly if any belt fragments remain — you'll need to match the routing pattern with the new belt. Remove any pieces of the old broken belt from around the drum, motor pulley, and idler pulley. Support the drum from underneath (a wooden block or two can help hold it in position). Route the new 134719300 belt around the drum in the same position as the old belt — approximately 4-6 inches from the front lip of the drum. Install with the grooves facing DOWN, against the drum surface — this is essential for proper engagement with the motor pulley. From under the drum, route the belt over the idler pulley and around the drive motor pulley in a Z-shape. Rotate the drum by hand a few full turns to confirm the belt seats correctly and rides smoothly. Verify the drum rotates freely without binding — if it doesn't, the belt is twisted, kinked, or misrouted; fix it before reassembling. Reinstall the front and top panels, reconnect the door switch, restore power, and run a test cycle to confirm normal operation. Tools needed: Phillips screwdriver, wooden block, side cutters (for removing broken belt fragments), flathead screwdriver, work gloves.
Frequently Asked Questions
My dryer runs but the drum won't turn — is the belt the problem?
Almost certainly, yes. When the motor runs (you hear the humming/whirring) but the drum stays still, the belt has almost always snapped or is slipping badly. To confirm without opening the dryer: reach in through the door and try turning the drum by hand. If it spins freely with no resistance whatsoever, the belt is broken. If it turns but feels notchy or resistant, the belt may still be intact but the drum bearings or rollers could be the issue. In either case, opening the dryer to inspect the belt visually is the definitive check — a snapped belt will be lying in the bottom of the cabinet.
Why do I have to install the belt with grooves facing down?
The dryer's motor pulley is a smooth, un-grooved cylinder — the belt runs against it with the flat (smooth) side. The drum, on the other hand, needs the grooves to positively engage and drive without slipping under load. So the grooved side faces the drum (down when you're routing the belt around the drum from above), and the smooth side wraps around the motor pulley and idler pulley. Installing the belt backwards with grooves facing up will cause the belt to slip against the drum immediately and can burn out the new belt within a few minutes of operation.
Should I replace the idler pulley at the same time?
Yes, it's strongly recommended. The idler pulley (134793500 or 134793511 on many compatible dryers) maintains constant tension on the drum belt as the drum rotates. It wears from the same friction cycles as the belt — when the belt fails, the idler pulley bearings have typically also been stressed and are near end-of-life. Since the dryer is already open and the pulley is right there next to the belt, replacing both saves you a repeat repair when the pulley fails a few months later. Signs of a worn idler pulley: rough or noisy rotation when spun by hand, visible wear grooves, or seized bearings.
What's the difference between 134719300 and 137315300?
These are the same drive belt across production revisions. 137315300 was a Frigidaire OEM part number and 134719300 is the current cross-referenced part number that covers the same belt. Both are physically and functionally identical — if your dryer's parts diagram shows either number, this listing is the correct replacement. LB5300 and 7134719300 are additional catalog references for the same belt.
Is this an OEM or aftermarket part?
This is an aftermarket replacement part built to OEM-equivalent quality standards. It is not a genuine Frigidaire/Electrolux OEM part, but is manufactured from durable rubber with reinforced fabric/cord to match the dimensions (90"L x 5/16"W x 1/8"H), rib and groove pattern (5 ribs, 4 grooves), and drive function of the original 134719300 drum belt used in compatible Frigidaire, Electrolux, Crosley, Kenmore, White-Westinghouse, and Gibson dryers.
Shop With Confidence
A U.S.-based appliance parts retailer specializing in genuine OEM and high-quality replacement parts. We stock components for all major appliance brands and offer fast shipping from our U.S. warehouse. Our team is available to help verify compatibility before you purchase.
✓ Fast US Shipping ✓ Quality Aftermarket Parts ✓ Compatibility Support ✓ Secure Checkout
XPARTCO 316489403 Gas Oven Igniter
The XPARTCO 316489403 is an aftermarket replacement gas oven igniter compatible with a wide range of Frigidaire, Electrolux, Crosley, Gibson, Kelvinator, Tappan, White-Westinghouse, Ikea, and Kenmore gas ranges, ovens, and stoves. The oven igniter is the component that lights the gas burner — when you set the oven to bake or broil, electricity flows through the igniter, heating it until it glows bright orange. This heat both ignites the gas and draws enough current to open the gas safety valve, releasing gas to the burner. When the igniter weakens with age, it may still glow but no longer pull enough current to open the safety valve — so the oven fails to light, takes a long time to heat, or heats unevenly.
This is a flat-style, open-cage igniter. Electrical rating: 3.2–3.6 amps, 120V AC. Made of silicon carbide and ceramic for high heat resistance and long service life. Overall dimensions: 3-1/2"L x 1-3/4"W x 13/16"H with a 1.5" ceramic block; the lead and plug measure approximately 16" long. Includes the flat-style igniter assembly with bracket and leads/plug. It directly replaces 316489403, 5304508786, 7316489403, 501RB, 1513415, AH2364063, AP4433236, EA2364063, EAP2364063, PD00000756, and PS2364063. Important: the igniter element is fragile — handle it only by the bracket, never by the element itself. Installs in 30–45 minutes with basic hand tools.
Quick Answer
The XPARTCO 316489403 Gas Oven Igniter fixes Frigidaire, Electrolux, Crosley, Gibson, Kelvinator, Tappan, White-Westinghouse, Ikea, and Kenmore gas ovens that won't light, take too long to heat, heat unevenly, or where you smell gas because the igniter is too weak to open the safety valve. Flat-style open-cage igniter. 3.2–3.6A, 120V AC. Silicon carbide/ceramic. Overall 3-1/2"L x 1-3/4"W x 13/16"H, 16" lead. Replaces 5304508786, 7316489403, 501RB, 1513415, AH2364063, AP4433236, EA2364063, EAP2364063, PD00000756, PS2364063. Handle by the bracket only — the element is fragile.
Common Problems This Part Fixes
Oven won't light or heat at all — igniter too weak to open the gas safety valve
Oven takes a long time to reach temperature — igniter glowing but drawing insufficient current
Oven heats unevenly or undercooks food — weak or slow ignition
Igniter glows but the burner never ignites — classic sign of a degraded igniter
Igniter doesn't glow at all — burned out or open circuit (no power reaching the burner)
Gas smell when the safety valve opens but the burner doesn't light
Oven runs erratically or won't maintain temperature
Igniter visibly cracked, broken, or with a damaged element
Cross Reference Information
Part numbers can change over a product's lifecycle as manufacturers update designs or release new appliance models. For your convenience, we've included any known superseded, alternate, or cross-reference part numbers that match this item.
Replaces Part Numbers
This gas oven igniter directly replaces the following OEM and cross-reference part numbers:
316489403, 5304508786, 7316489403, Model 501RB, AH2364063, EA2364063, EAP2364063, AFR16172, AP4433236, PD00000756, PS2364063.
If your part number is not listed above, contact our support team before ordering and we will verify compatibility. Note: on some models this is the broil (upper) igniter, and the bake (lower) igniter is a different part — see the FAQ below on bake vs broil igniters.
Compatibility
This gas oven igniter is compatible with select gas ranges, ovens, and stoves from the following brands:
Frigidaire gas ranges and ovens — including many Frigidaire Gallery models (LGGF, FGGF, FFGF series and related)
Electrolux gas ranges and ovens (select models)
Crosley gas ranges and ovens (select models)
Gibson gas ranges and ovens (select models)
Kelvinator gas ranges and ovens (select models)
Tappan gas ranges and ovens (select models)
White-Westinghouse gas ranges and ovens (select models)
Ikea gas ranges and ovens (select Frigidaire-built models)
Kenmore / Sears gas ranges and ovens (select Frigidaire-built models, including 790-series)
Note: This igniter fits specific models — always verify against your appliance's model number before ordering. On ranges with two igniters (a bake igniter and a broil igniter), confirm which one you need (see the bake-vs-broil FAQ below). Contact our support team with your model number if you're unsure.
Key Features
Gas oven igniter — heats up to ignite the burner and draws current to open the gas safety valve
Flat-style, open-cage design
Resolves "won't light," "slow to heat," "uneven heating," "glows but won't ignite," and "gas smell" symptoms caused by a weak or failed igniter
Electrical rating: 3.2–3.6 amps, 120V AC
Silicon carbide and ceramic construction — high heat resistance and long service life
Overall dimensions: 3-1/2"L x 1-3/4"W x 13/16"H with a 1.5" ceramic block; lead and plug approximately 16" long
Includes the flat-style igniter assembly with bracket and leads/plug (some kits include ceramic wire nuts)
Replaces 5304508786, 7316489403, 501RB, 1513415, AH2364063, AP4433236, EA2364063, EAP2364063, PD00000756, and PS2364063
Compatible with Frigidaire, Electrolux, Crosley, Gibson, Kelvinator, Tappan, White-Westinghouse, Ikea, and Kenmore gas ranges and ovens
Aftermarket replacement built to OEM-equivalent quality standards
DIY repair — installs in 30–45 minutes with basic hand tools
Product Specifications
Part Number
316489403
Part Type
Gas Oven Igniter (Flat Style, Open Cage)
Condition
Aftermarket Replacement
Application
Gas Ranges, Ovens, and Stoves (Frigidaire platform)
Amperage
3.2–3.6 Amps
Voltage
120V AC
Igniter Style
Flat, open cage
Overall Dimensions
3-1/2"L x 1-3/4"W x 13/16"H
Ceramic Block
1.5" L
Lead Length
Approximately 16"
Material
Silicon carbide / ceramic / metal
Color
Almond / White / Gray
Includes
Igniter assembly with bracket and leads/plug
Compatible Brands
Frigidaire, Electrolux, Crosley, Gibson, Kelvinator, Tappan, White-Westinghouse, Ikea, Kenmore
Installation Notes
⚠️ Gas Appliance Safety Warning This part is installed in a gas oven. Shut off the gas supply to the range at the shutoff valve and disconnect electrical power at the breaker before beginning any repair. After installation, if you smell gas at any point, leave the area immediately and contact your gas utility provider. If you're not comfortable working around gas components, have this repair done by a qualified appliance technician. Improper gas appliance repairs can cause fire, explosion, or carbon monoxide hazards.
⚠️ Handle the Igniter by the Bracket Only — The Element Is Fragile Disconnect power at the breaker and shut off the gas supply before beginning. Wear work gloves and safety glasses. The silicon carbide igniter element is extremely fragile and cracks easily — handle the new igniter only by its metal bracket, never by touching the element itself. Skin oils and any impact can shorten its life or break it. Locate the igniter: the bake igniter is beneath the oven floor panel (remove the oven racks, then the floor panel, and on some models the bottom drawer for access), while the broil igniter is mounted near the top of the oven cavity. Photograph the wiring connection before disconnecting. Disconnect the old igniter's wire leads at the connector (they're often joined with ceramic wire nuts). Remove the screws securing the old igniter bracket and lift it out. Install the new 316489403 by securing its bracket in the same position and orientation, then connect the wire leads (use the included or existing ceramic wire nuts — regular wire nuts can't handle the heat). Route the leads away from the burner flame. Restore gas and power. Test by setting the oven to bake (or broil, if that's the igniter you replaced) — the igniter should glow bright orange within a minute or so, and the burner should light within about 60–90 seconds. Tools needed: Nut driver, Phillips screwdriver, work gloves, safety glasses.
Frequently Asked Questions
My igniter glows but the oven won't light — do I still need to replace it?
Yes — this is actually the most common way an oven igniter fails, and it's counterintuitive. The igniter has two jobs: to get hot enough to ignite the gas, AND to draw enough electrical current to open the gas safety valve. As an igniter ages, it can still glow (so it looks like it's working) but weaken to the point where it no longer pulls enough current to open the safety valve — so no gas is released and the burner never lights. If your igniter glows orange but the burner doesn't light within about 90 seconds, the igniter is weak and needs replacement. A good rule of thumb: if it takes more than 90 seconds from glow to flame, the igniter is on its way out.
Is the 316489403 the bake igniter or the broil igniter?
This is an important distinction, and there's genuine confusion in the industry about it. On many Frigidaire gas ranges, the 316489403 is used as the broil (upper) igniter with an approximately 14–16" lead, while the bake (lower) igniter is a different part — 5304506545 (which superseded 316489404) — often with a shorter lead. However, some sources and parts diagrams list them differently or even reversed, and on some models the 316489403 serves the bake position. The safest approach: look up YOUR specific model number to confirm which igniter you need, and compare your old igniter's lead length to the replacement. If your old igniter's leads reach a connector far from the igniter (14–16"), the 316489403 with its 16" lead is likely correct. Contact our support team with your model number and we'll confirm.
Why do I smell gas when I try to use the broiler?
If you smell gas when the broiler's safety valve opens but the burner doesn't light, it usually means the igniter isn't getting hot enough (or drawing enough current) to ignite the gas that's being released — so raw gas escapes before shutting off. This points to a weak igniter. To confirm which part is at fault: with the gas off, do a voltage test at the oven safety valve on the broil side — you should read between 3.0 and 3.3 VAC. If the voltage is correct but the burner won't light, the igniter is the problem. If there's no proper voltage, or the burner tube has spider webs or debris blocking it, address those first. Also inspect the gas supply tube from the safety valve to the burner for damage or loose connections.
Why do I need to handle the igniter so carefully?
The igniter's heating element is made of silicon carbide, a material that's excellent at withstanding heat but is brittle and cracks easily from impact or flexing. Even touching the element with bare fingers can leave oils that create hot spots and shorten its life, and a small bump can crack it invisibly, causing premature failure. Always handle the new igniter by its metal bracket, never by the element or the ceramic block. When installing, be careful not to bump the element against the oven walls or burner. This care is the single biggest factor in whether your new igniter lasts years or fails early.
Is this an OEM or aftermarket part?
This is an aftermarket replacement part built to OEM-equivalent quality standards. It is not a genuine Frigidaire/Electrolux OEM part, but is manufactured from silicon carbide and ceramic to match the electrical specifications (3.2–3.6A, 120V AC), flat open-cage style, dimensions (3-1/2"L x 1-3/4"W x 13/16"H, 16" lead), and ignition function of the original 316489403 gas oven igniter used in compatible Frigidaire, Electrolux, Crosley, Gibson, Kelvinator, Tappan, White-Westinghouse, Ikea, and Kenmore gas ranges and ovens.
Shop With Confidence
A U.S.-based appliance parts retailer specializing in genuine OEM and high-quality replacement parts. We stock components for all major appliance brands and offer fast shipping from our U.S. warehouse. Our team is available to help verify compatibility before you purchase.
✓ Fast US Shipping ✓ Quality Aftermarket Parts ✓ Compatibility Support ✓ Secure Checkout
DG94-01496A Genuine OEM Samsung Gas Cooktop Valve Assembly
The DG94-01496A is a Genuine OEM Samsung replacement gas cooktop auxiliary valve assembly compatible with select Samsung gas cooktops in the NA30K, NA30N, NA36K, and related series. The valve assembly is the mechanical component that connects the burner knob to the gas supply manifold — when you turn the knob, the valve precisely regulates the flow of gas to the burner, controlling the flame size from low simmer to high heat. Without a properly functioning valve, the burner can fail to light, stay lit, shut off when turned, or stick in position making the knob unable to turn.
This is the auxiliary (single-flow) burner valve, used in burner positions that have a single flame ring. Samsung cooktops typically use multiple valve assemblies — one per burner position — and the center burner (dual-flame) uses a different dual valve assembly. As a Genuine OEM part manufactured by Samsung to factory specifications, the DG94-01496A directly replaces AP6049694, EAP12072702, PD00052726, and PS12072702. Important: this is a gas appliance part — installation requires shutting off the gas supply, working safely with gas connections, and leak-testing after installation. Installs in 45–60 minutes with basic hand tools by experienced DIYers, or call a qualified appliance technician.
Quick Answer
The DG94-01496A Genuine OEM Samsung Gas Cooktop Valve Assembly fixes Samsung gas cooktops with a burner that won't light, won't shut off, where the knob is stuck or won't turn, or where flame size won't adjust properly. Auxiliary (single-flow) burner valve. Genuine OEM. Replaces AP6049694, EAP12072702, PD00052726, PS12072702. Compatible with Samsung NA30K6550TG/AA, NA30K6550TS/AA, NA30N6555TG/AA, NA36K6550TG/AA, NA36K7750TG/AA and related gas cooktops. Center (dual-flame) burner uses a different valve — confirm which burner position before ordering.
Common Problems This Part Fixes
Burner won't light — gas not flowing through the valve to the burner
Burner won't shut off — valve stuck open, gas continuing to flow even with the knob turned to "OFF"
Knob stuck and won't turn — valve internally seized (often caused by water entering during cleaning)
Burner flame size won't adjust — valve unable to modulate gas flow
Flame too high even on low setting — valve not restricting flow properly
Flame too low or weak on high setting — valve partially blocked
Gas smell at the cooktop or burner area — valve seal failure
Difficulty turning the knob — internal valve corrosion or wear
Replaces Part Numbers
This gas cooktop valve assembly directly replaces the following OEM and cross-reference part numbers:
AP6049694, ASM116044, EAP12072702, PD00052726, PS12072702.
Contact our support team with your model number if you need confirmation before ordering.
Compatibility
This valve assembly is compatible with select Samsung gas cooktops, including:
Samsung gas cooktops — NA30K6550TG/AA-00, NA30K6550TS/AA-00 series
Samsung gas cooktops — NA30N6555TG/AA-00 series
Samsung gas cooktops — NA36K6550TG/AA-00, NA36K7750TG/AA-00 series
Other Samsung gas cooktops in the NA-series using compatible auxiliary burner valves
Important — Confirm the Burner Position Before Ordering: Samsung gas cooktops use multiple valve assemblies — typically one per burner position. The DG94-01496A is the auxiliary (single-flow) burner valve. The center dual-flame burner uses a different valve assembly, and other burner positions may also have position-specific part numbers. Before ordering, verify in your cooktop's parts diagram that DG94-01496A is listed for the specific burner position you're replacing, or compare the old valve's part number markings to the new one. Contact our support team with your model number if you're unsure.
Key Features
Genuine OEM part manufactured by Samsung to factory specifications — guaranteed fit and performance
Auxiliary (single-flow) burner valve assembly — controls gas flow to one burner position on compatible Samsung gas cooktops
Restores smooth knob action and precise flame size adjustment from simmer to high heat
Replaces a stuck, leaking, or failed original valve
Replaces AP6049694, EAP12072702, PD00052726, and PS12072702
Compatible with Samsung NA30K, NA30N, NA36K series gas cooktops
For experienced DIYers or qualified appliance technicians — gas appliance work requires safety precautions and leak testing
Installation typically takes 45–60 minutes with basic hand tools
Product Specifications
Part Number
DG94-01496A
Part Type
Gas Cooktop Valve Assembly (Auxiliary / Single-Flow Burner)
Condition
Genuine OEM
Application
Gas Cooktops (Samsung NA-series)
Valve Type
Auxiliary (single-flow) burner valve
Note
Center dual-flame burner uses a different valve assembly
Compatible Brands
Samsung
Installation Notes
⚠️ Gas Appliance Safety Warning This part is installed in a gas cooktop. Always shut off the gas supply at the shutoff valve before beginning any repair, and disconnect electrical power to the cooktop. After installation is complete, ALL gas connections must be checked for leaks using a soap-and-water solution or an approved gas leak detector before restoring full gas service. If you smell gas at any point during or after installation, leave the area immediately and contact your gas utility provider. If you are not comfortable working with gas connections, have this repair done by a qualified appliance technician. Improper installation of gas components can cause fire, explosion, or carbon monoxide hazards.
⚠️ Wear Work Gloves — Significant Disassembly Required Shut off the gas supply at the shutoff valve and disconnect electrical power. Wear work gloves to protect your hands. Remove the burner caps, burner heads, and grates from the cooktop surface. The valve assembly is accessed by removing the cooktop top surface — this typically involves removing 16–20 screws around the perimeter of the cooktop to lift the top free. Photograph everything as you go, including the gas line routing and electrical wire connections. Once the top is off, locate the specific valve being replaced (confirm against the parts diagram and the burner position). Disconnect the gas line from the valve (use two wrenches — one to hold the manifold, one to turn the nut — to avoid stressing the manifold). Disconnect any electrical connections to the valve (spark ignitor wires) and remove the valve's mounting hardware. Install the new DG94-01496A valve in the same position with the same orientation, reconnect the gas line and any electrical connections, and secure the mounting hardware. Reinstall the cooktop top, burner heads, caps, and grates. Before restoring full gas service, turn on the gas at the shutoff valve and use a soap-and-water solution or gas leak detector on all gas connections to confirm there are no leaks. Restore electrical power and test the burner by lighting it and confirming smooth flame control across the full range of the knob. Tools needed: Phillips screwdriver, set of wrenches (two needed at each gas connection), gas leak detector or soap solution, work gloves.
Frequently Asked Questions
Why is my burner knob stuck and won't turn?
A stuck burner knob is one of the most common symptoms of a failed valve assembly on Samsung gas cooktops — and one frequent root cause is water entering the valve during knob cleaning. When the knobs are washed (especially with soap and water) and water enters the valve through the knob shaft, it can rust the internal valve mechanism, causing the knob to seize. Once the valve is internally corroded, no amount of force on the knob will free it without risking damage — replacing the valve is the correct repair. To prevent recurrence on the remaining valves: clean knobs by wiping them in place rather than removing and submerging them, and dry the knob shaft area carefully before reinstalling.
Does this fit all five burners on my Samsung cooktop?
Not necessarily. Samsung gas cooktops typically use multiple valve assemblies — the surrounding burner positions (front-left, front-right, rear-left, rear-right) use auxiliary single-flow valves like the DG94-01496A, while the center burner is typically a dual-flame burner that uses a different dual-valve assembly. If you're replacing valves on more than one burner, confirm which position each valve is needed for and verify the part numbers in your specific model's parts diagram. The valves often look similar but are not interchangeable across positions.
Can I do this repair myself, or should I hire a technician?
Replacing a gas valve is a manageable DIY repair for someone comfortable with mechanical work, but it does involve disconnecting and reconnecting gas connections — which means leak testing is mandatory and any error can have serious safety consequences. If you have experience with plumbing or gas appliance work and you're confident in your ability to make tight, leak-free connections and properly test them, this is a feasible DIY. If you've never worked with gas connections before, hiring a qualified appliance technician (typical cost $200–$400) is the safer option. The PartsDr customer story mentioned that a quote from a service technician was $750 for this repair, so the DIY savings are substantial — but only if done safely.
My cooktop has more than one stuck or failed valve — should I replace them all at once?
If multiple valves have failed at the same time, it's worth considering. Once the cooktop top is off, all valves are accessible — replacing additional valves only adds 5–10 minutes per valve. Since the valves are exposed to the same age, use, and potential water intrusion, multiple valve failures often indicate the others are heading the same way. However, valve part numbers may differ by burner position (the center dual-flame valve is different from the auxiliary single-flow valves) — make sure you order the correct valve for each specific position.
Is this a Genuine OEM or aftermarket part?
This is a Genuine OEM part manufactured by Samsung to factory specifications. It is the exact same gas cooktop valve assembly installed in compatible Samsung gas cooktops from the factory — guaranteed fit, materials, and performance.
Shop With Confidence
A U.S.-based appliance parts retailer specializing in genuine OEM and high-quality replacement parts. We stock components for all major appliance brands and offer fast shipping from our U.S. warehouse. Our team is available to help verify compatibility before you purchase.
✓ Genuine OEM Parts ✓ Fast US Shipping ✓ Compatibility Support ✓ Secure Checkout
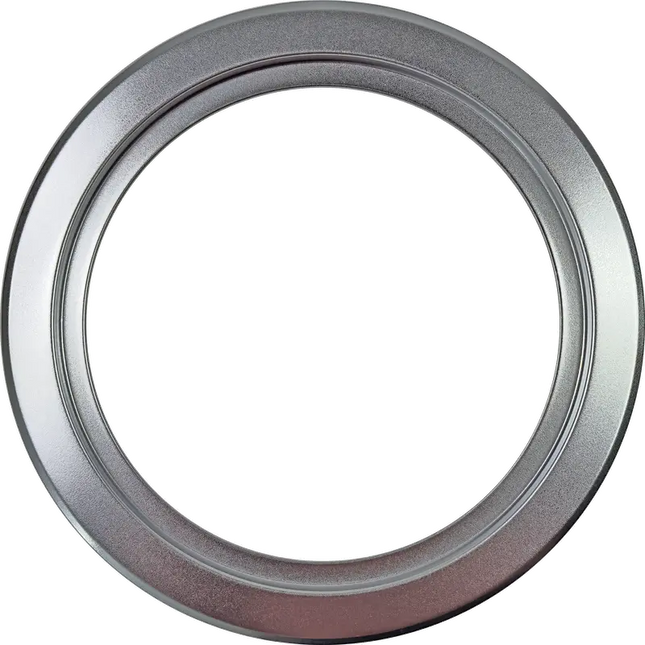
WB31X5010CM 6" Burner Drip Pan
Chrome drip bowl (also called a drip pan) for 6 inch burner on an electric range. The drip pan sits underneath the heating element to collect drips or spills around the burner.
6" Chrome pan/ring.
Fits GE, Hotpoint range.
Replaces Part Numbers: WB31X5010, 4, AH244466, DP101, EA244466, PM32X0101, PM32X101, SGP400, WB31X5010A, WB31X5010B, WB31X5010R, AP2028082, PS244466.
This is an aftermarket part that can be used as a replacement for the OEM part.
California Residents only
WARNING: Cancer and/or Reproductive Harm - www.p65warnings.ca.gov
WP74010750 Genuine OEM Whirlpool Oven Bake Element
The WP74010750 is a Genuine OEM Whirlpool replacement oven bake element compatible with select Whirlpool, Jenn-Air, Maytag, KitchenAid, Amana, Kenmore, Magic Chef, Admiral, Norge, and Roper electric ranges and ovens — particularly CE-series, JDS-series, and MES-series slide-in and freestanding ranges. The bake element is the lower heating element located at the bottom of the oven cavity. It provides the primary heat source for baking, roasting, and preheating. When the element coil burns through, the oven will not heat, will bake unevenly, or will trip the circuit breaker when the bake cycle is selected.
This Genuine OEM part is manufactured by Whirlpool to factory specifications and is rated at 2585W with push-on terminal ends (two 1/4" high-temp connectors). It measures approximately 23-5/8" wide x 15-3/8" long with 3-3/8" inserts. It directly replaces 74010750, 74003039, 7406P425-60, 1184162, WP74010750VP, ERB0750, AP6011209, PS11744404, and several additional cross-reference numbers. Installs in 15–20 minutes with basic hand tools.
Quick Answer
The WP74010750 Genuine OEM Whirlpool Oven Bake Element fixes electric ovens that won't heat, bake unevenly, or trip the circuit breaker during bake. 2585W, push-on terminal ends (two 1/4" high-temp connectors), 23-5/8"W x 15-3/8"L, 3-3/8" inserts. Genuine OEM. Compatible with Whirlpool CE, Jenn-Air JDS, Maytag MES series and related brands. Replaces 74010750, 74003039, 7406P425-60, 1184162, ERB0750, AP6011209, PS11744404.
Common Problems This Part Fixes
Oven produces no heat — bake element coil has burned through
Oven takes much longer than normal to preheat
Food baking unevenly — bottom of food undercooked while top is done
Bake element not glowing red during the bake cycle
Visible burn marks, blistering, holes, or breaks in the element coil
Oven trips the circuit breaker when the bake cycle is selected — shorted element
Burning smell during a bake cycle — arcing at a weak point in the element
Replaces Part Numbers
This bake element directly replaces the following OEM and cross-reference part numbers:
WP74010750, 74010750, 1184162, 74003039, 7406P425-60, AP6011209, AWP47950, EAP11744404, PD00002565, PS11744404, WP74010750VP.
Contact our support team with your model number if you need confirmation before ordering.
Compatibility
This bake element is compatible with select electric ranges and ovens from the following brands and series:
Whirlpool electric ranges — CE35200, CE38800 and related CE-series models
Jenn-Air electric ranges — JDS8850, JDS9860 and related JDS-series slide-in models
Maytag electric ranges — MES5770 and related MES-series models
KitchenAid electric ranges (select models)
Amana electric ranges (select models)
Kenmore / Sears electric ranges (select Whirlpool-built models)
Magic Chef electric ranges (select models)
Admiral electric ranges
Norge electric ranges
Roper electric ranges
Note: Always verify your exact model number before ordering — bake elements are model-specific due to differences in dimensions and terminal configuration. The WP74010750 uses 1/4" push-on terminals and specific mounting dimensions that differ from other Whirlpool-family bake elements. If you are not sure this element is the right fit, contact our support team with your model number.
Key Features
Genuine OEM part manufactured by Whirlpool to factory specifications — guaranteed fit and performance
Primary heat source for baking, roasting, and preheating in compatible electric ovens
Rated 2585W — correct wattage for compatible CE, JDS, and MES series models
Push-on terminal ends — two 1/4" high-temperature connectors for direct wire attachment
Dimensions: approximately 23-5/8" wide x 15-3/8" long, with 3-3/8" inserts
Replaces 74010750, 74003039, 7406P425-60, 1184162, ERB0750, and AP6011209
Compatible with Whirlpool, Jenn-Air, Maytag, KitchenAid, Amana, Kenmore, Magic Chef, Admiral, Norge, and Roper electric ranges
DIY repair — installs in 15–20 minutes with basic hand tools
Product Specifications
Part Number
WP74010750
Part Type
Oven Bake Element (Lower Heating Element)
Condition
Genuine OEM
Application
Electric Ranges and Ovens
Wattage
2585W
Terminal Type
Push-on — two 1/4" high-temperature connectors
Width
Approximately 23-5/8 inches
Length
Approximately 15-3/8 inches
Inserts
3-3/8 inches
Compatible Brands
Whirlpool, Jenn-Air, Maytag, KitchenAid, Amana, Kenmore, Magic Chef, Admiral, Norge, Roper
Installation Notes
⚠️ Unplug Range or Turn Off Breaker Before Starting Disconnect power before beginning and allow the oven to cool completely. Open the oven door and remove all racks. The bake element is located at the bottom of the oven cavity. Remove the screws securing the element bracket to the rear oven wall — typically one or two Phillips screws at the back. Carefully pull the element forward toward the door to expose the two 1/4" push-on wire connectors behind the oven rear wall. Note the position of each wire before disconnecting — take a photo. Pull each wire connector off the element terminals by gripping the connector (not the wire) and pulling straight back. Connect the two wires to the new WP74010750 element's terminals, slide the element back into position, and secure the mounting screws. Restore power and run a bake cycle to confirm the element heats and glows red. Tools needed: Phillips screwdriver.
Frequently Asked Questions
How do I know if my bake element has failed?
The clearest sign is an oven that does not heat, takes much longer than usual to preheat, or bakes food unevenly with the bottom undercooked. When the bake element is working, it should glow bright red during a bake cycle. If it does not glow at all, the element has failed. You can also visually inspect the element for burn marks, blistering, cracks, or a visible break in the coil. A multimeter continuity test will confirm failure — a working element shows continuity (resistance of approximately 10–100 ohms), while a failed element reads open circuit. If the element trips the circuit breaker when selected, the element coil has shorted to the metal housing — replace it immediately.
What is the difference between WP74010750 and WP74003019?
Both are Genuine OEM Whirlpool oven bake elements but for different model families and with different wattage ratings. The WP74010750 is rated 2585W and is used on CE, JDS, and MES-series electric ranges. The WP74003019 is rated 2800W and is used on a different set of models. They are not interchangeable — always verify your model number to confirm which element is correct for your oven before ordering.
Is it normal for a bake element to arc or spark before it fully fails?
Yes — it is not unusual for a bake element to arc or spark at a weak spot before the coil fully burns through. If you see sparking, arcing, or a bright flash from the element area, immediately turn off the oven and disconnect power. Do not use the oven again until the element has been replaced. An arcing element can damage the oven liner and, in rare cases, pose a fire risk. The good news is that once you replace the WP74010750 element, the oven should perform normally again.
Are the wires interchangeable on the bake element terminals?
On most electric range bake elements — including the WP74010750 — the two terminal wires are interchangeable. The bake element is a resistance heater with no polarity, so either wire can connect to either terminal and the element will heat correctly. However, it is good practice to photograph the original connection before disconnecting to ensure you reconnect in the same configuration, particularly if one wire is color-coded differently from the other.
Is this a Genuine OEM or aftermarket part?
This is a Genuine OEM part manufactured by Whirlpool to factory specifications. It is the exact same bake element installed in compatible Whirlpool, Jenn-Air, Maytag, and related brand electric ranges from the factory — guaranteed fit, materials, and performance.
Shop With Confidence
A U.S.-based appliance parts retailer specializing in genuine OEM and high-quality replacement parts. We stock components for all major appliance brands and offer fast shipping from our U.S. warehouse. Our team is available to help verify compatibility before you purchase.
✓ Genuine OEM Parts ✓ Fast US Shipping ✓ Compatibility Support ✓ Secure Checkout
WB10X26769 Oven Genuine Door Hinge
Replaces Part Number: WB10X26769, AP6331433, PS12342111.
Description: This Door Hinge is a Genuine part for specific GE oven models. This door hinge consists of three parts, the spring, the hinge receiver and the hinge arm, which work together to support the weight of the door and ensure proper alignment. It allows the door to swing open and close securely, providing easy access to the appliance's interior.
W10918546CM Gas Oven Igniter
Replaces Part Numbers: W10918546, W10140611, 98005652, W10918546VP, WPW10140611, AP6037202, PS11770066.
3.4 - 3.6 Amp,
1.5" block, 3.75" cage,
10" leads w/male pins.
Bake igniter for specific single burner Whirlpool range models.
Description: This Oven Igniter is a replacement part for select Maytag, Kenmore, Whirlpool gas oven models, responsible for igniting the gas burner that heats the oven. It works by drawing electrical current through the igniter filament, heating it to a high temperature until it glows and ignites the gas to start the cooking process.
This is an aftermarket part that can be used as a replacement for the OEM part.
WB31X5013CM 6" Burner Trim Ring
6" Chrome ring.
Fits GE, Hotpoint range.
Replaces Part Numbers: WB31X5013, 340525, 5, WB31X0056, WB31X5008, WB31X5013A, WB31X5013B, WB31X5013DS, WB31X5013R, WB31X5015, WB31X56, AH244475, EA244475, AP2028085, PS244475.
This is an aftermarket part that can be used as a replacement for the OEM part.
California Residents only
WARNING: Cancer and/or Reproductive Harm - www.p65warnings.ca.gov
316233903 Oven Genuine Temperature Sensor
Replaces Part Numbers: 316233903, 316217008, 316233902, 316233900, AP5998652, PS11731754.
Description: This Oven Temperature Sensor is a Genuine part for select Frigidaire, Kenmore oven models. It monitors and regulates the oven's temperature by sending accurate temperature readings to the control board. This ensures that the oven maintains the desired cooking temperature throughout the baking or roasting process.
California Residents only
WARNING: Cancer and/or Reproductive Harm - www.p65warnings.ca.gov
XPARTCO 4449751 Oven High Limit Thermostat Replaces WP4449751
The XPARTCO 4449751 is an aftermarket replacement oven high limit thermostat compatible with a wide range of Whirlpool, KitchenAid, Maytag, Jenn-Air, Amana, Magic Chef, Admiral, Norge, Roper, and Kenmore ovens, wall ovens, microwave-oven combinations, and ranges. The high limit thermostat is a critical safety device mounted near the oven cavity — it continuously monitors the oven's temperature and cuts off electrical power to the heating element if the oven exceeds its safe operating temperature. When the oven temperature drops back to normal, the thermostat closes and allows normal operation to resume. This backup safety layer protects against fires, damage to the oven, and unsafe cooking conditions when the main temperature control fails.
Rated to trip at approximately 335°F (170°C). Common causes for the high limit thermostat to trip include a faulty control board, cooling fan failure, blocked ventilation, poor door sealing, disrupted air circulation, or an abnormal self-cleaning cycle. It directly replaces WP4449751, 1550872, AP6009390, AH2375382, EA2375382, PS2375382, PS11742549, EAP11742549, and AH11742549. Installs in 30–45 minutes with basic hand tools by experienced DIYers. This is a safety component in a 240V oven circuit — proceed only if you're comfortable with high-voltage electrical work, or call a qualified appliance technician.
Quick Answer
The XPARTCO 4449751 Oven High Limit Thermostat fixes Whirlpool, KitchenAid, Maytag, Jenn-Air, Amana, and Kenmore ovens with symptoms including oven not heating, oven overheating, uneven heating, oven failing to start, and self-clean door won't unlock after cycle. 335°F (170°C) trip temperature — cuts off power to heating element on overheat, then resets when temperature returns to normal. Replaces WP4449751, 1550872, AP6009390, AH2375382, EA2375382, PS2375382, PS11742549, EAP11742549, AH11742549. Compatible with WOS/WOD wall ovens, KOSE/KODE/KOCE series, JJW/JMW/JDRP/JDR series, and many more.
Common Problems This Part Fixes
Oven not heating at all — high limit thermostat tripped open
Oven overheating — thermostat failing to trip when needed (rare failure mode)
Inconsistent oven temperatures leading to undercooked or overcooked food
Oven fails to start when powered on
Oven door won't unlock after a self-cleaning cycle completes
Uneven heating — hot spots or cold spots inside the oven cavity
Oven cuts off heat mid-cycle without reaching set temperature
F-code or thermostat-related error displayed on the control panel
Multimeter continuity test on the thermostat shows an open circuit at room temperature
Visible damage or discoloration on the thermostat housing from a prior overheat event
Cross Reference Information
Part numbers can change over a product's lifecycle as manufacturers update designs or release new appliance models. For your convenience, we've included any known superseded, alternate, or cross-reference part numbers that match this item.
Replaces Part Numbers
This oven high limit thermostat directly replaces the following OEM and cross-reference part numbers:
WP4449751, 4449751, 1550872, AP6009390, AWP47600, EAP2375382, PD00025977, PS11742549
If your part number is not listed above, contact our support team before ordering and we will verify compatibility.
Compatibility
This high limit thermostat is compatible with select ovens, wall ovens, ranges, and microwave-oven combinations from the following brands:
Whirlpool wall ovens — WOS series (WOS31ES0JS, WOS51EC0AS, WOS51EC0HS, WOS51EC7HW02, WOS51EC7HW21, WOS72EC0HS/HV, WOS72EC7HS/HV, WOS92EC0/EC7 all revisions, WOS97ES0ES series)
Whirlpool double wall ovens — WOD series (WOD51EC0AW03, WOD51EC7HS, WOD93EC7AS)
Whirlpool combination wall ovens — WOC54EC0/EC7 series
KitchenAid wall ovens — KOSE, KODE, and KOCE series (KOSE500ESS, KODE500ESS, KOCE500ESS, KOCE500EBL00/EBL01/EBL02/EBL04/EBL05)
Jenn-Air wall ovens — JJW, JMW, JDRP, and JDR series (JJW2427DB/DS 00/01, JJW2430DS, JJW3430DS, JMW2430DS, JDRP430HL/HM 00/01, JDRP430WP00, JDRP436HL/HM/WP series, JDRP536HL/HM/WP series)
Maytag wall ovens and ranges (select models)
Amana wall ovens (select models — AWO6313SFB00/02, AWO6313SFS00/02, AWO6313SFW00/02)
KitchenAid ranges — KDRS407 series (KDRS407VBK01, KDRS407VBU01, KDRS407VSS00)
Whirlpool ranges — IBD350DS00, IBS300DS00, IBS350DS00 series
Magic Chef, Admiral, Norge, Roper wall ovens (select Whirlpool-built models)
Kenmore / Sears wall ovens (select Whirlpool-built models)
Suitable for single or double electric wall ovens and microwave-oven combination units
Always verify your appliance model number before ordering. Contact our support team if you're unsure.
Key Features
Aftermarket replacement built to OEM-equivalent quality standards
High limit thermostat (safety switch) — cuts off power to the oven's heating element when temperature exceeds 335°F (170°C) to prevent overheating damage or fire
Auto-reset design — closes and restores normal operation when the oven temperature returns to safe range
Precision-calibrated to Whirlpool factory specifications for accurate trip temperature and reliable safety response
Replaces WP4449751, 1550872, AP6009390, AH2375382, EA2375382, PS2375382, PS11742549, EAP11742549, and AH11742549
Compatible with Whirlpool WOS/WOD/WOC series, KitchenAid KOSE/KODE/KOCE series, Jenn-Air JJW/JMW/JDRP/JDR series, plus Maytag, Amana, Magic Chef, Admiral, Norge, Roper, and Kenmore ovens
Fits single wall ovens, double wall ovens, ranges, and microwave-oven combination units
Resolves "oven won't heat," "overheating," "uneven heating," "self-clean door stuck locked," and "won't start" symptoms when caused by a failed high limit thermostat
For experienced DIYers or qualified appliance technicians — this is a safety component in a 240V oven circuit
Installation typically takes 30–45 minutes with basic hand tools
Product Specifications
Part Number
4449751
OEM Part Number
WP4449751
Part Type
Oven High Limit Thermostat (Safety Switch)
Condition
Aftermarket Replacement
Application
Wall Ovens, Ranges, Microwave-Oven Combinations (Whirlpool platform)
Trip Temperature
335°F (170°C)
Type
Auto-Reset (closes when temperature returns to safe range)
Compatible Brands
Whirlpool, KitchenAid, Maytag, Jenn-Air, Amana, Magic Chef, Admiral, Norge, Roper, Kenmore
Installation Notes
⚠️ Turn Off Power at Breaker Before Starting — This Is a 240V Oven Circuit — Wear Work Gloves Disconnect power at the household breaker before beginning — this is a 240V circuit and there is a serious risk of electrical shock if power is not fully disconnected. Verify power is off with a voltage tester before touching any wiring. Wear work gloves and safety glasses. Allow the oven to cool completely before beginning (several hours after any recent cooking). The high limit thermostat is typically mounted on the rear or side of the oven cavity, accessed by removing the back panel of the appliance (for freestanding ranges) or the front trim/service panel (for wall ovens). The exact location varies by model — consult your appliance's service diagram before starting. Photograph all wire connections and mounting details before disconnecting anything. Disconnect the wire terminals from the old thermostat (typically two spade-terminal wires). Remove the mounting screws or clips holding the thermostat to the oven cavity, and lift it out. Install the new 4449751 in the exact same position and orientation — the thermostat must be in good thermal contact with the oven cavity to function correctly. Secure the mounting hardware and reconnect the wires to their correct terminals. Reinstall the access panels. Restore power at the breaker and test the oven — start with a low-temperature bake cycle to confirm normal heating operation before running a high-temperature or self-clean cycle. Tools needed: Phillips screwdriver, 1/4" nut driver, voltage tester (essential), work gloves, safety glasses.
Frequently Asked Questions
Why did my high limit thermostat trip in the first place?
A high limit thermostat trips because the oven exceeded its safe operating temperature — meaning something upstream in the temperature control chain failed to shut off the heating element when it should have. Common causes are: a failed oven control board (relay stuck closed), a failed cooling fan (allowing the oven cavity or electronics to overheat), blocked or restricted ventilation, poor door sealing (letting the cavity overheat), disrupted air circulation, or an abnormal self-cleaning cycle. Before installing the new thermostat, investigate and address the underlying cause — otherwise the new thermostat will trip again in short order. Also inspect the ventilation, oven door gasket, and cooling fan while you have the appliance open.
What's the difference between a high limit thermostat and the operating thermostat?
These are two different components serving two different roles. The operating thermostat (or the oven control board with its temperature sensor) is the primary component that maintains the oven at your set temperature by cycling the heating element on and off during normal operation — it opens and closes at your selected temperature (e.g., 350°F). The high limit thermostat (WP4449751) is a backup safety device that only trips when the oven temperature far exceeds normal operation (335°F over the cavity's safe threshold), typically because the operating thermostat or control has failed. If the high limit thermostat trips, both need to be checked — the operating thermostat may also need replacement.
Does the high limit thermostat reset itself, or does it need to be replaced after tripping?
The WP4449751 is an auto-reset thermostat — it closes automatically once the oven cools back to a safe temperature, allowing normal operation to resume. If your oven is heating normally again after cooling, the thermostat is likely still functional (the underlying overheating cause needs investigation). However, if the thermostat has failed permanently open — often the result of repeated overheat events or age — it will need replacement. Test with a multimeter set to continuity: a working thermostat shows continuity at room temperature. If it reads open (infinite resistance) when cold, it has failed and needs replacement.
Why does my self-cleaning cycle leave the oven door locked and the oven won't heat?
This is a classic symptom of a high limit thermostat that tripped during the self-clean cycle. Self-cleaning cycles run at extreme temperatures (800–1000°F) and stress every component in the oven — if the ventilation, door gasket, or cooling fan can't keep up, the high limit thermostat will trip open. Once tripped, the oven can't heat OR unlock the self-clean door lock mechanism, leaving the door stuck closed. Once the thermostat cools and closes (or is replaced), the door lock releases and normal operation resumes. If self-clean cycles routinely trip the thermostat, investigate whether the ventilation, cooling fan, or door gasket are causing the problem.
Can I do this repair myself, or should I hire a technician?
Replacing an oven high limit thermostat is a manageable DIY repair for someone comfortable with mechanical work and electrical connections, but this is a 240V circuit and the thermostat is a safety component — any error can create a serious safety risk. If you have experience with appliance repair, follow the safety precautions carefully (breaker off, voltage tester, correct thermostat orientation), and can confirm the wiring connections are secure, this is a feasible DIY. If you've never worked with 240V appliance circuits before, hiring a qualified appliance technician is the safer option. Also identify and address whatever caused the original overheat event — otherwise the new thermostat will trip again.
Is this a Genuine OEM or aftermarket part?
This is an aftermarket replacement part built to OEM-equivalent quality standards. It is not a genuine Whirlpool OEM part, but is manufactured to match the trip temperature (335°F / 170°C), auto-reset function, terminal configuration, and fit of the original WP4449751 high limit thermostat used in compatible Whirlpool, KitchenAid, Maytag, Jenn-Air, Amana, and Kenmore ovens.
Shop With Confidence
A U.S.-based appliance parts retailer specializing in genuine OEM and high-quality replacement parts. We stock components for all major appliance brands and offer fast shipping from our U.S. warehouse. Our team is available to help verify compatibility before you purchase.
✓ Quality Aftermarket Parts ✓ Fast US Shipping ✓ Compatibility Support ✓ Secure Checkout
XPARTCO Y312959 Dryer Drum Belt Replaces WPY312959
The XPARTCO Y312959 is an aftermarket replacement dryer drum drive belt compatible with a wide range of Maytag, Jenn-Air, Whirlpool, Amana, Magic Chef, Admiral, Norge, Roper, and Kenmore dryers — including the long-running vintage Maytag DE and DG halo-of-heat series. The drum belt is a critical component that connects the drive motor to the drum. It wraps all the way around the drum's circumference, passes around a spring-loaded idler (tension) pulley, and connects to the drive motor pulley. When the motor runs, it drives the belt, which rotates the drum to tumble clothes for even drying. Over time, drive belts fail from normal wear, cracking or fraying from age and repeated flexing, exposure to heat and lint buildup, stretching that causes slipping, or sudden breakage.
Constructed from durable black rubber. Dimensions: 100" long x 3/8" (5/16") wide, with 5 ribs and 4 grooves. Includes instructions. It directly replaces Y312959, WPY312959, WPY312959VP, 312959, 3-12959, 3-14774, 314774, 1000H5, 8195-959, LB234, P46-150, P46-151, 1246110, 6-3129590, AP6024192, EAP11757542, PD00028571, and PS11757542. Important: install the belt with the grooved side against the motor pulley and the smooth side against the drum. Because the belt is symmetrical, it can be installed with either end facing out. Often replaced together with the idler pulley (WP6-3037050) and drum support roller kit (12001541 / 303373K), sold separately. Installs in 30–60 minutes with basic hand tools.
Quick Answer
The XPARTCO Y312959 Dryer Drum Belt fixes Maytag, Jenn-Air, Whirlpool, Amana, and Kenmore dryers where the drum won't turn (motor runs but drum stays still), the drum spins slowly, or the dryer makes loud squealing/thumping noises. 100"L x 3/8"W. 5 ribs, 4 grooves. Black rubber. Replaces WPY312959, WPY312959VP, 312959, 3-12959, 3-14774, 314774, 1000H5, 8195-959, LB234, P46-150, P46-151, 1246110, 6-3129590, AP6024192, EAP11757542, PS11757542. Install grooved side against the motor pulley, smooth side against the drum. Often paired with idler pulley WP6-3037050 and drum roller kit 12001541.
Common Problems This Part Fixes
Dryer drum doesn't turn — motor runs but drum stays still (belt snapped)
Dryer drum rotates slowly or intermittently — belt worn or slipping
Loud squealing, squeaking, or thumping noises during operation — belt cracked, glazed, or misaligned
Clothes taking much longer than normal to dry — drum not tumbling clothes effectively
Visible cracks, fraying, or glazing on the belt surface
Belt broken completely — often heard as a loud snap during operation
Drum spins freely by hand with no resistance — a clear sign the belt has snapped
Belt worn thin or stretched after decades of use on a vintage Maytag dryer
Cross Reference Information
Part numbers can change over a product's lifecycle as manufacturers update designs or release new appliance models. For your convenience, we've included any known superseded, alternate, or cross-reference part numbers that match this item.
Replaces Part Numbers
This dryer drum belt directly replaces the following OEM and cross-reference part numbers:
Y312959, WPY312959, 1000H5, 1246110, 3-12959, 3-14774, 312959, 314774, 8195-959, P46-150, P46-151, 6 3129590, AP6024192, AWP51437, EAP11757542, PD00028571, PS11757542
If your part number is not listed above, contact our support team before ordering and we will verify compatibility.
Compatibility
This dryer drum belt is compatible with select dryers from the following brands:
Maytag electric dryers — DE106, DE107, DE110, DE180, DE18CA/CM/CS/CT, DE19CA/CD/CS/CT, DE210, DE212, DE21CA/CM/CS/CT, DE22CA/CS/CT, DE23CD, DE24CA/CM/CS/CT, DE25CS, DE26CA/CD/CS/CT, DE27CA/CS/CT, DE303, DE308, DE309, DE312, DE313, DE382, DE4000, DE408-DE9900 series and many more
Maytag gas dryers — DG106, DG107, DG110, DG18CA/CM/CS/CT, DG19CA/CD/CS/CT, DG210, DG212, DG21CA/CM/CS/CT, DG22CA/CS and related DG-series models
Maytag dryers — LDE and LDG series (LDE7304ACE, LDE8406ACE/ACM/ADE, LDE8410, LDG8424AAE, LDG9304AAM and related)
Jenn-Air dryers (select models)
Whirlpool dryers (select Whirlpool-built models)
Amana, Magic Chef, Admiral, Norge, Roper dryers (select Whirlpool/Maytag-built models)
Kenmore / Sears dryers (select Whirlpool/Maytag-built models)
Note: When you replace the drum belt, this is also the ideal time to inspect the idler (tension) pulley (WP6-3037050) and the drum support rollers (kit 12001541 / 303373K) — they wear from the same friction cycles as the belt, and if they're rough, seized, or noisy, the new belt will wear out prematurely. Before replacing the belt due to noise, check the drum support rollers and idler pulley and replace if you see signs of wear. Always verify your dryer model number before ordering.
Key Features
Dryer drum drive belt — connects the motor pulley to the drum to enable tumbling during drying cycles
Resolves "drum won't turn," "loud squealing noise," and "long dry times" symptoms when caused by belt failure
Durable black rubber construction — engineered to withstand thousands of hours of high-temperature, high-friction operation
Dimensions: 100" long x 3/8" (5/16") wide with 5 ribs and 4 grooves
Install with the grooved side against the motor pulley and the smooth side against the drum
Symmetrical design — can be installed with either end facing out
Includes instructions
Replaces WPY312959, WPY312959VP, 312959, 3-12959, 3-14774, 314774, 1000H5, 8195-959, LB234, P46-150, P46-151, 1246110, 6-3129590, AP6024192, EAP11757542, and PS11757542
Compatible with vintage Maytag DE/DG series, LDE/LDG series, plus Jenn-Air, Whirlpool, Amana, Magic Chef, Admiral, Norge, Roper, and Kenmore dryers
Often replaced together with the idler pulley (WP6-3037050) and drum support roller kit (12001541 / 303373K), sold separately
Aftermarket replacement built to OEM-equivalent quality standards
DIY repair — installs in 30–60 minutes with basic hand tools
Product Specifications
Part Number
Y312959
OEM Part Number
WPY312959
Part Type
Dryer Drum Drive Belt
Condition
Aftermarket Replacement
Application
Dryers (Maytag / Whirlpool platform)
Length
100"
Width
3/8" (5/16")
Ribs / Grooves
5 ribs / 4 grooves
Color
Black
Material
Rubber
Installation Orientation
Grooved side against motor pulley, smooth side against drum
Often Paired With
Idler Pulley (WP6-3037050), Drum Roller Kit (12001541 / 303373K)
Compatible Brands
Maytag, Jenn-Air, Whirlpool, Amana, Magic Chef, Admiral, Norge, Roper, Kenmore
Installation Notes
⚠️ Unplug Dryer Before Starting — Wear Work Gloves — Grooved Side Against Motor Pulley Disconnect power at the breaker or outlet before beginning. Wear work gloves to protect your hands from sharp sheet metal edges inside the dryer cabinet. Access the drum by removing the appropriate panels — the specific procedure varies by model, but on many vintage Maytag dryers this involves removing the front or top panel. Photograph the belt routing before disassembly if any belt fragments remain. Remove any pieces of the old broken belt from around the drum, motor pulley, and idler pulley, and vacuum out accumulated lint and belt dust. Clean any belt dust off the drum. Route the new Y312959 belt around the drum. Install with the grooved (ribbed) side against the motor pulley and the smooth side against the drum — this is the correct orientation for proper drive engagement. Because the belt is symmetrical, either end can face outward. A helpful tip from experienced installers: use two small pieces of tape to hold the belt against the drum while you lace it onto the idler and motor pulleys. From under or behind the drum, route the belt around the idler (tension) pulley and the drive motor pulley following the belt diagram for your model. Rotate the drum by hand a few full turns to confirm the belt seats correctly and rides smoothly without binding. While you have the machine apart, check that the idler pulley and drum support rollers spin freely — if they're rough or noisy, replace them now to protect the new belt. Reassemble the panels, restore power, and run a test cycle. Tools needed: Phillips screwdriver, nut driver, socket/ratchet, vacuum, work gloves, tape (helpful for holding the belt).
Frequently Asked Questions
My dryer runs but the drum won't turn — is the belt the problem?
Almost certainly, yes. When the motor runs (you hear the humming) but the drum stays still, the belt has almost always snapped. To confirm without opening the dryer: reach in and try turning the drum by hand. If it spins freely with no resistance whatsoever, the belt is broken. If it turns but feels notchy or resistant, the belt may still be intact but the drum rollers or bearings could be the issue. Opening the dryer to inspect is the definitive check — a snapped belt will be lying in the bottom of the cabinet. On decades-old Maytag dryers, a belt that finally snapped from age is one of the most common repairs.
Which way does the belt go — grooves in or out?
Install the belt with the grooved (ribbed) side facing the motor pulley and the smooth side against the drum. The ribs engage the grooved motor pulley for positive drive without slipping, while the smooth side rides against the large drum surface. Note that this is the opposite orientation from some other dryer belts (like certain Frigidaire belts where grooves face the drum) — so don't assume; follow the grooves-against-motor-pulley rule for this Maytag/Whirlpool-platform belt. The belt is symmetrical end-to-end, so either end can face outward; only the grooved-vs-smooth orientation matters.
Should I replace the idler pulley and drum rollers at the same time?
It's strongly recommended, especially on older dryers. The idler (tension) pulley (WP6-3037050) keeps the belt under proper tension, and the drum support rollers (kit 12001541 / 303373K) carry the drum's weight as it turns. All wear from the same friction and heat cycles as the belt. In fact, a common piece of repair advice is: before you replace the belt due to noise, check the drum support rollers and idler pulley first — worn rollers or a seized idler are frequent noise sources, and if you replace only the belt, the new belt may wear out prematurely against a bad pulley. Since the dryer is already apart, replacing all three together is efficient and saves a repeat repair.
What's the difference between Y312959 and WPY312959?
These are the same drum belt across production revisions. Y312959 was the earlier Maytag part number and WPY312959 is the Whirlpool-era part number (after Whirlpool acquired Maytag) for the same belt. WPY312959VP is a variant packaging code. All are physically and functionally identical — if your dryer's parts diagram shows any of these numbers, this listing is the correct replacement. The many other cross-references (3-12959, 314774, LB234, P46-150, etc.) reflect the belt's long production history across decades of Maytag dryers.
Is this an OEM or aftermarket part?
This is an aftermarket replacement part built to OEM-equivalent quality standards. It is not a genuine Maytag/Whirlpool OEM part, but is manufactured from durable rubber to match the dimensions (100"L x 3/8"W), rib and groove pattern (5 ribs, 4 grooves), and drive function of the original Y312959/WPY312959 drum belt used in compatible Maytag, Jenn-Air, Whirlpool, Amana, and Kenmore dryers.
Shop With Confidence
A U.S.-based appliance parts retailer specializing in genuine OEM and high-quality replacement parts. We stock components for all major appliance brands and offer fast shipping from our U.S. warehouse. Our team is available to help verify compatibility before you purchase.
✓ Fast US Shipping ✓ Quality Aftermarket Parts ✓ Compatibility Support ✓ Secure Checkout
W10861732 Oven Genuine OEM Control Board
Color: White
Condition: New, Never Used, Open Box, Original Packing is Missing.
Replaces Part Numbers: W10861732, W10540194, W10565359, W10576929, W10786394, OEM18078872, PS11737999, AP6026289.
California Residents only
WARNING: Cancer and/or Reproductive Harm - www.p65warnings.ca.gov